Video Center - How to Use Virtual Channels
With Virtual Channels, you can use the videos you already have in Video Center to create a 24/7, linear streaming experience, fully monetized with native, in-stream advertising before and after each video. Virtual Channels is available to all customers in Sandbox for evaluation as of the Video Center 1.104 release. Contact Arc XP Customer Support to use it in Production.
This document walks you through creating your first Virtual Channel, setting it up for advertising, adding programs to the program list, and finally, starting and publishing your channel.
Getting Started with Virtual Channels
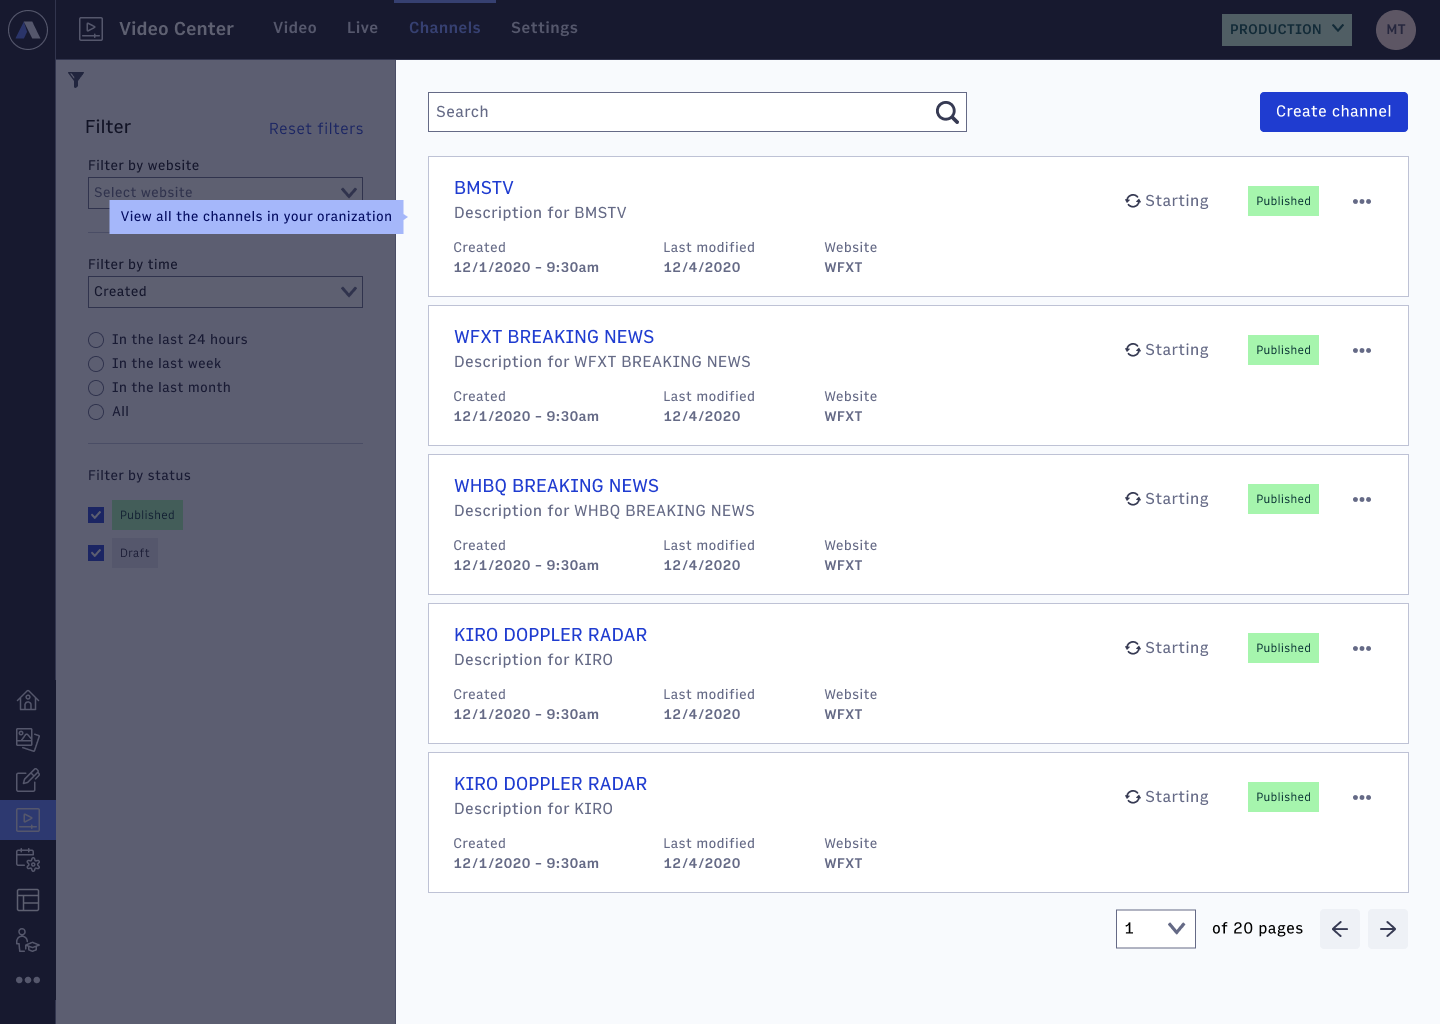
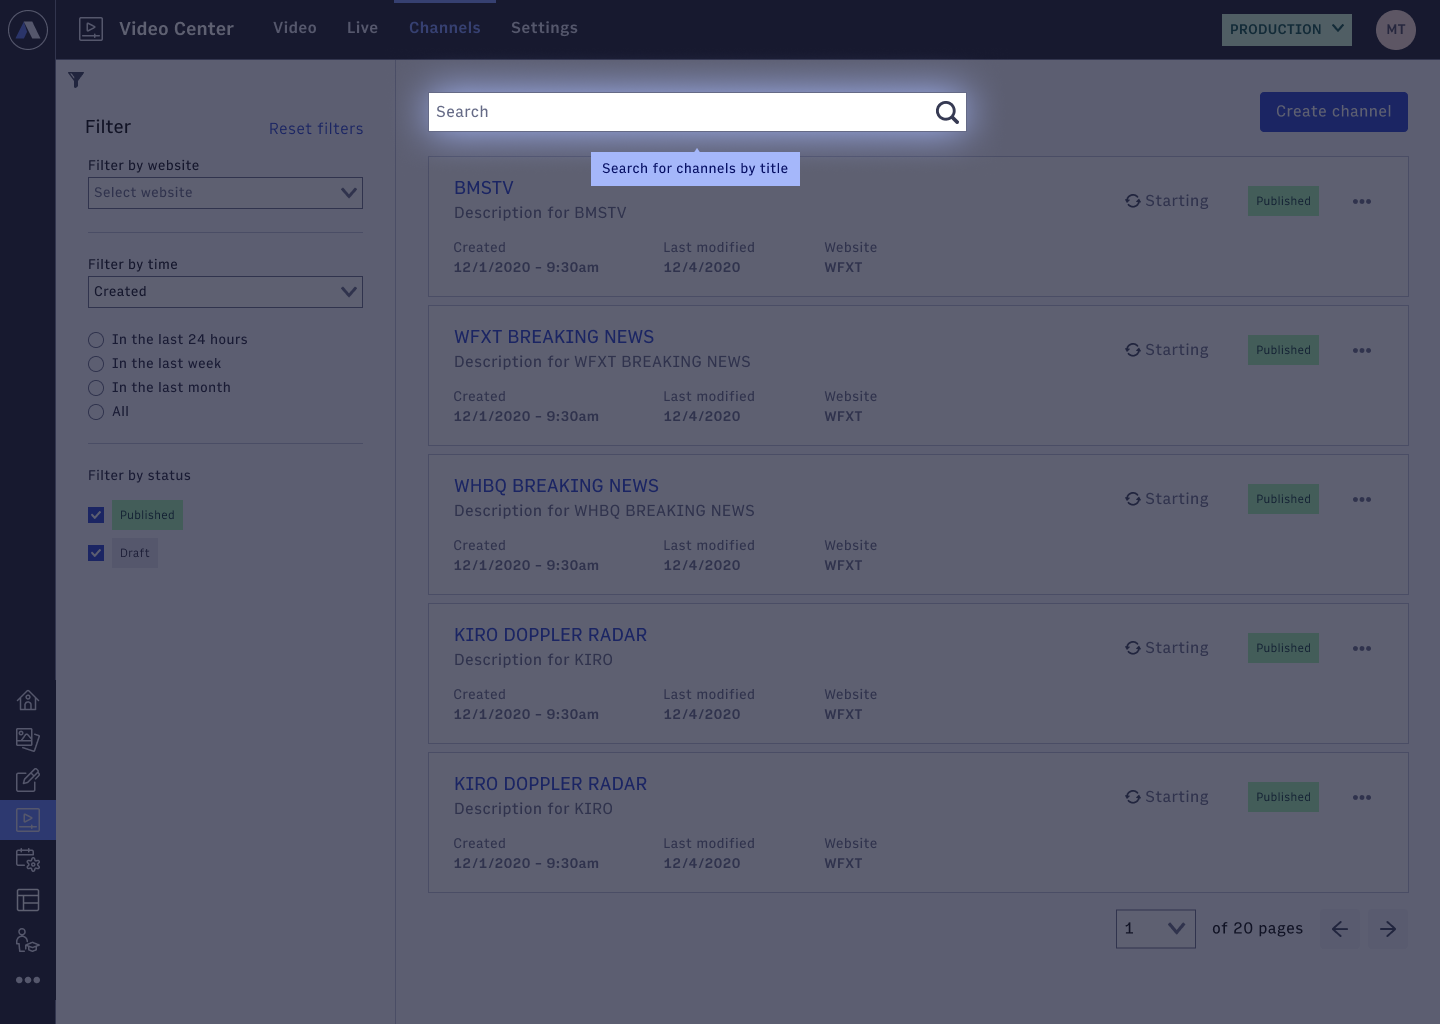
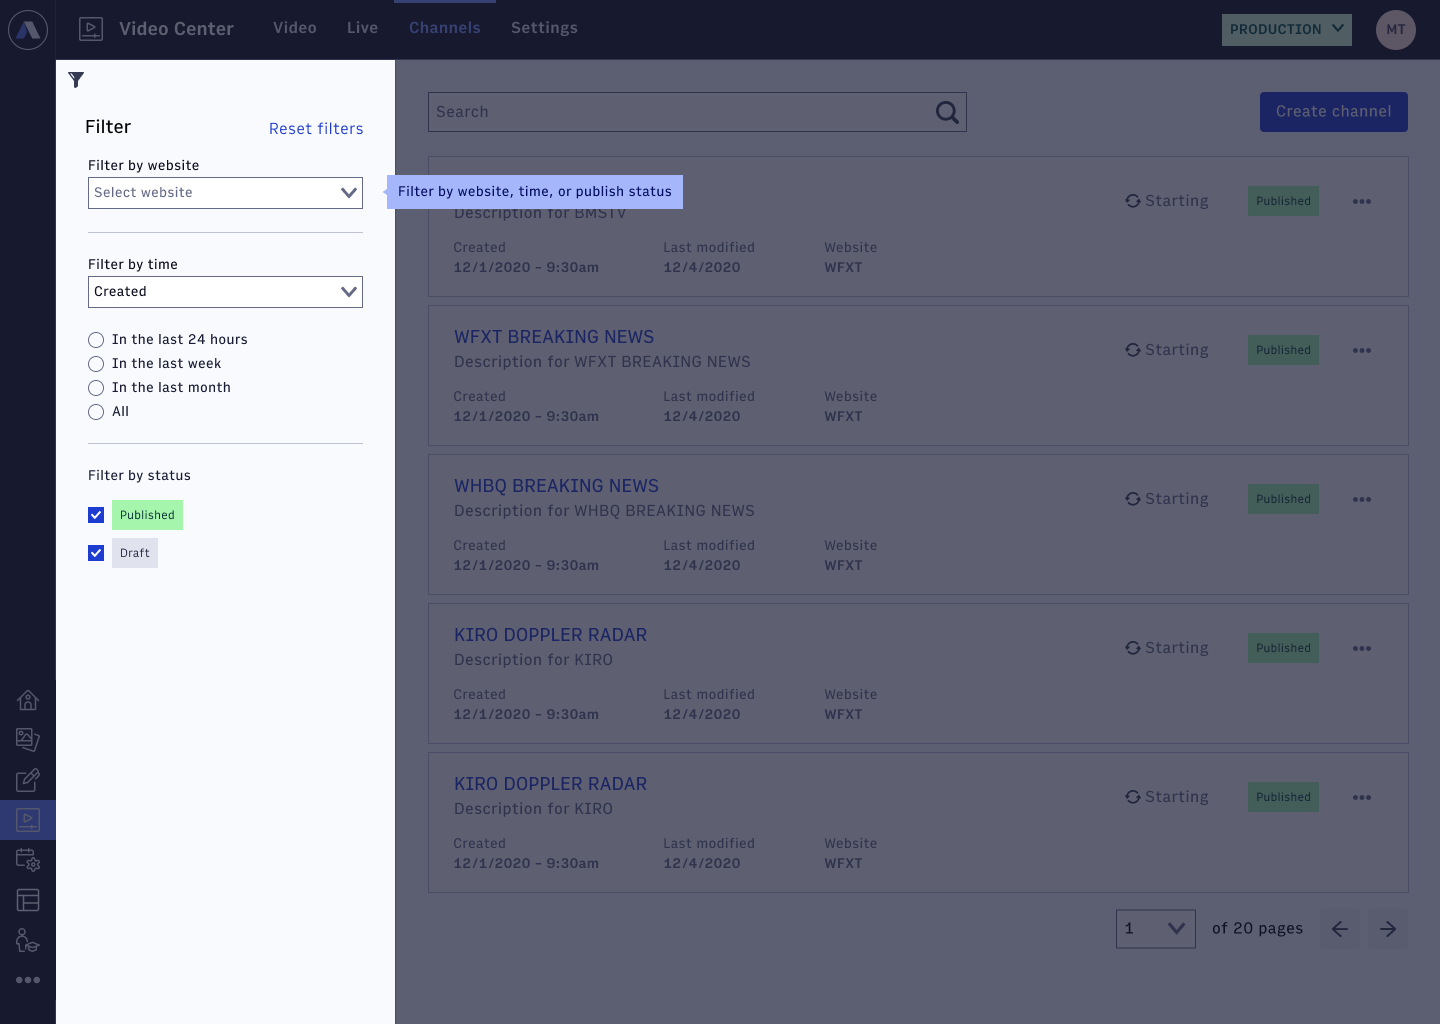
The first thing to notice when you log in to Video Center is a new option in the menu bar: Channels. Clicking on Channels takes you to a brand new search interface built from the ground up using the Arc Design System. You can see all the channels you've created as an organization and filter by website, as well as search by title. You can also choose to see only published channels, or only draft (or both).
 |
 |
 |
Creating a Channel
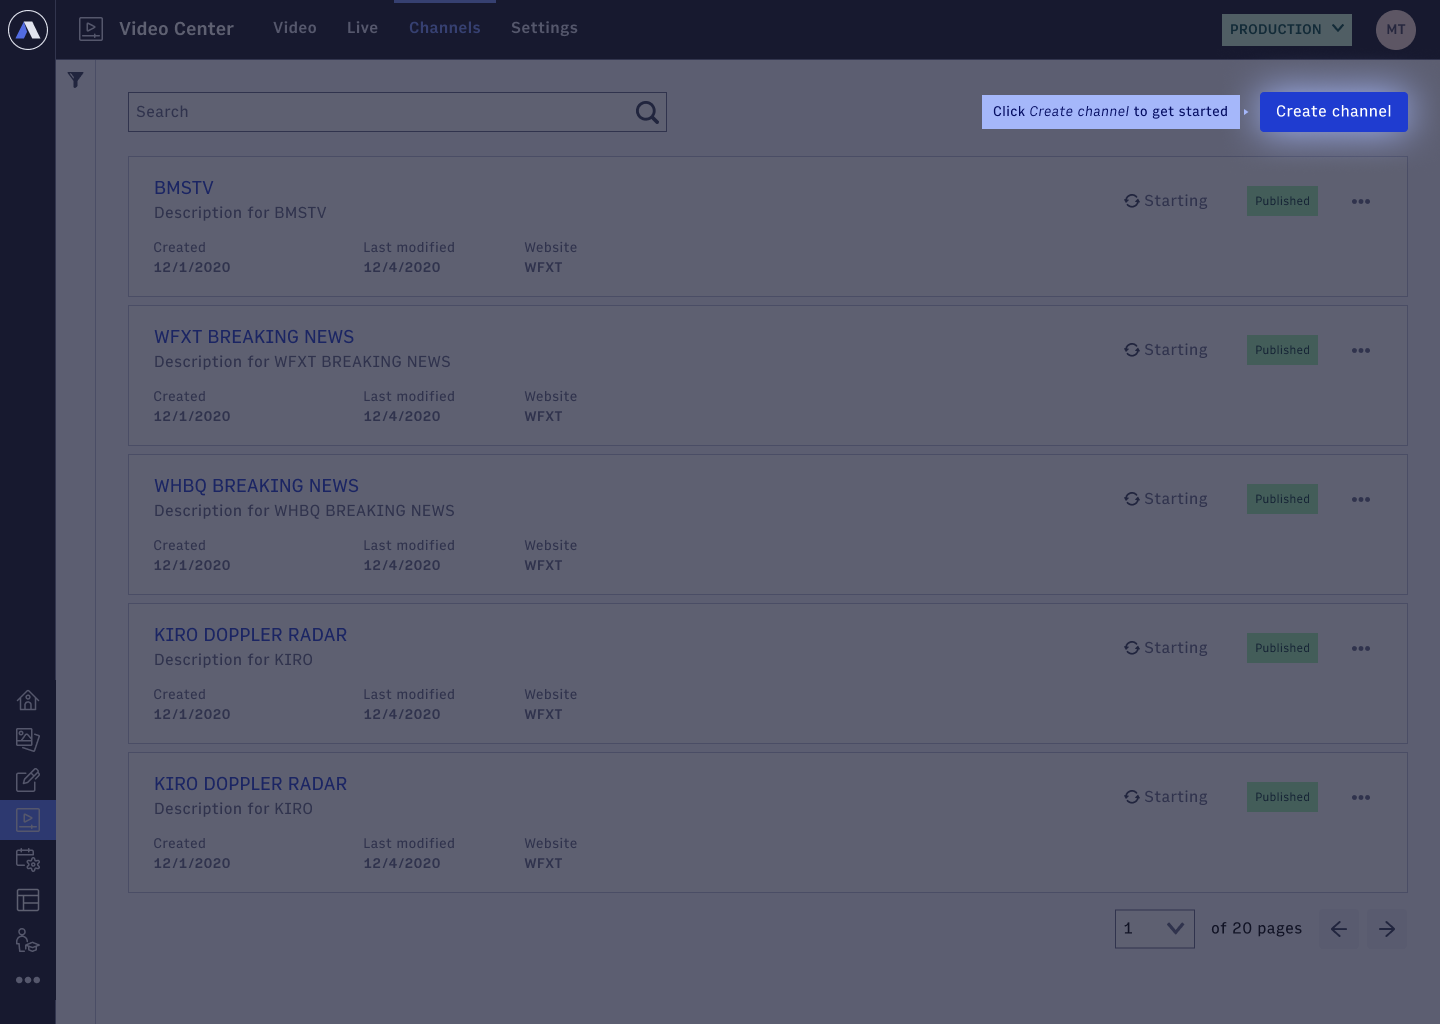 |
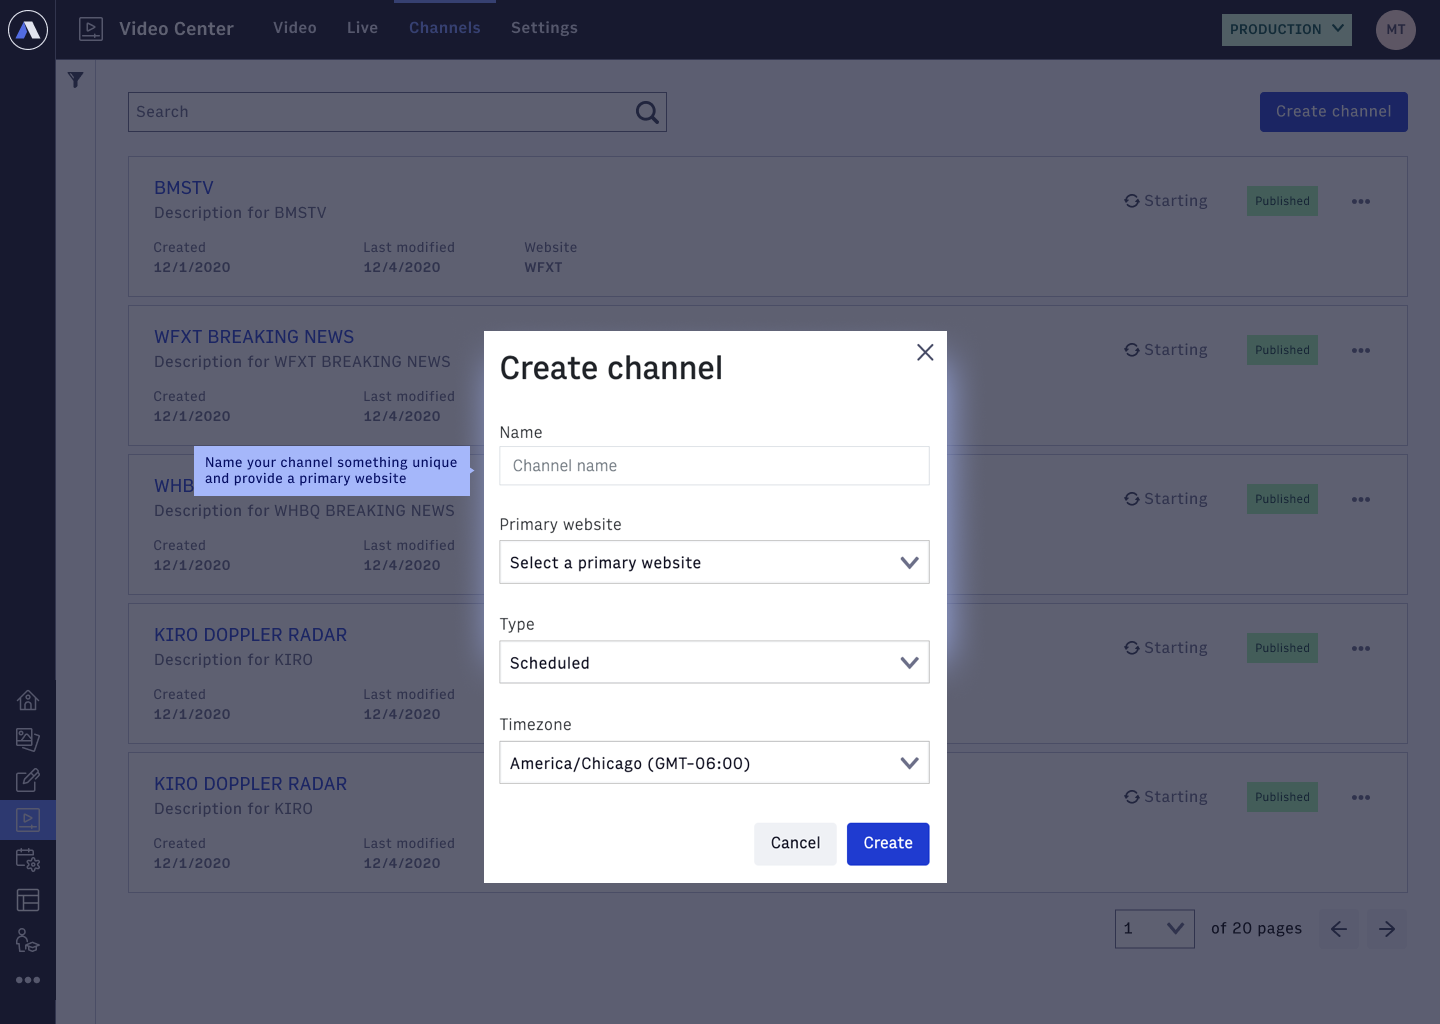
When you're ready to create your new channel, click the New Channel button at the top right corner of the screen. Give the channel a name and a primary website.
Note
Channel names don't currently support special characters.
With the 1.108 release, you are now able to select between creating a Looping or a Scheduled Virtual Channel.
Note
Creating a Scheduled Virtual Channel requires selecting a timezone, but Looping does not have that requirement.
 |
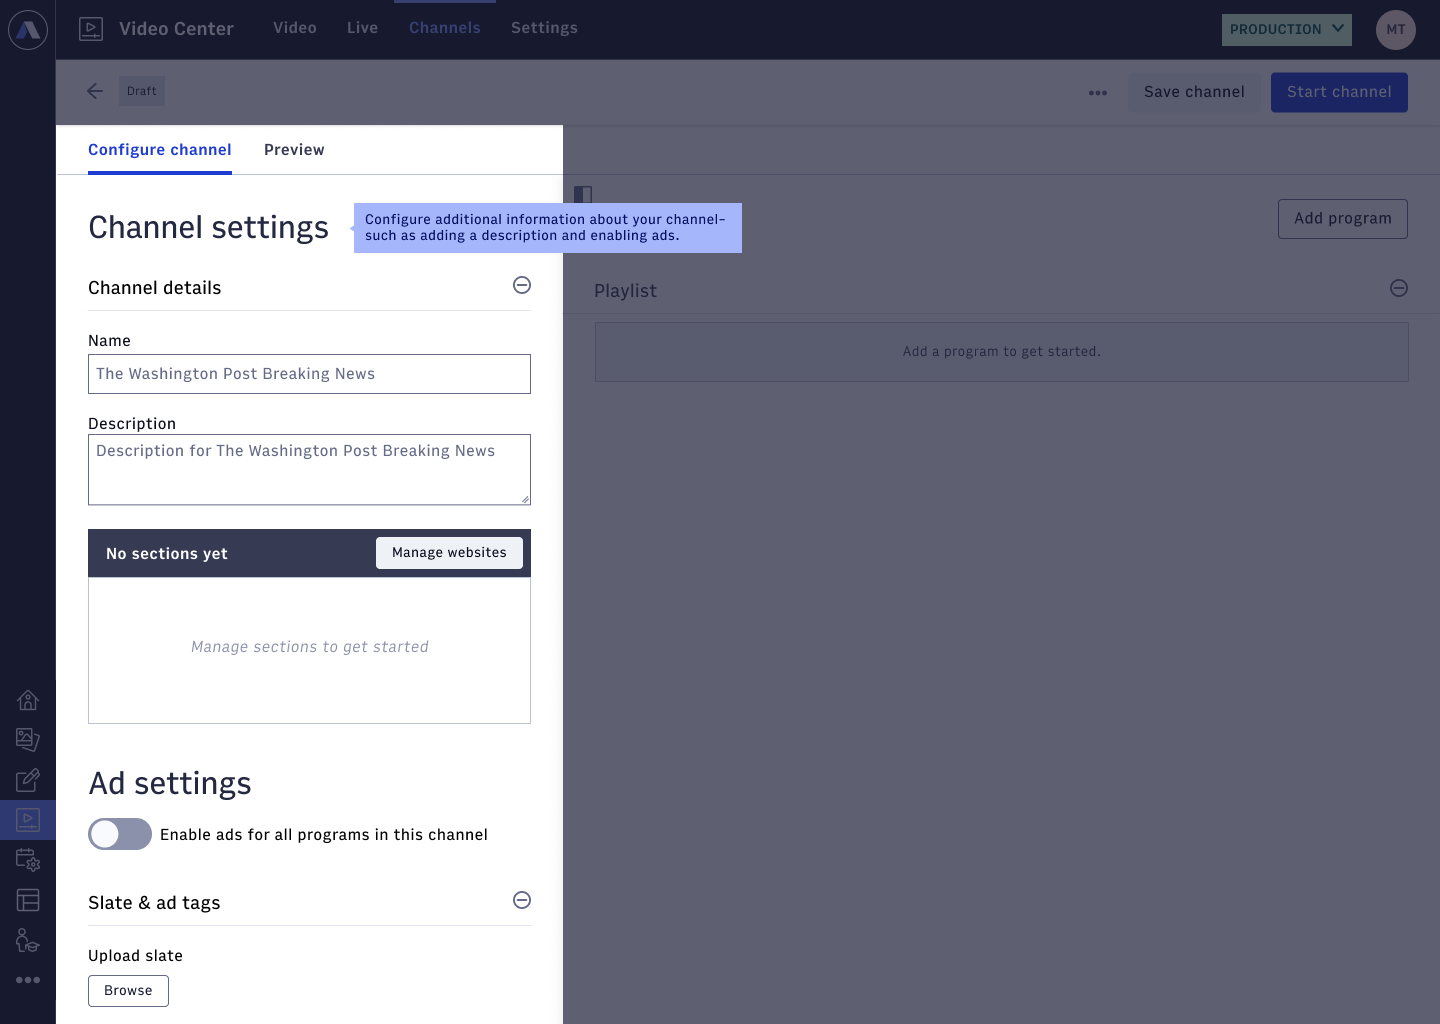
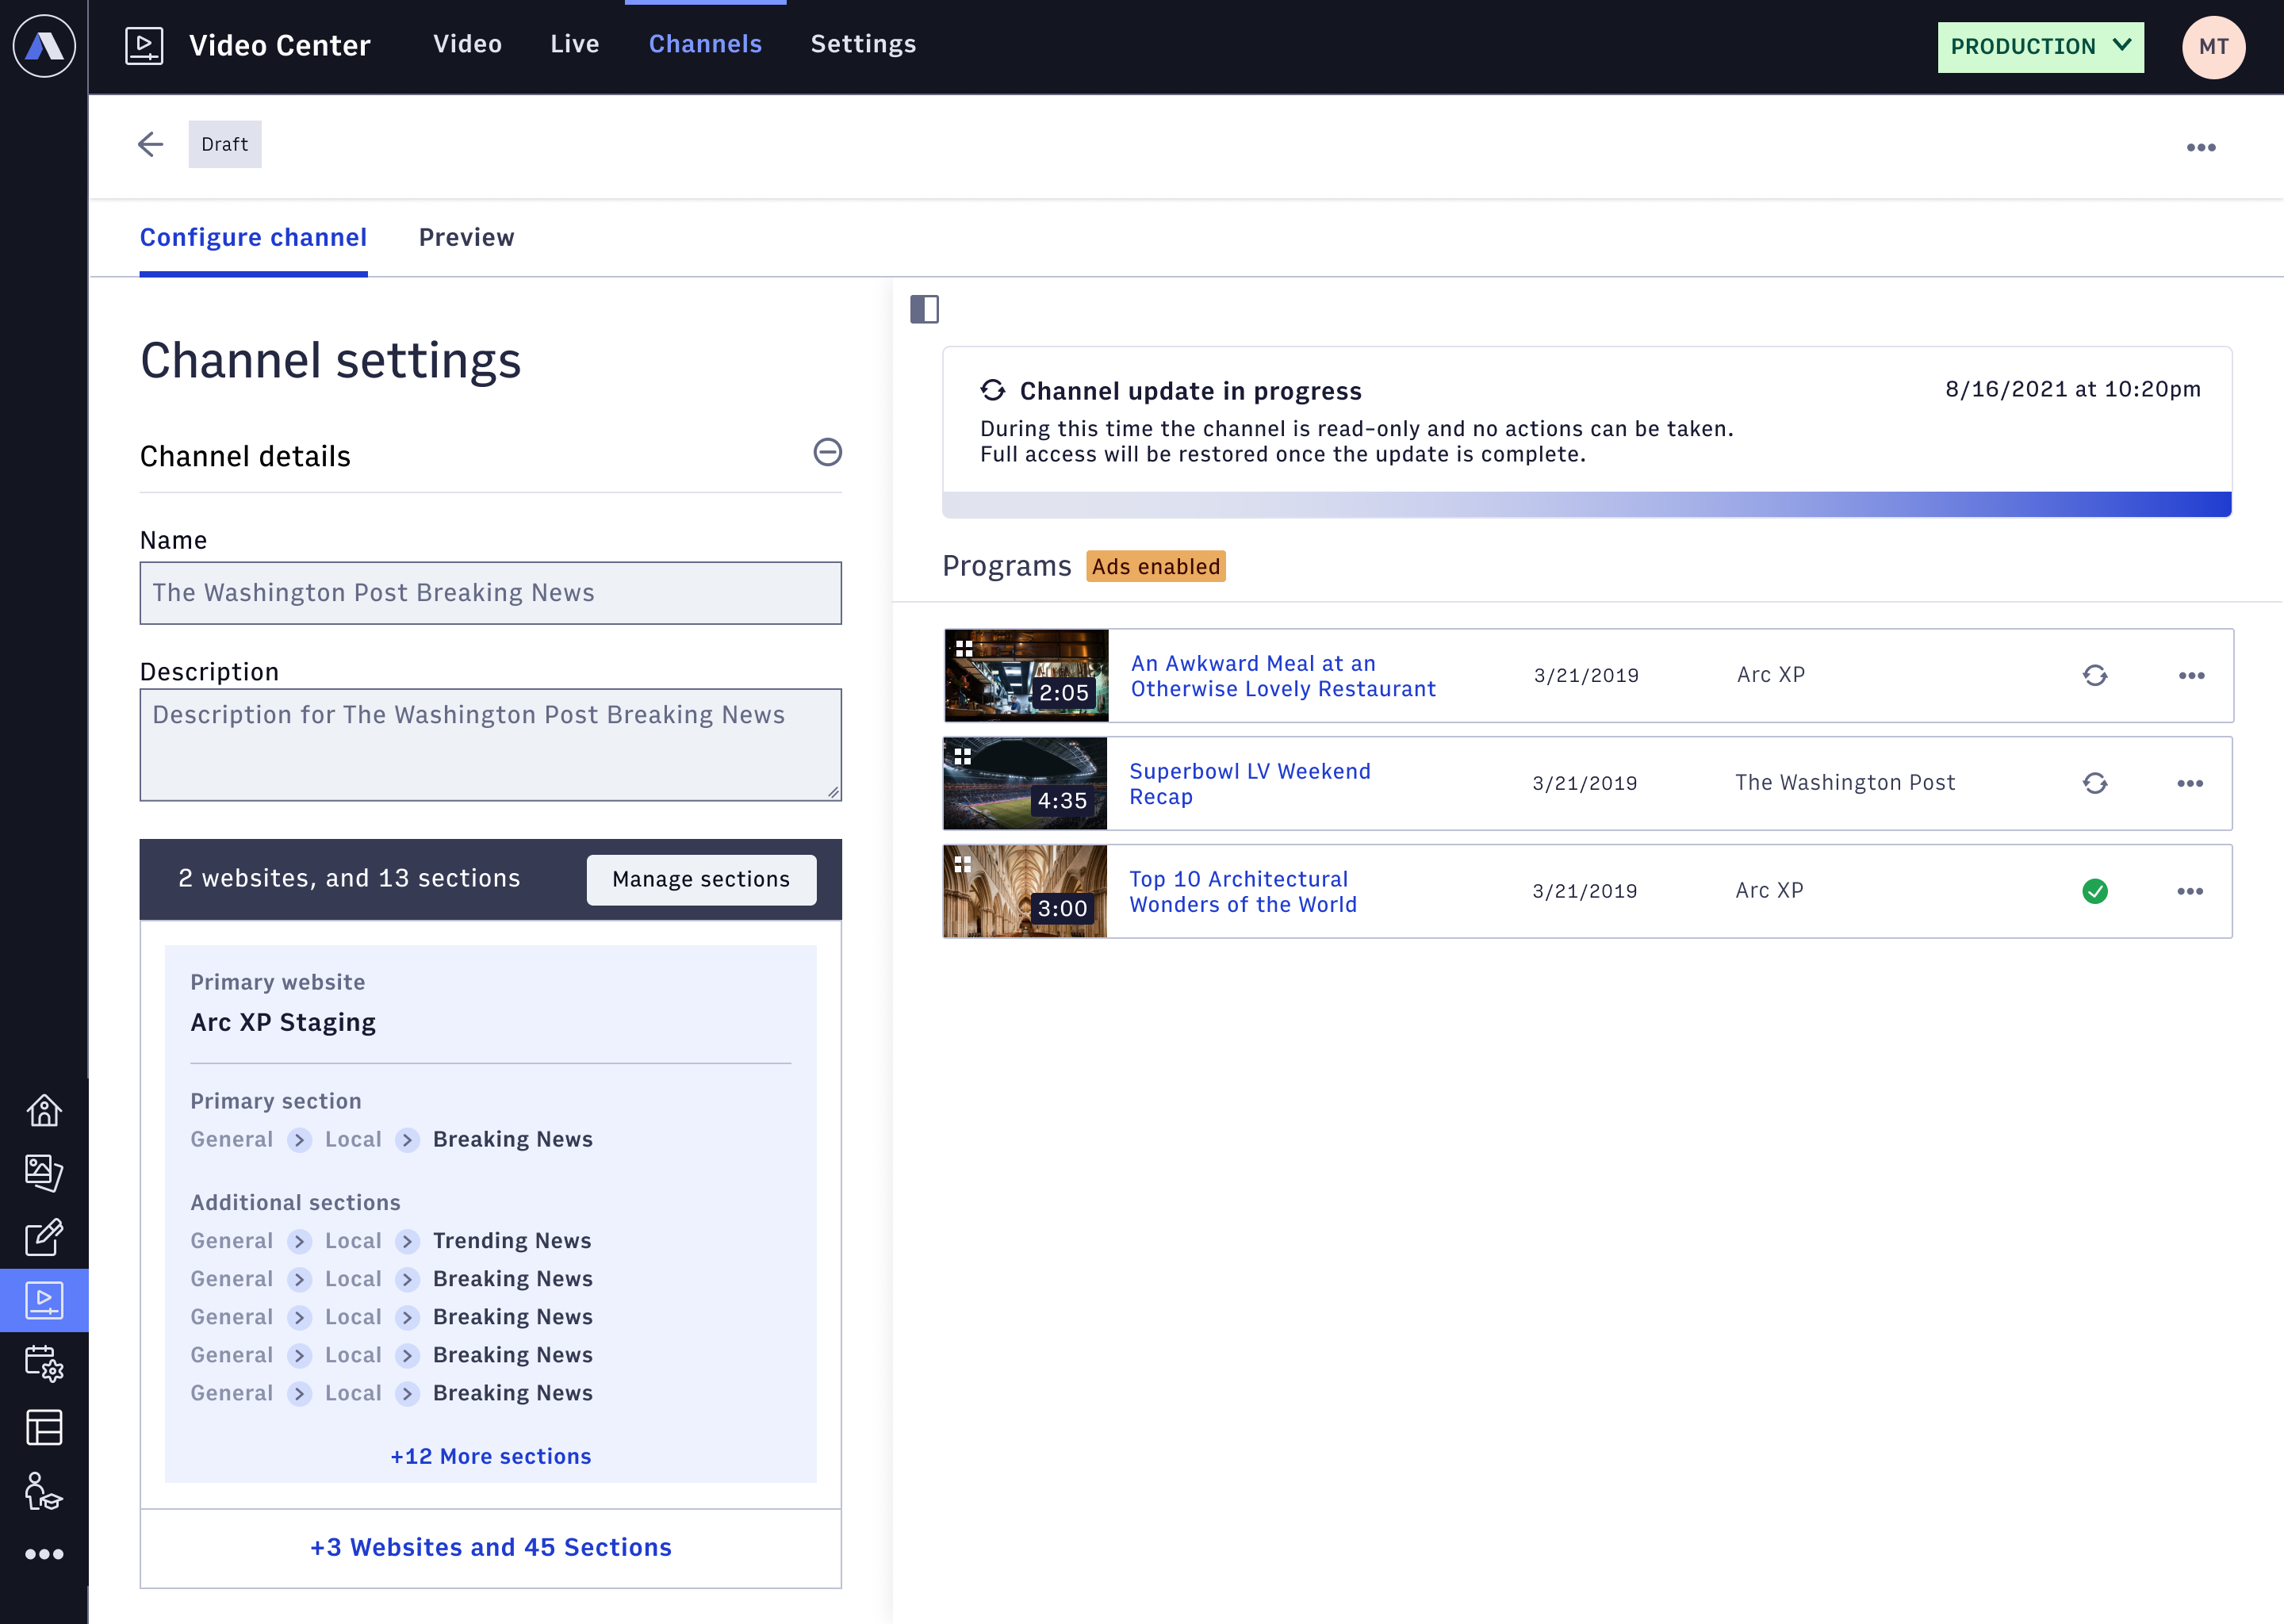
After you create your channel, you can fill in a few more details, including a channel description and any additional websites and sections. You can also set up advertising settings; channels are currently not ad-enabled by default, so if you want to monetize your channel, enable ads and set up your ad decision server before you start the channel.
 |
Setting Up Advertising
Virtual Channels use Arc's Dynamic Ad Insertion (DAI) tools to create streams with custom ads for every viewer as they start watching. If you've already set up DAI for Video Center, you must do it again for Virtual Channels. This is a one-time setup for each channel you bring online.
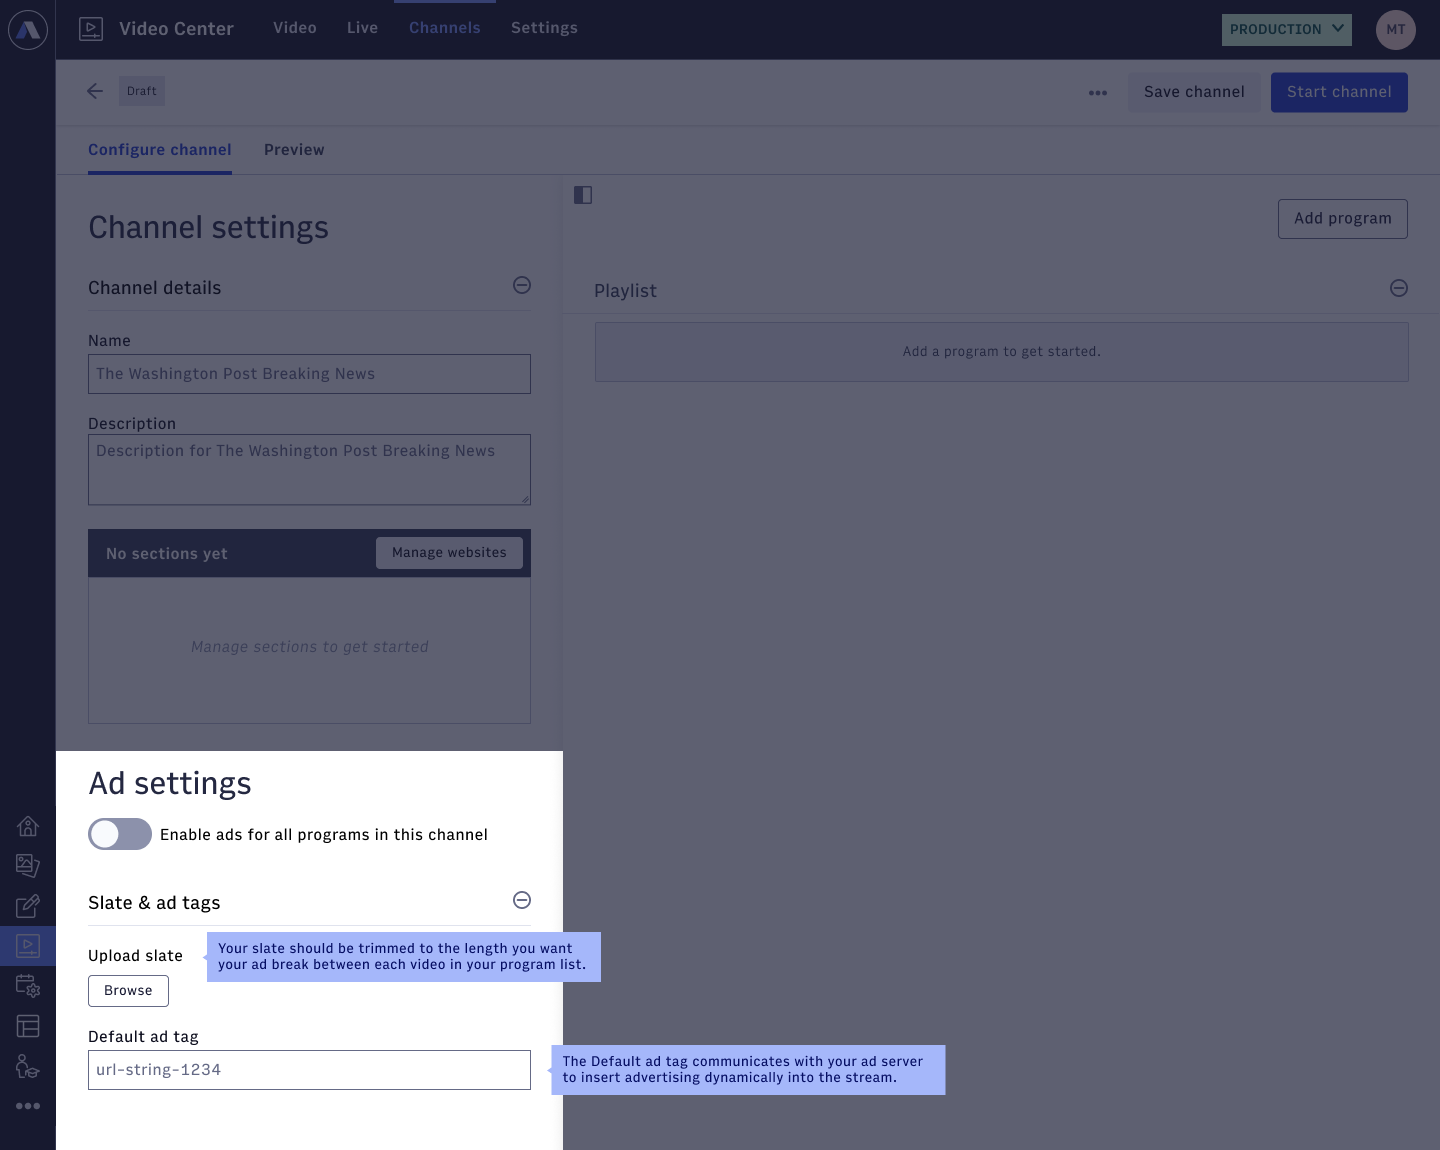 |
When you turn on advertising for your channel, you will be asked to upload a slate. Your slate should be trimmed to the length you want your ad break between each video in your program list to be. For instance, if you want a one-minute ad break between each program, upload a minute-long slate video. Your slate video is used as a fallback if the ad decision server fails to return any ads, so we recommend using a slate with your organization's logo or other identifying marks.
In addition to uploading your slate, you must set up your Default ad tag. This is how Arc communicates with your ad server to insert advertising dynamically into the stream.
Adding Programs - Looping Channels
The core of every Virtual Channel is the programs it features. Virtual Channels makes finding content for your experience easy with integrated search and drag-and-drop ordering.
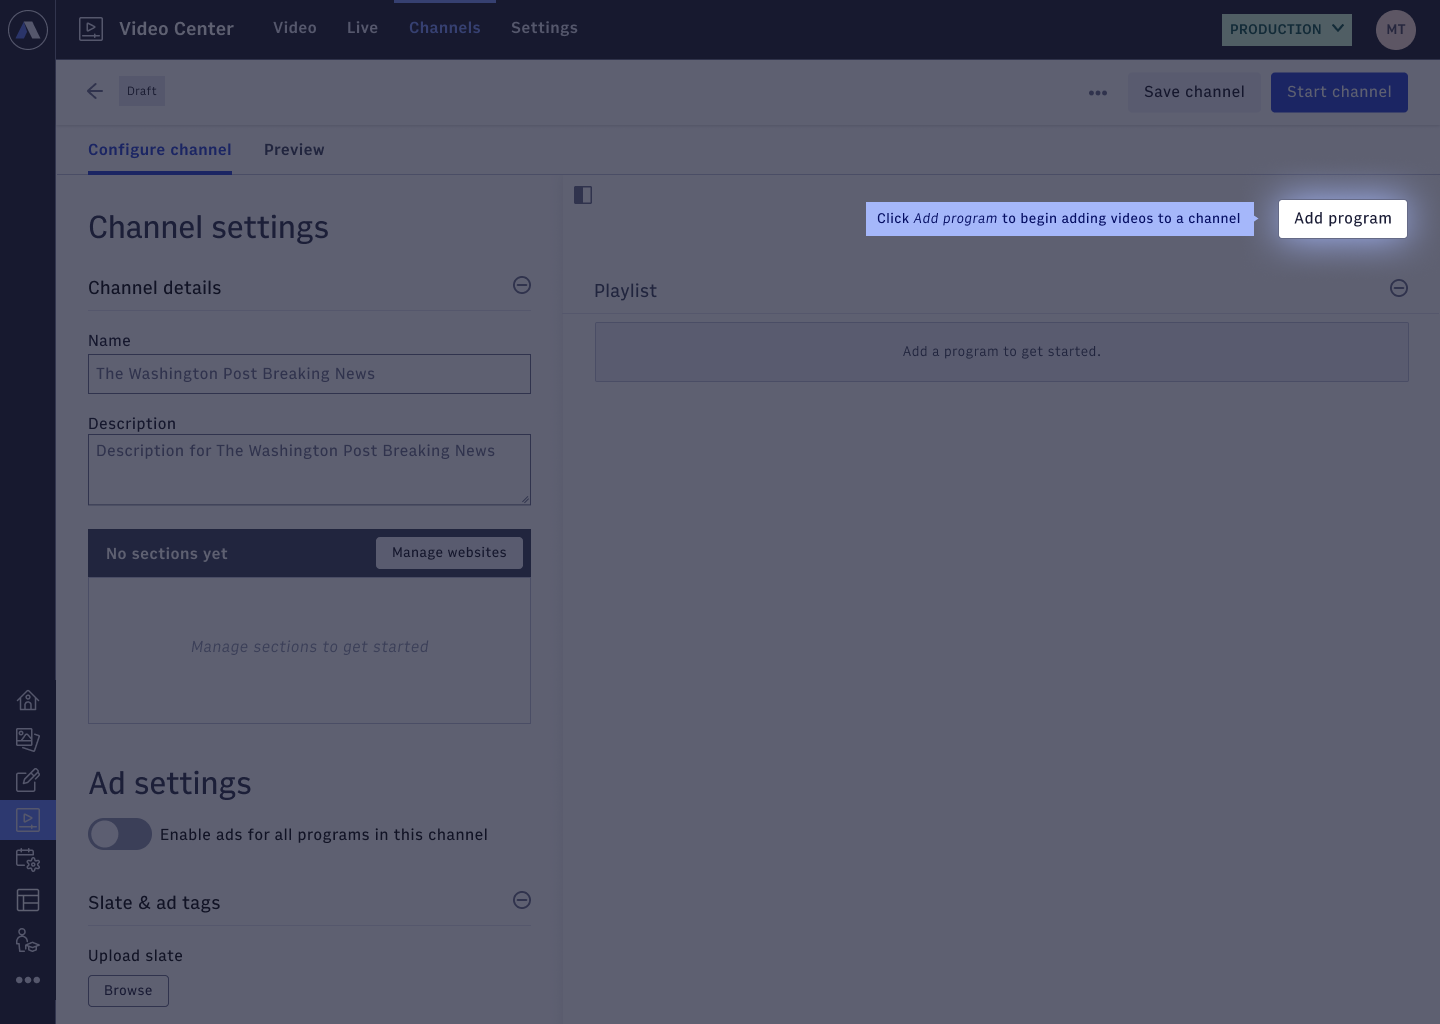
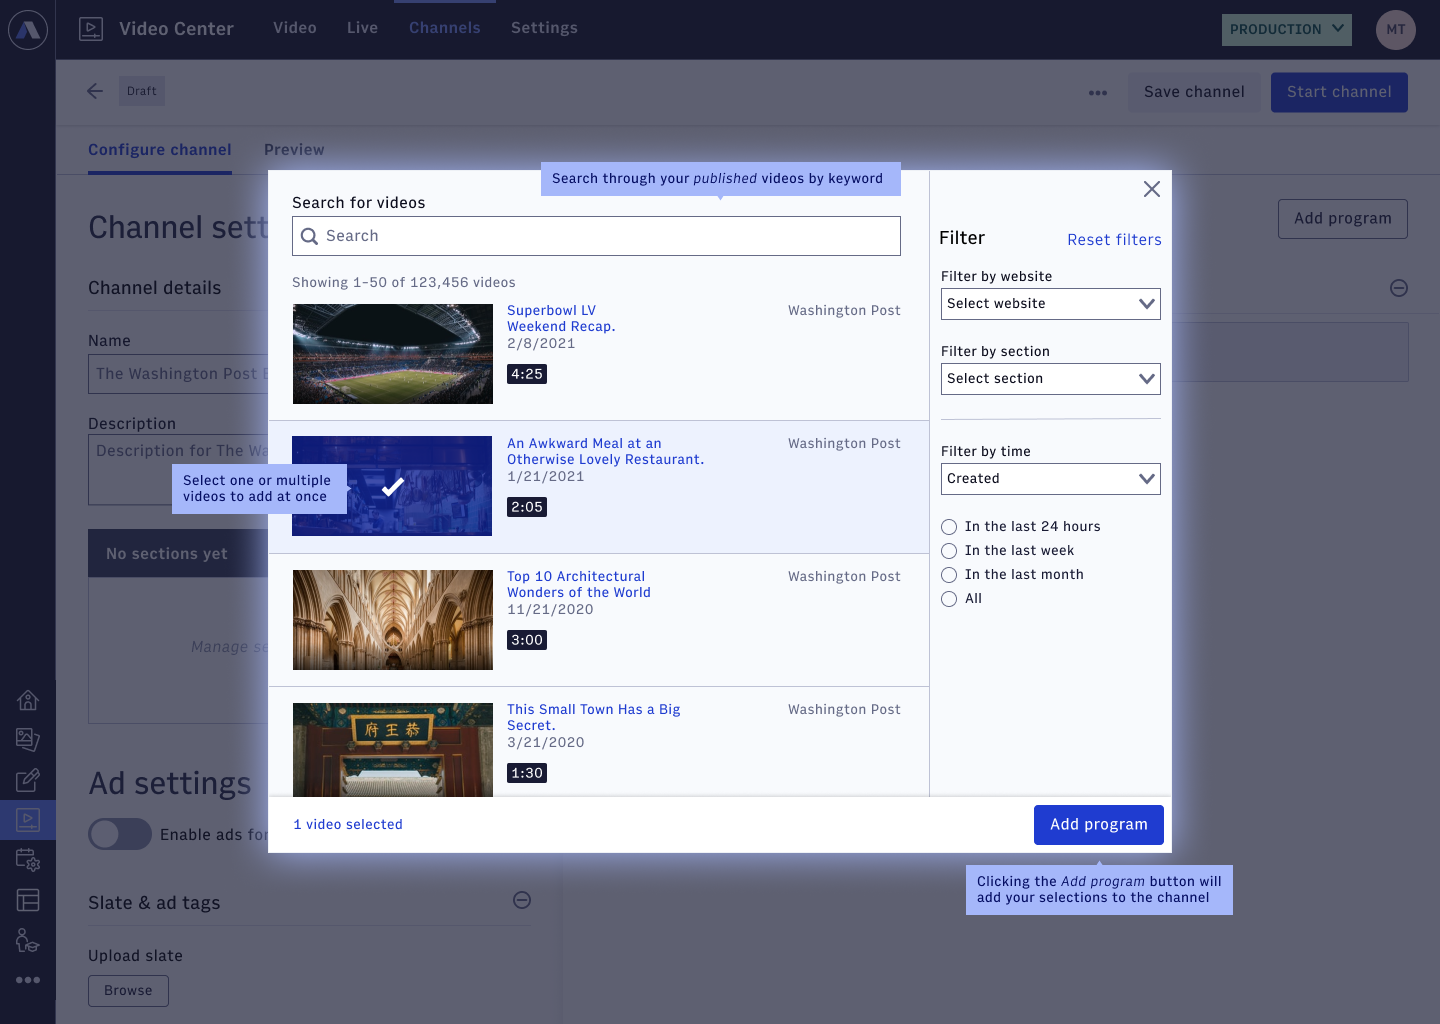
To add a program, click the Add program button on the channel page. A simple interface opens where you can search through your published videos by keyword, and filter by website, selection, and date created.
Note
The search interface can return a maximum of 100 results.
 |
You can select multiple videos to add at once, and the selection persists as long as you have the search experience open (you can reset filters, and the videos you selected earlier are still selected). When you've found the videos you want to add, click the Add program button to add them to the program list for your channel. You can always go back and add more programs, too. They'll always add to the end of the list.
 |
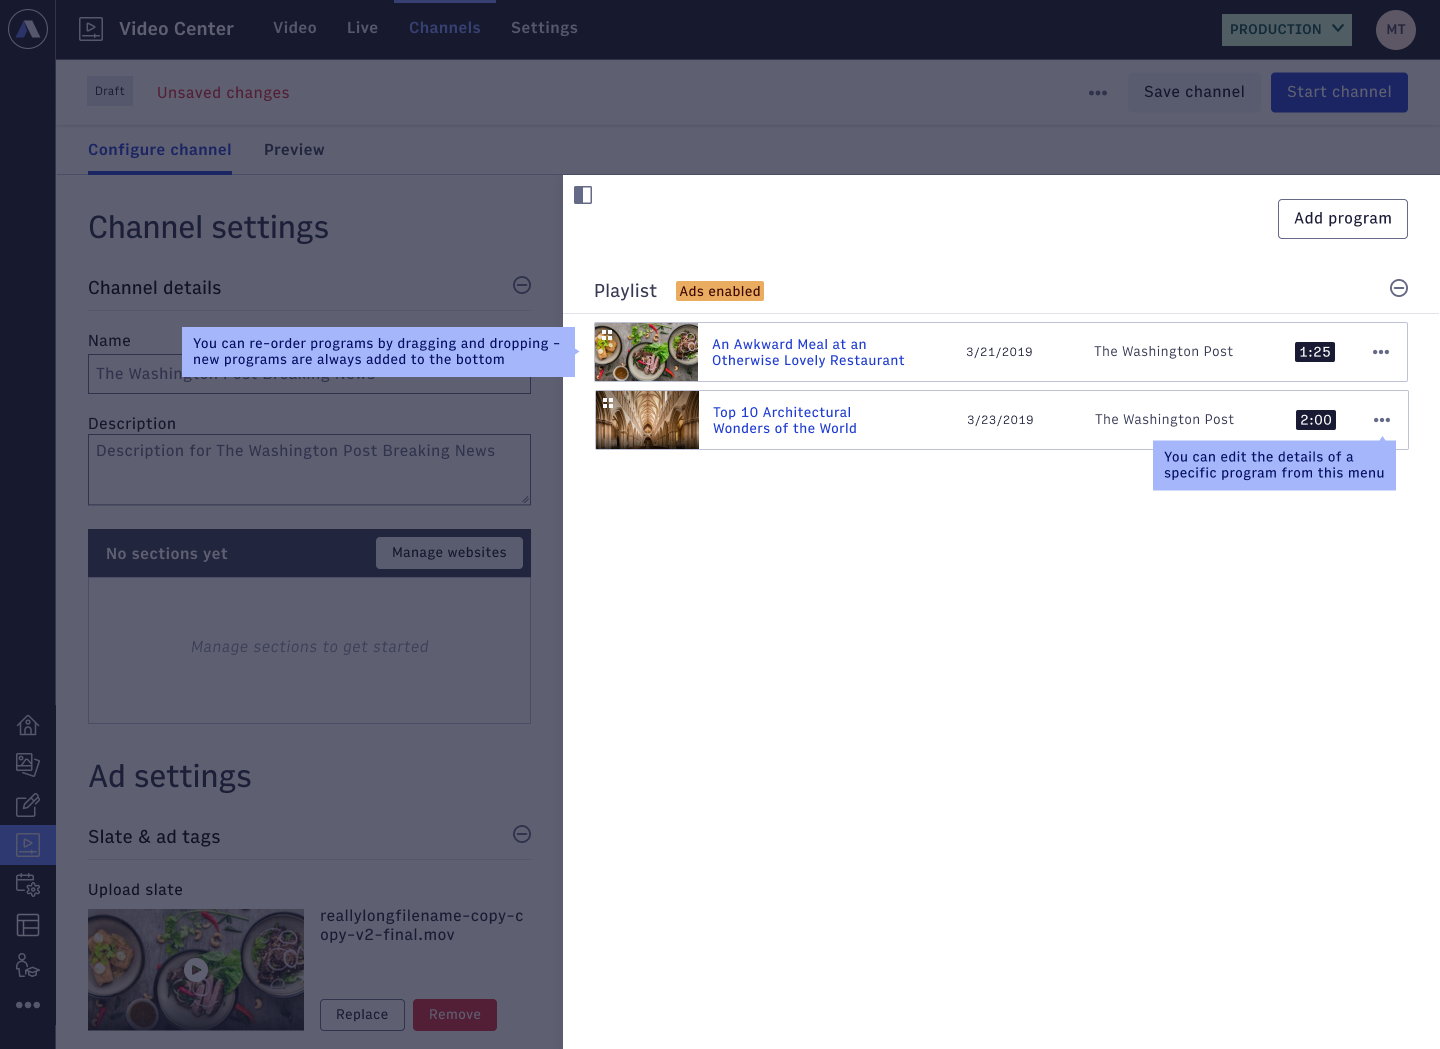
You can reorder the programs by dragging and dropping. You can also change the title and description of an individual program by clicking the “…” icon on the program card. For this first release, this only changes the details of the program within Video Center, but in the future, it will be available to your audience.
 |
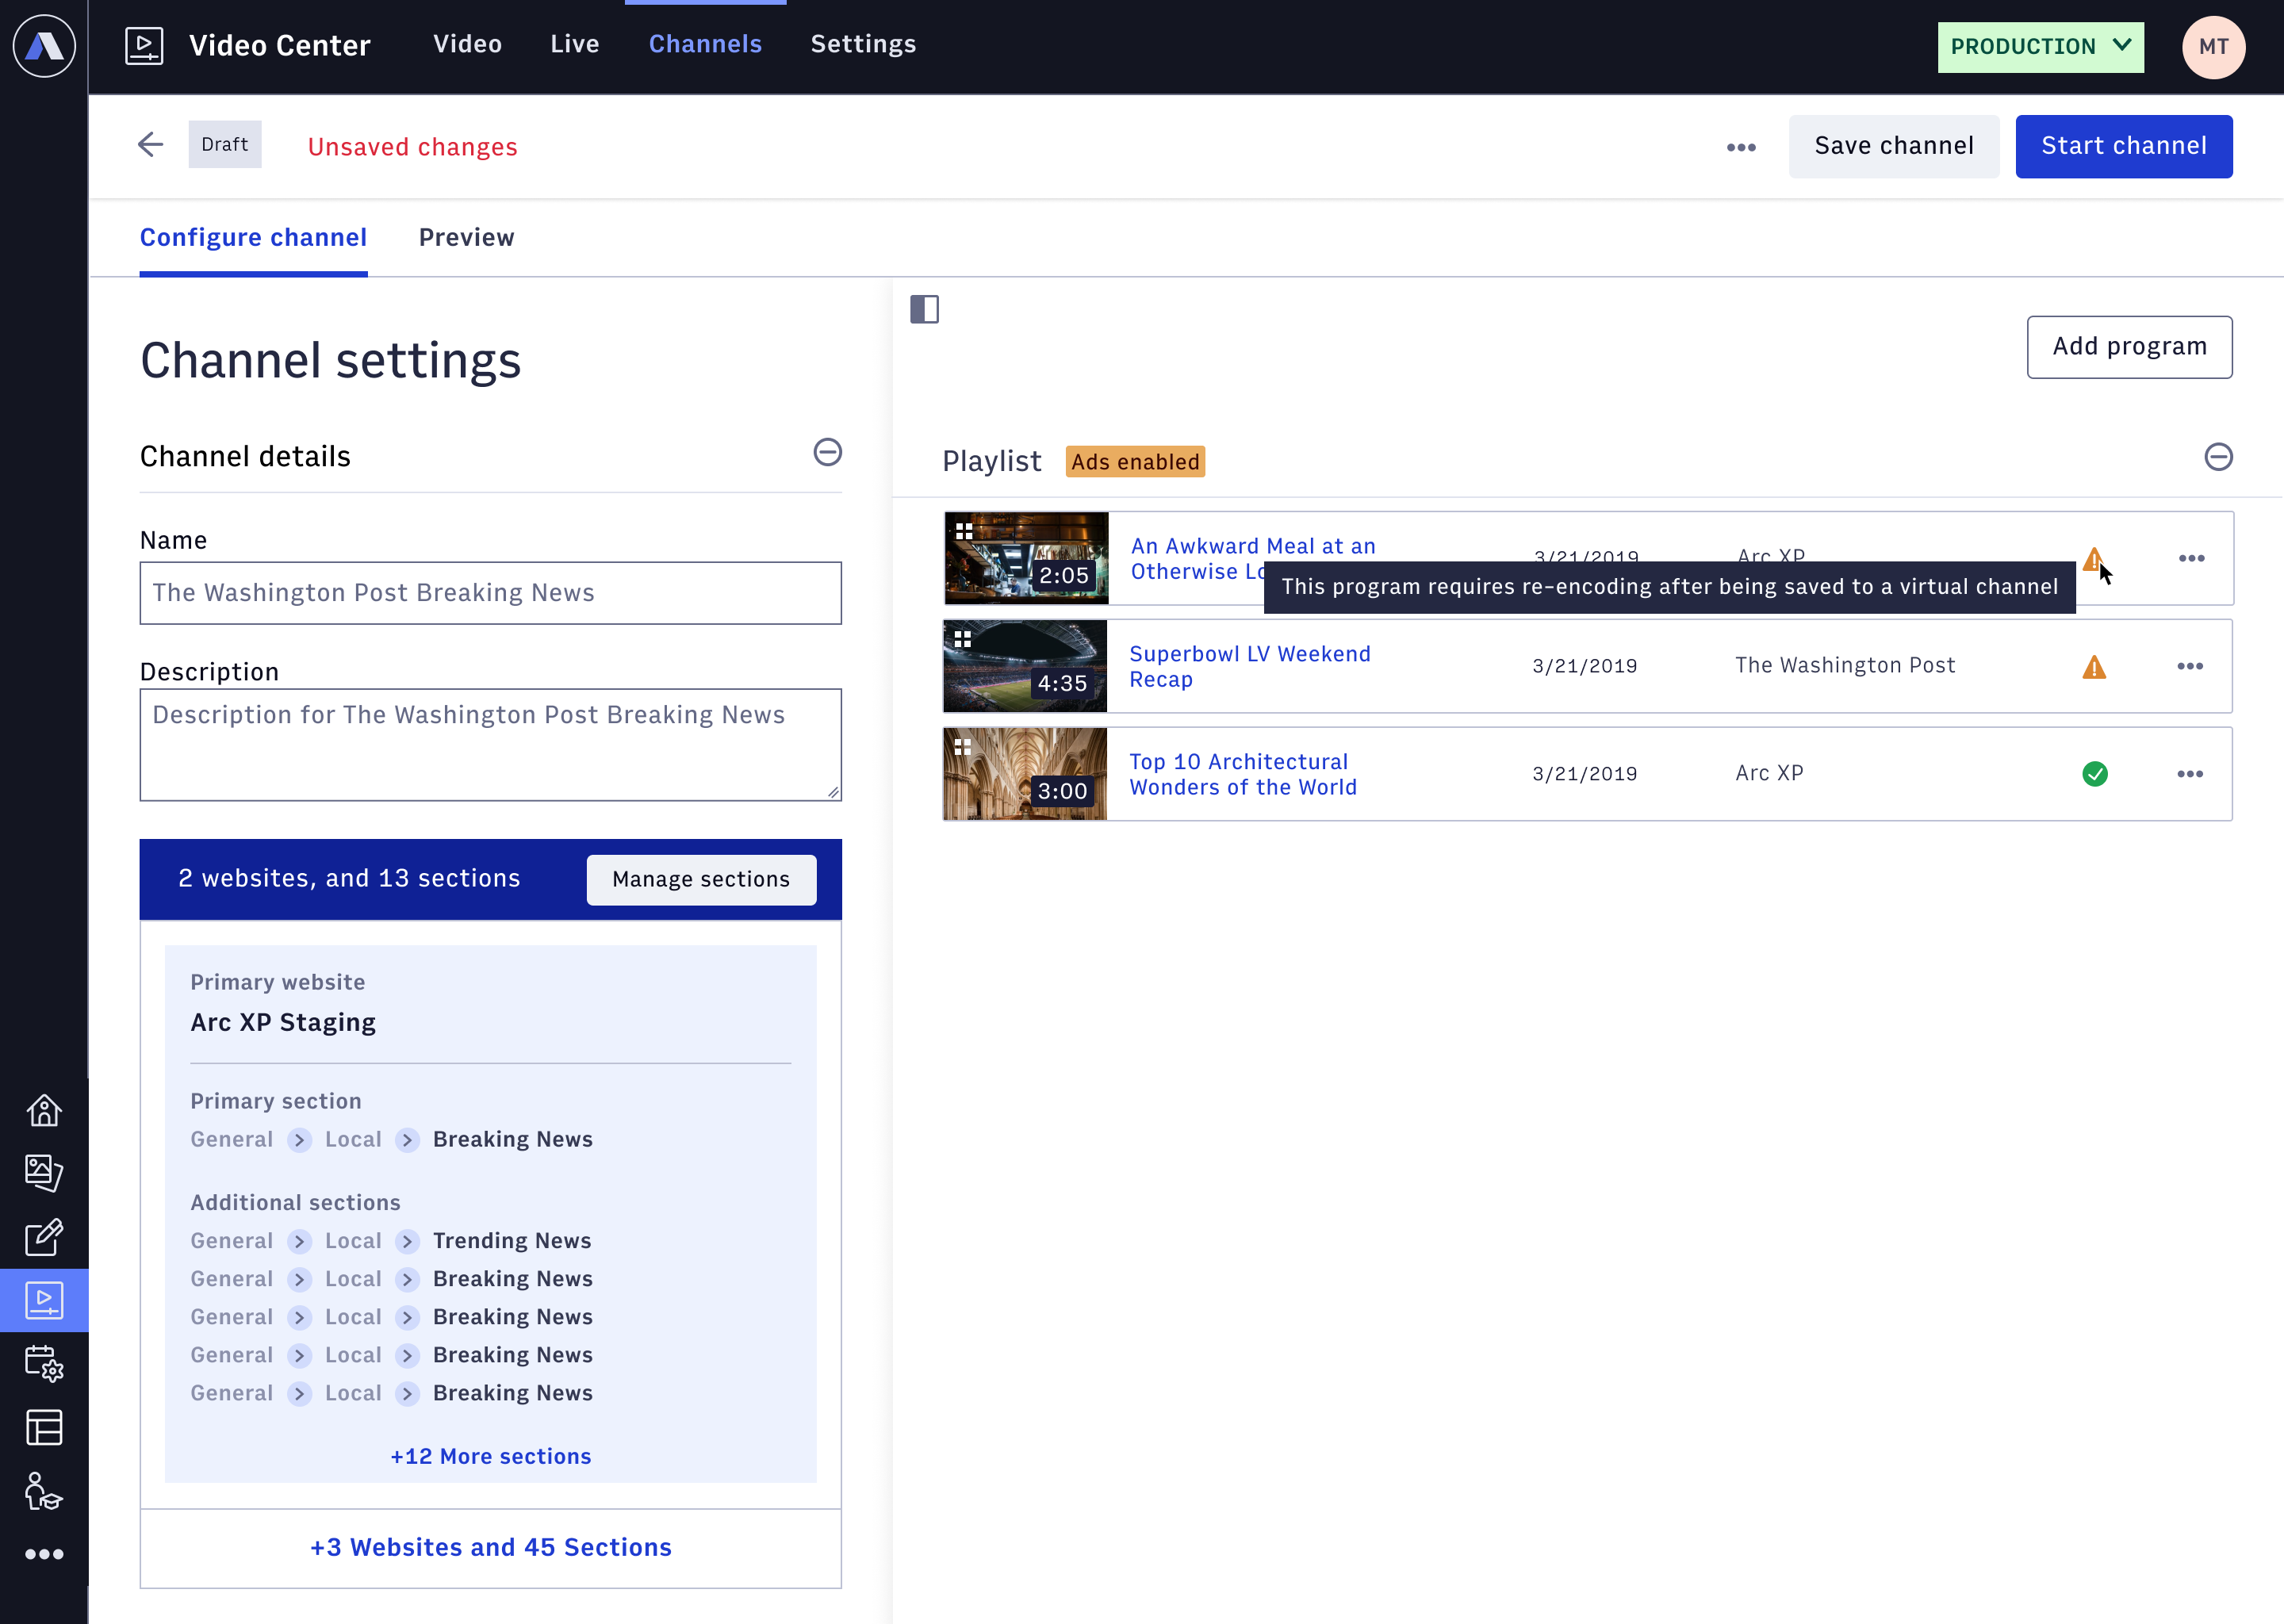
Some videos may require re-encoding before being added to your channel; this is a one-time process that the Virtual Channels tool performs automatically when you save your channel. When you start using Virtual Channels in production, your Video Center encoding profile will be updated, so this step is not necessary for newly created videos.
 |
Adding Blocks - Scheduled Channels (new.)
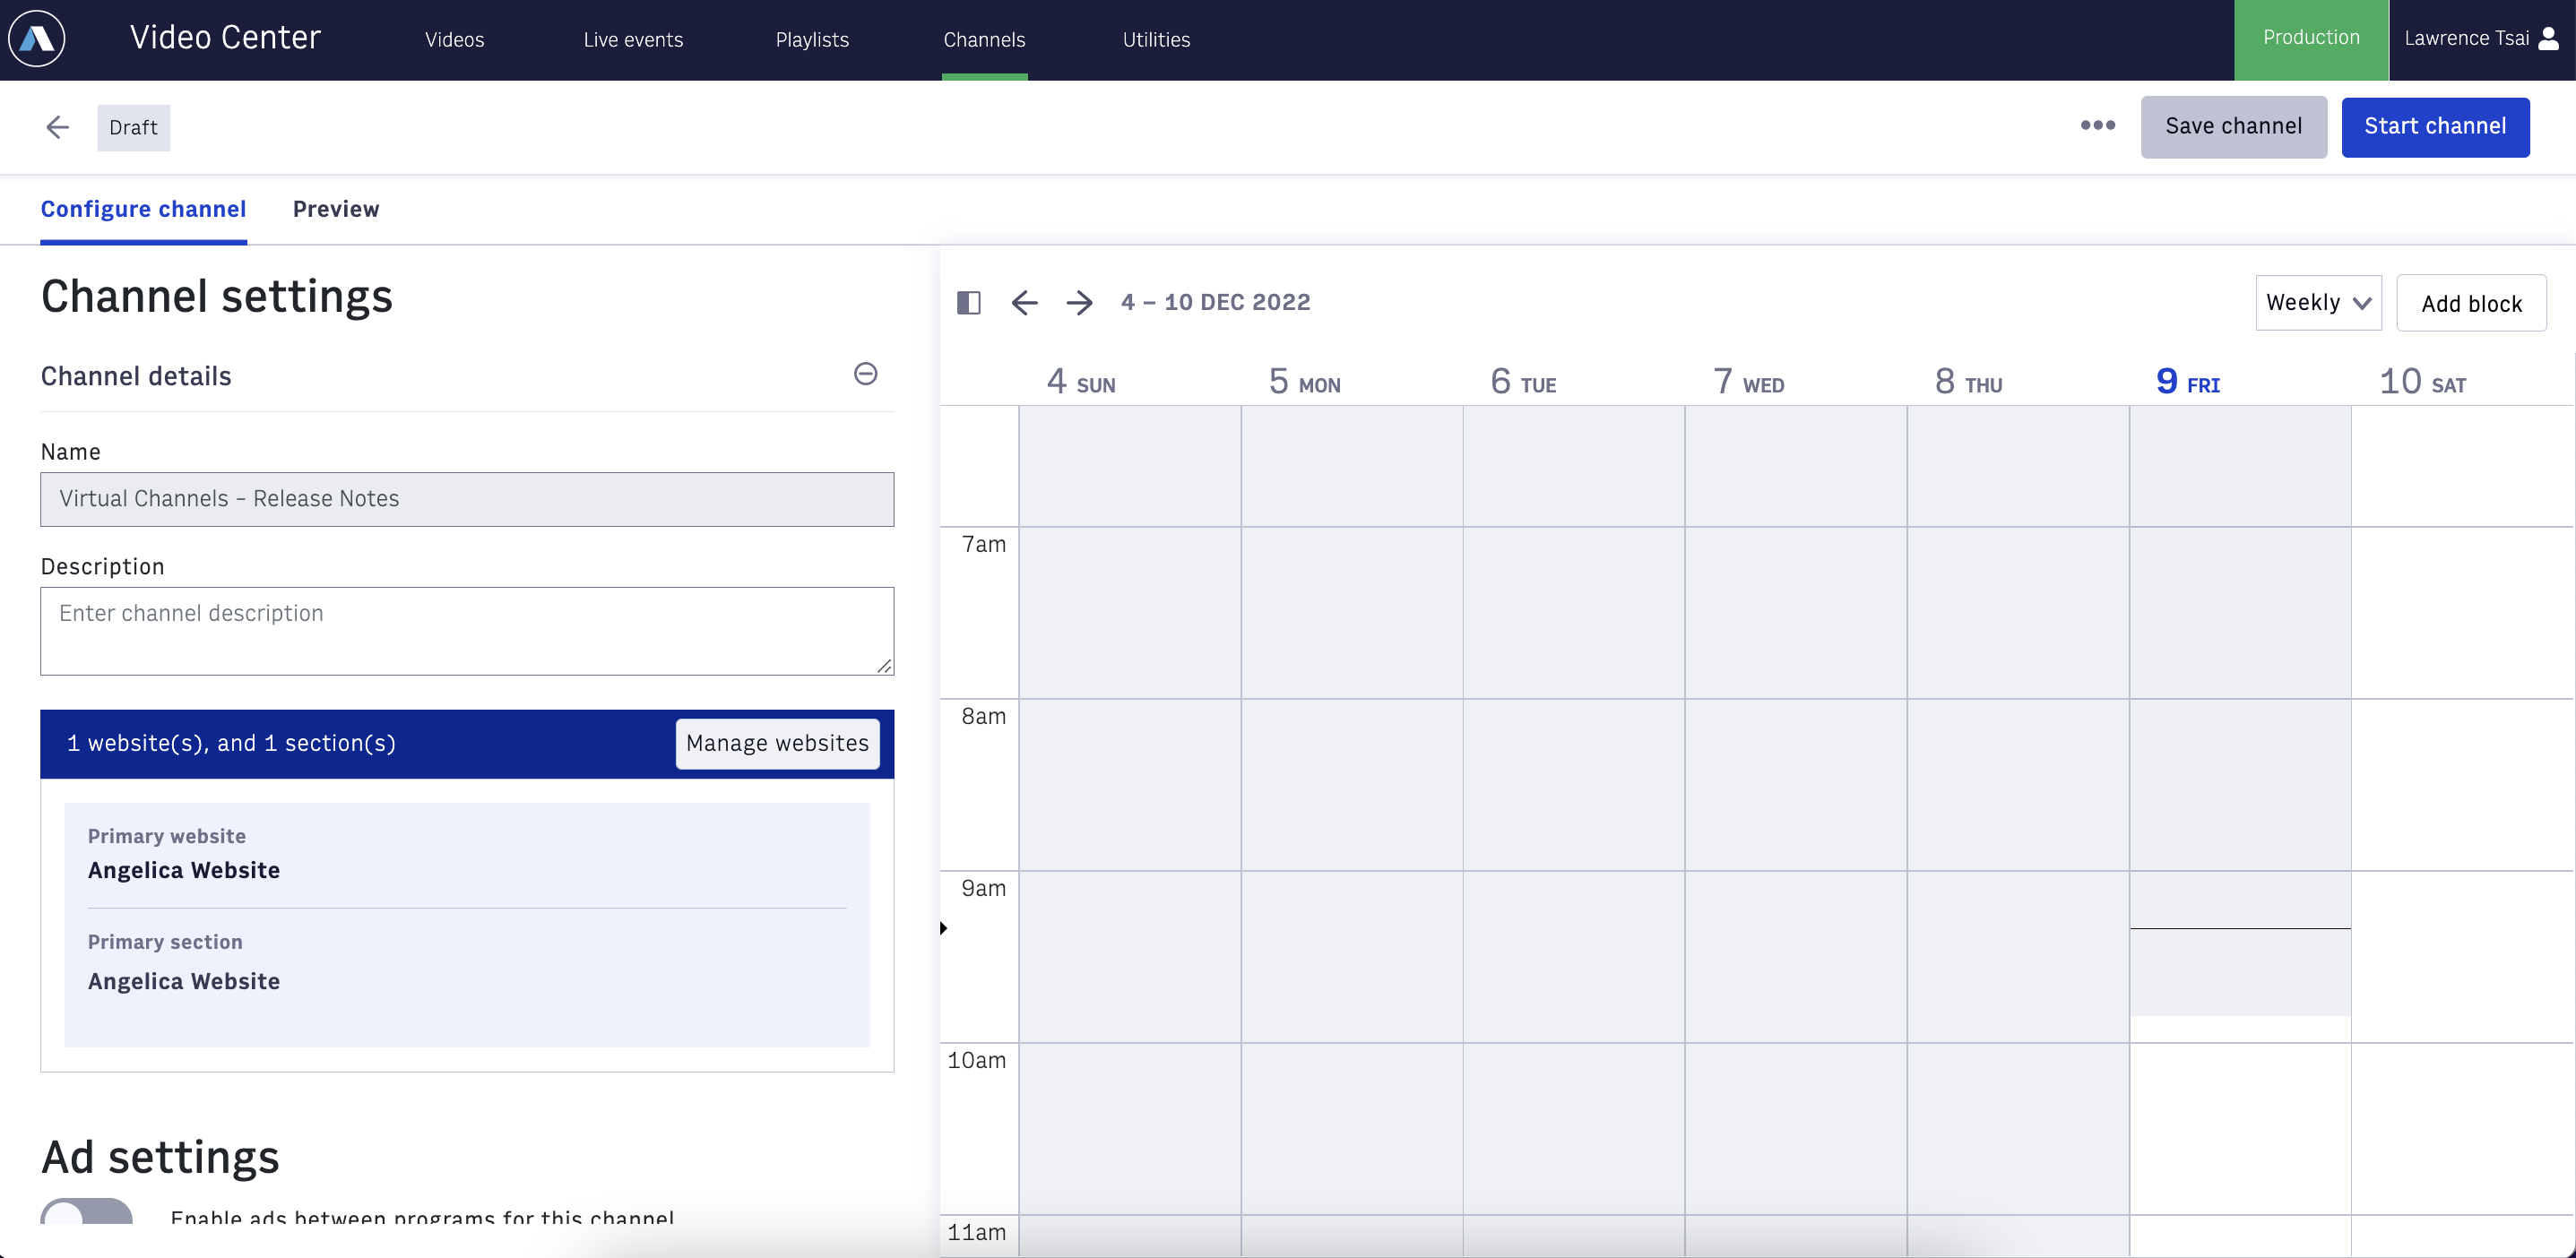
Finding and adding content for a Scheduled Channel presents a slightly different experience (compared to Looping). The first difference to notice is the calendar view. The calendar view lets you easily visualize all the content you're scheduling for the Channel.
 |
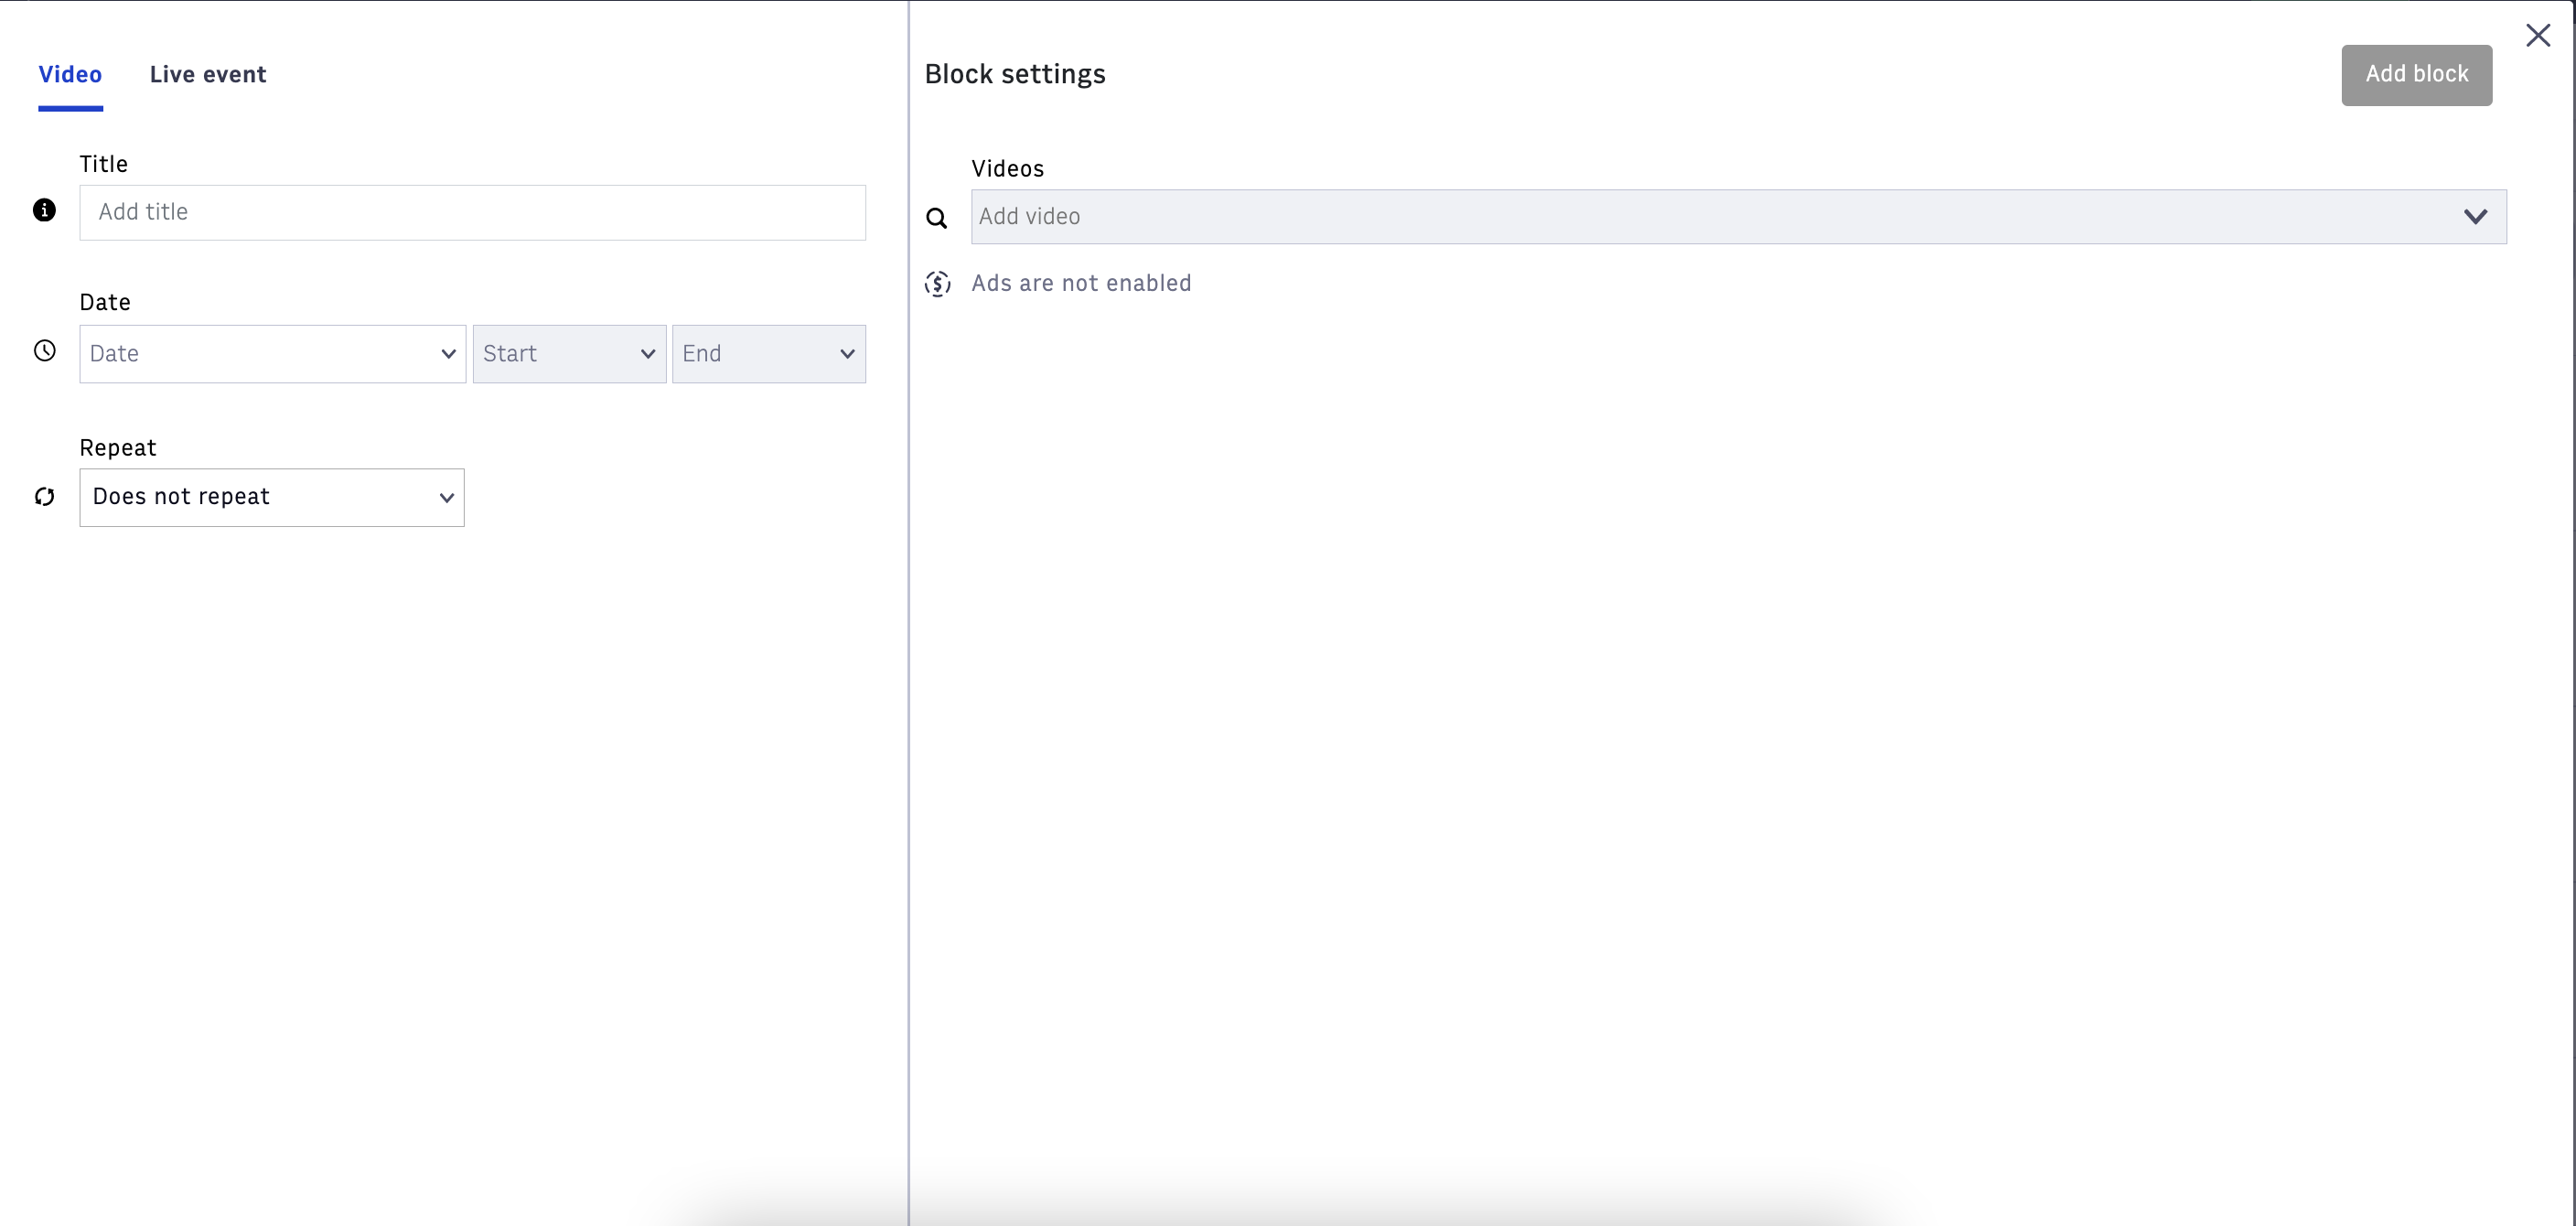
Instead of adding programs, you'll add blocks for a scheduled Virtual Channel. To add a block, click the Add block button on the channel page. You're be brought to a simple interface that lets you add a Video or a Live Event. Before you are able to search and add a Video or a Live Event, you must first fill out a specific date and time. Another way to add a block is to double-click on the specific time and date in the calendar view. This automatically fills out the time and date when you take the next step of adding a Video or Live Event to the block.
Note
You can't schedule a block 30 minutes before the current time. For example, if it is currently 7:59 am, you can schedule a block for 8:30 am or later.
Searching and Adding a Video: The drop-down field lets you select from the last 10 most recently updated videos. You can also use the drop-down field to search through your published videos by video title.
 |
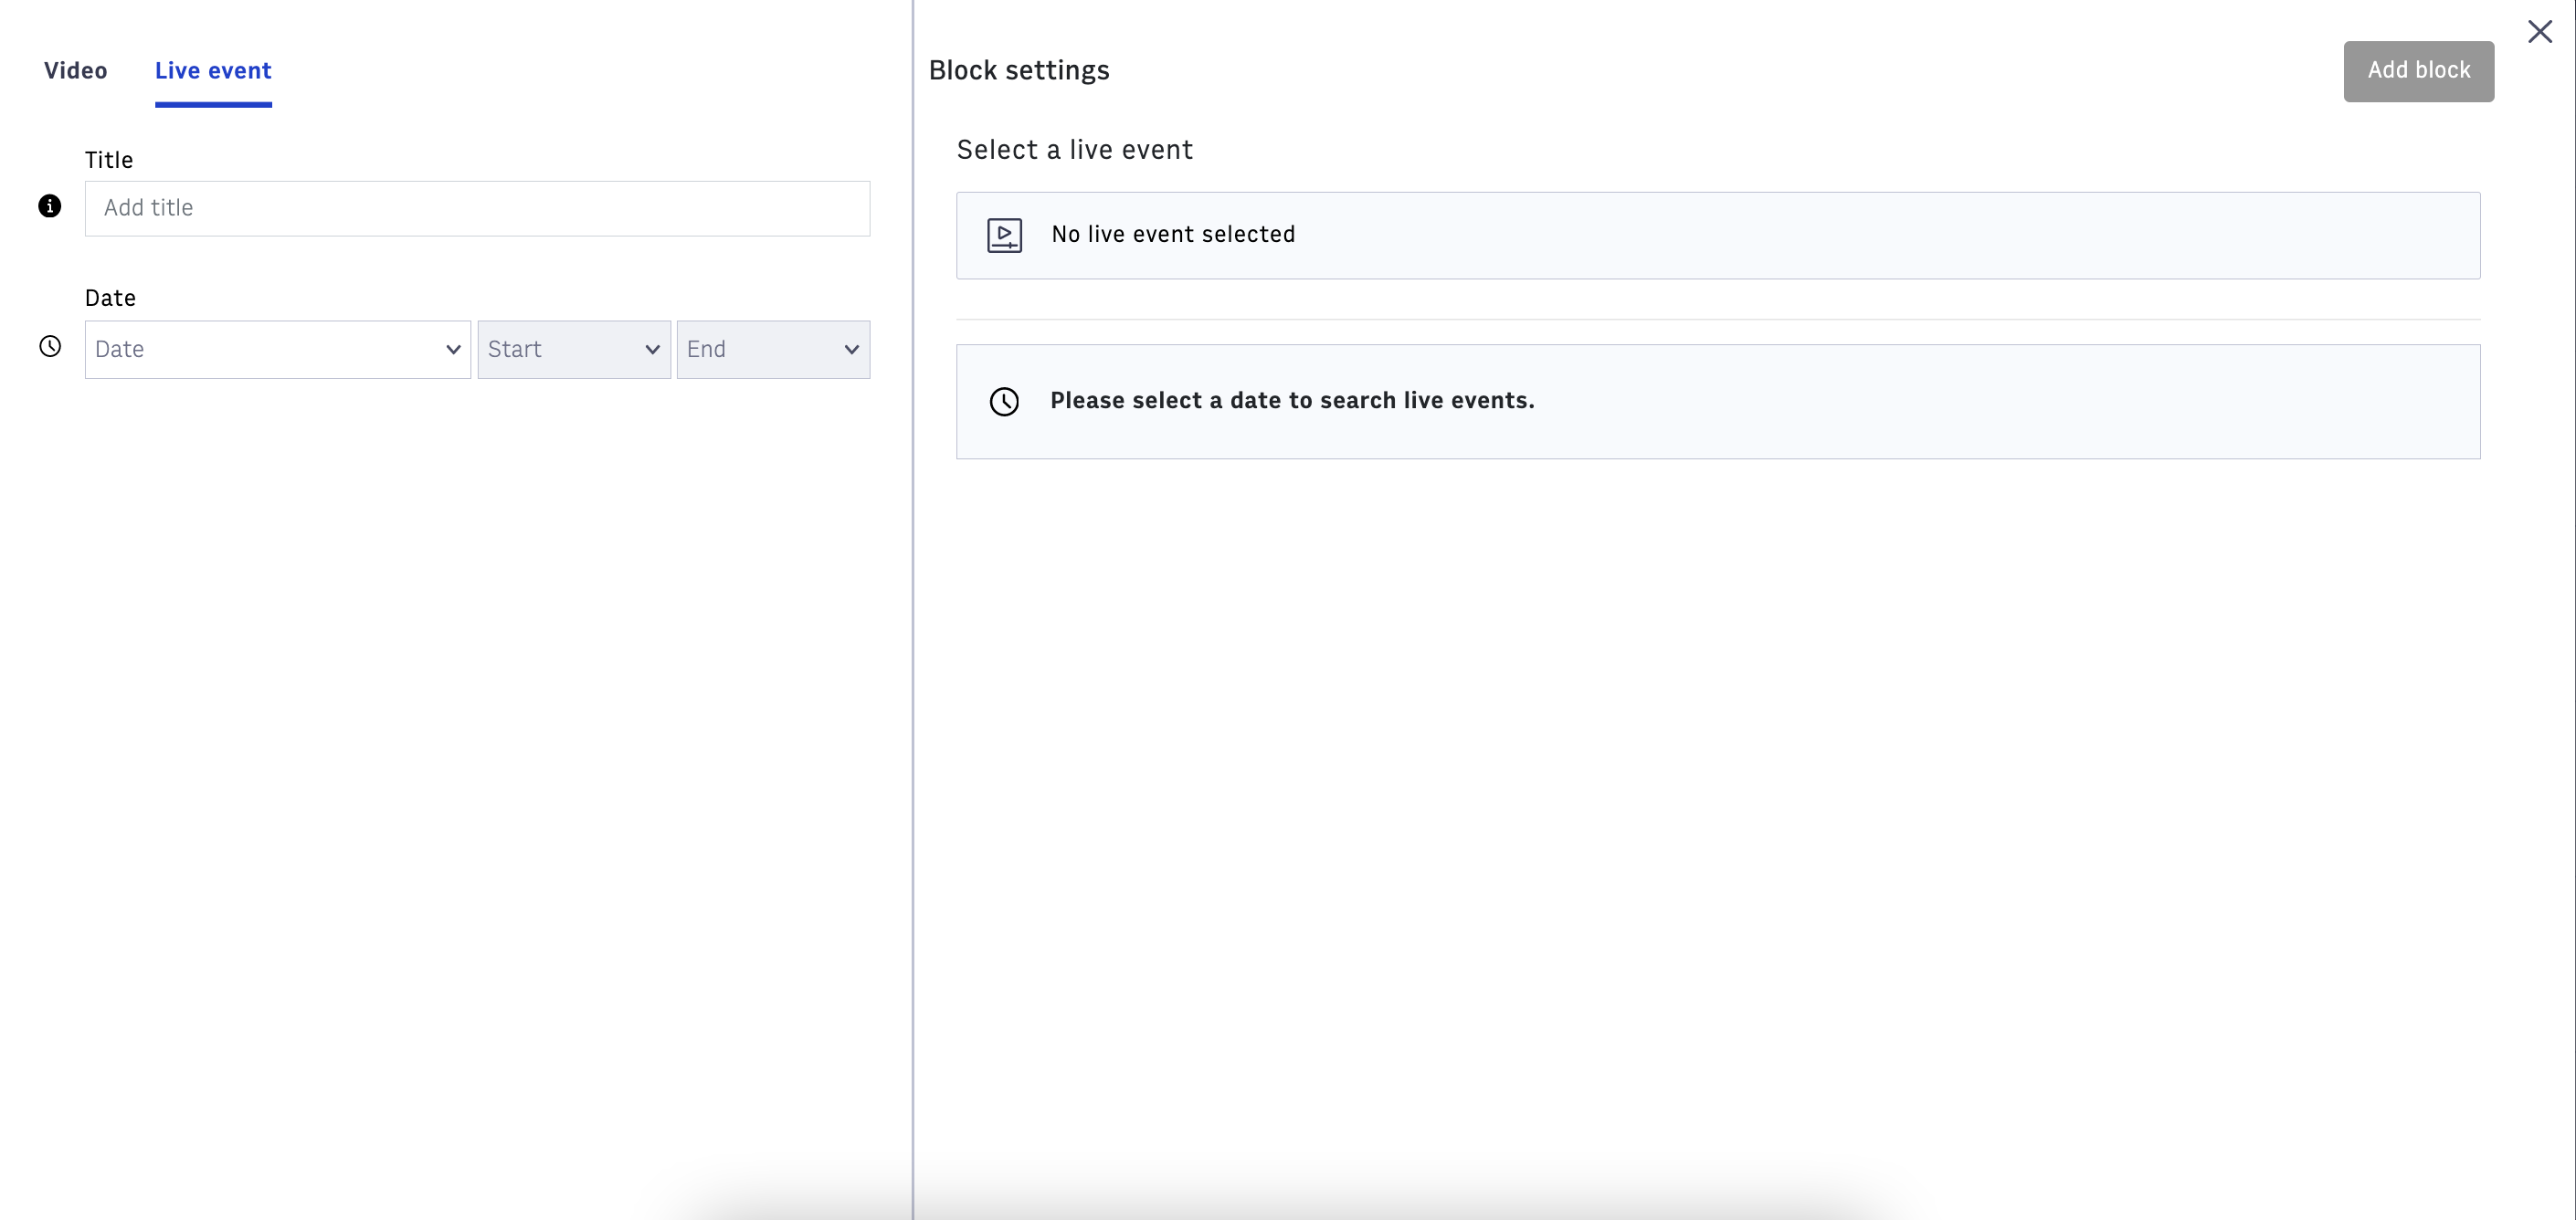
Searching and Adding a Live Event: Only Live Events that align with the date and time of your block are selectable. The available Live Events populate based on the date and time you've set for the block.
 |
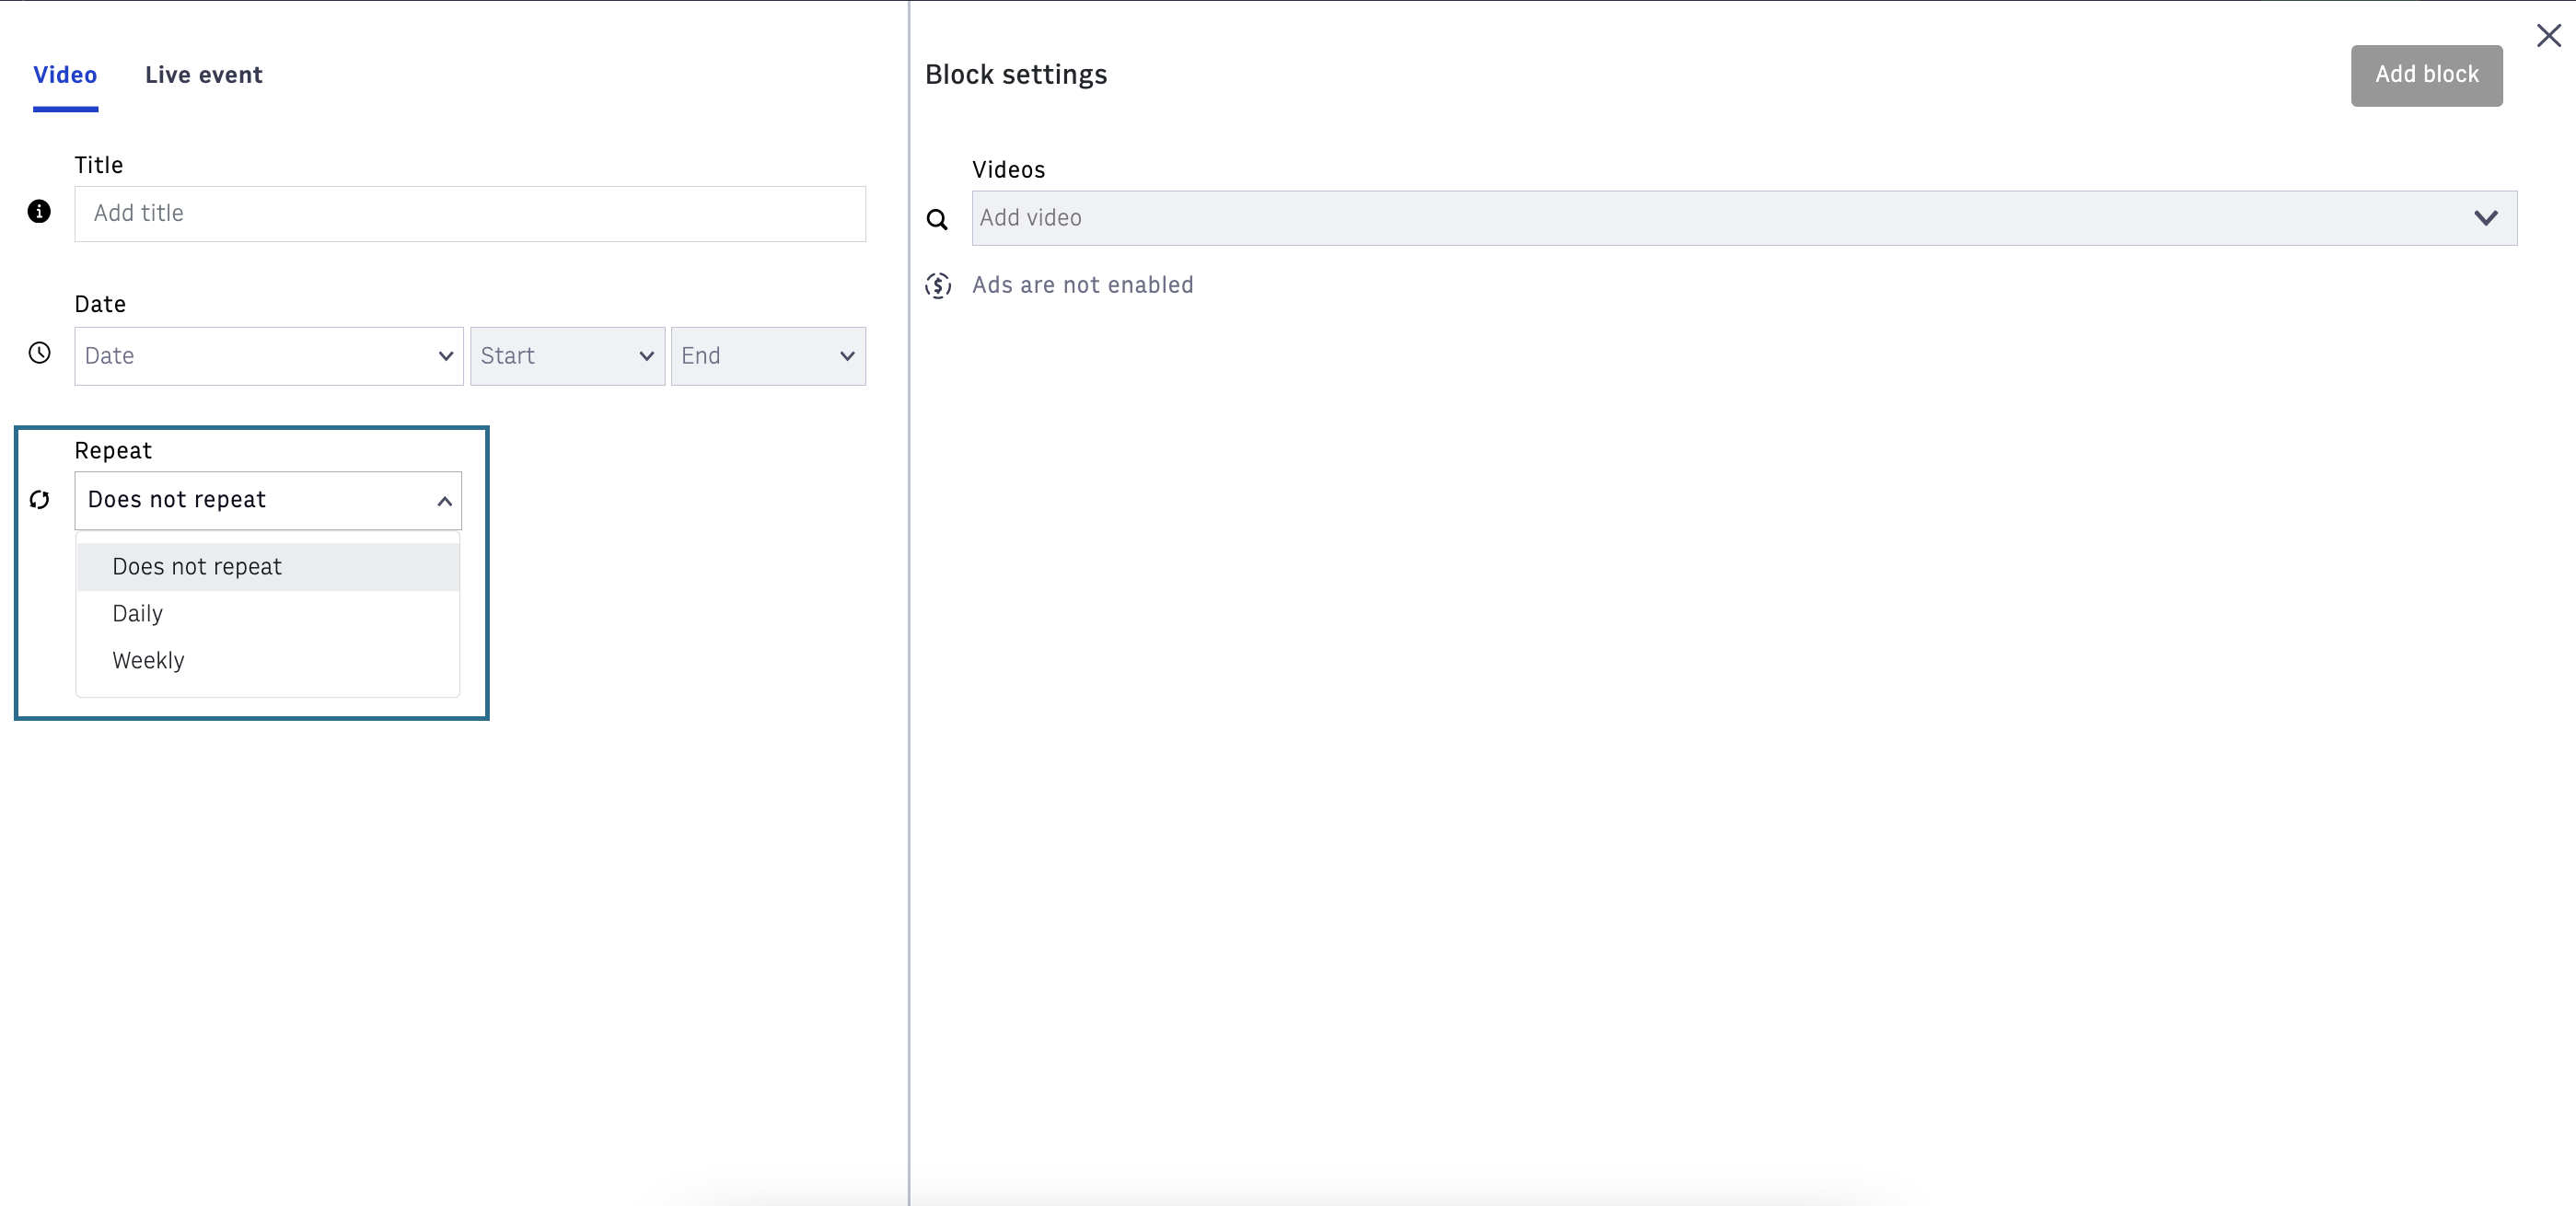
Recurring Blocks: Only available for adding a video and not available for adding a Live Event. Deleting a single block of a recurring block is not currently supported. You must delete the entire recurring block.
 |
Starting and Publishing Your Channel
After you add programs or blocks to your channel, you can start and publish it. After you've started it, your channel loops through the program list (for Looping Channels) until you stop it, including advertising between each program (if configured). Or, for a Scheduled Channel, it plays the blocks you scheduled, including advertising between each program (if configured). If there are no blocks scheduled in certain blocks of time on the schedule, a default blank slate will appear.
If you have any programs that need to be re-encoded, they must be re-encoded before you can start your channel. To begin re-encoding any videos that need it, simply save your channel and wait for the process to complete.
 |
Channels must be started manually before publishing them. Starting the channel will bring its cloud resources online, and then publishing the channel will make it available to the world through the Arc Video Player and Video SDK.
Important
The order of programs for a Looping Channel cannot be updated while the channel is running. You must stop the channel to add or reorder programs and restart them. The same applies to Scheduled Channels. To make any edits to your schedule, you must stop the channel to make edits. Your customers may see a slight stream interruption while you do this.