How to Set Up Live Streams in Video Center
Video Center offers the capability to run live streams and live events for your audience, but the first step is setting up Live Channels inside Video Center. This step-by-step guide will help you get your first Live Stream set up and ready to start broadcasting.
You do NOT have to set up a Live Stream to use the Arc XP app. To begin streaming with Arc XP, see Getting Started with Video Center.
Before You Begin
You must file a support ticket to have your Arc XP environment(s) provisioned for live streaming. You won’t be able to set up a stream in Arc until this provisioning is complete.
As part of the support ticket, include which environments (for example: sandbox, production) you’d like to provision.
In addition to the support ticket, you must ensure you have an encoder that can output an HLS or RTMP stream. Most encoders will support RTMP. We recommend a high bit rate output stream to best support Video Center’s suite of live-streaming features. Video Center supports a max bitrate of 20 megabits per second for live streaming.
Once Provisioning is Complete
Once your Arc environment is provisioned for live streaming, go into Video Center Utilities and set up your new stream. You can find it in Utilities > Server Configurations > Live Streams. To create a new channel, click on the “Add Config” button in the top right corner. You can also Edit an existing channel. The following guidelines focus on creating a new channel.
Basic Settings
If you’d like to create the stream and not have it available for live events immediately, you can un-check “Enabled” at the top of the page. This will prevent the stream from being selectable when creating a live event.
When first creating your stream, you’ll need to give it a Name. You can change this name after you create the stream, and it will be visible both on the Live Streams configuration page and on the channel list when Creating Live Events in Video Center. You can also add a “Stream Name” which is only used internally; if you don’t fill in the stream name, Video Center will simply “slugify” the stream name and remove any unsupported characters.
Note
Stream Name cannot be changed once a stream is created.
You can set a default promo image for your stream, but you’ll have to host it somewhere on the internet first. This promo image will be used by default for any Live Event that’s created on this stream, though you can always override it on a case-by-case basis.
Website Settings
If you have a multi-site Arc instance, you can configure your live stream to be tied to a specific website. This will help filter the live timeline view in Video Center and help you track live usage across all your sites.
Note
You cannot change the Website of a stream once it’s created.
YouTube Settings
If you’ve got a YouTube channel configured in Video Center, you can connect your live stream to YouTube. First, select one of the previously-configured channels, then add the stream ID for that channel.
Server-Side Ad Insertion
If this live stream will be configured to support Arc Dynamic Ad Insertion (DAI), you’ll need to indicate that here. For each live stream that you configure for Arc DAI, you’ll need to add an ad tag template and a URL for slate video.
Live Encoding
There are several ways to set up a live stream. The main difference is that streams can use Server-side Encoding or Client-side Encoding. Regardless of which encoding type you use, you’ll need to have a computer or other device sending the live video feed into Video Center.
Server-side Encoding
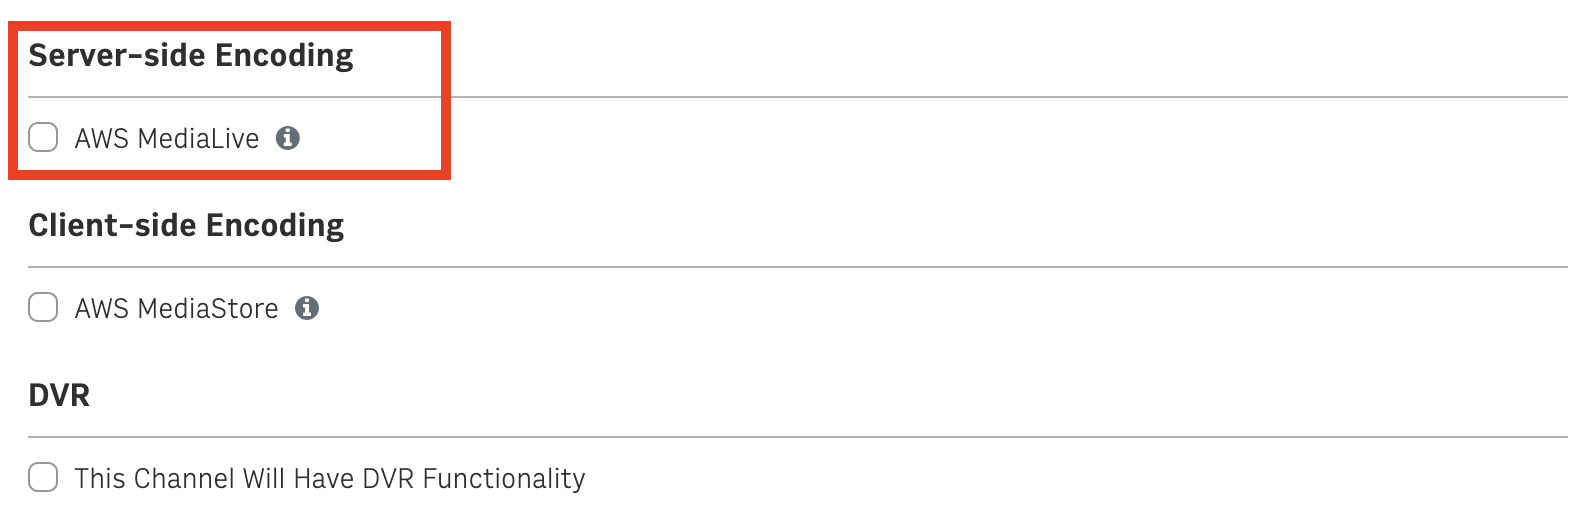 |
Streams that use server-side encoding are fully managed by Arc; you’ll send a single, high-bit rate stream into Arc over either the RTMP or HLS protocol, and Arc will re-encode that stream into multiple adaptive-bit rate streams for consumption across a variety of bandwidths and screen sizes. To set up a server-side encoding stream:
Click on the AWS MediaLive box on the setup page.
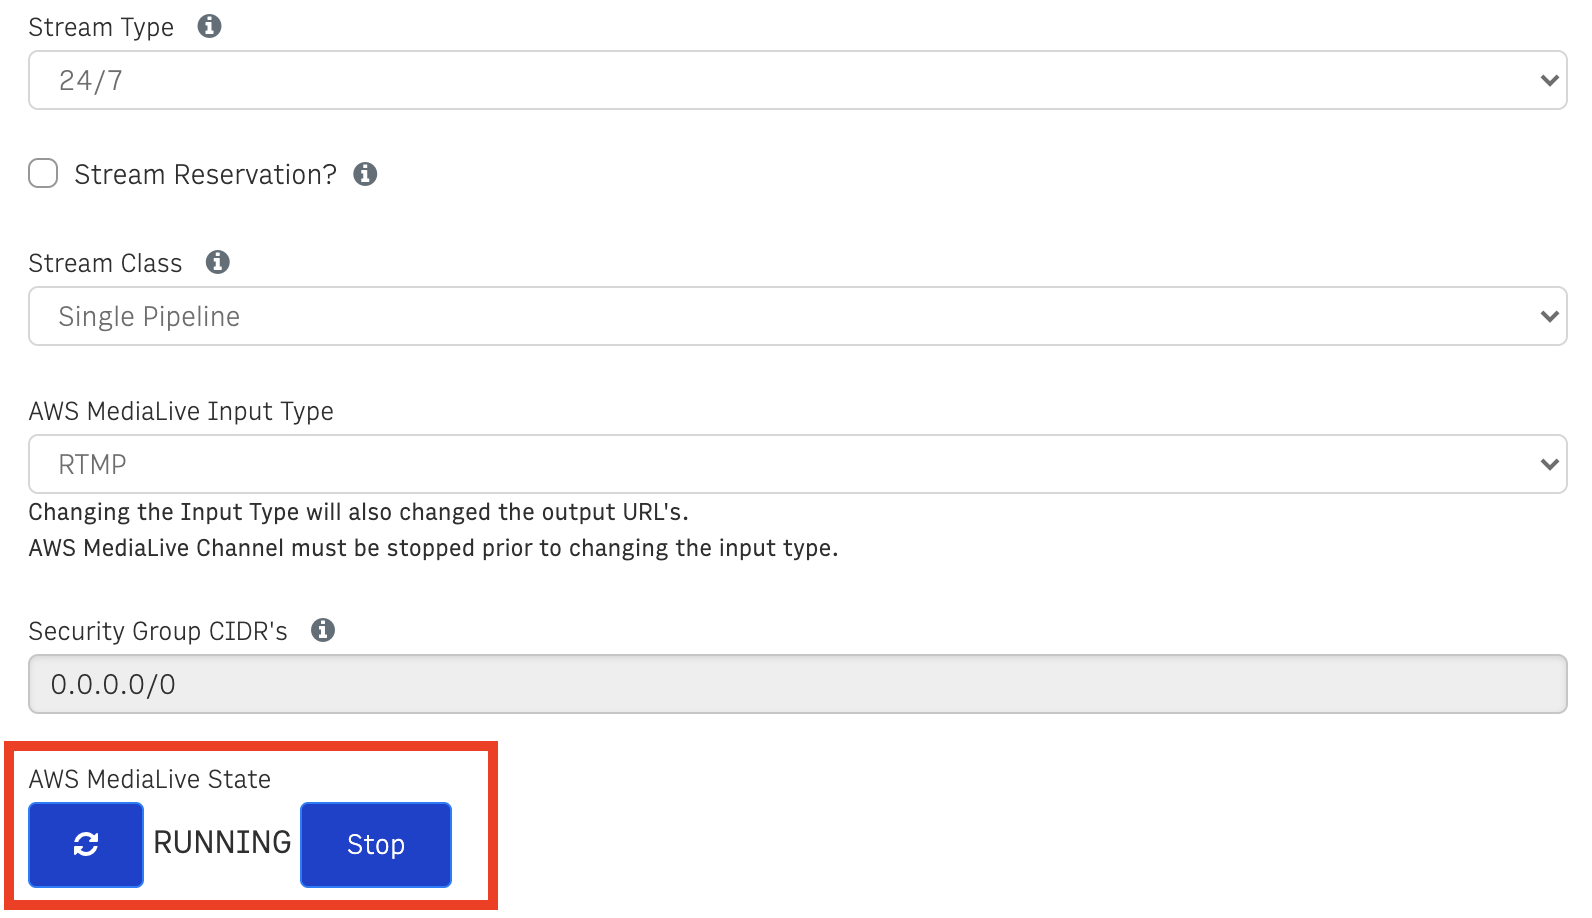
Select a Stream Type. You can choose either 24/7 or On Demand. On Demand streams start and stop when a Live Event begins and ends, and don’t incur costs when they’re stopped. 24/7 streams are on by default at all times; though they can be manually started and stopped from the live stream configuration page.
If you select 24/7, you can also choose to reserve it. Contact Arc XP Customer Support before you select this checkbox; while reserved 24/7 channels are less expensive by-the-hour, they require some specialized accounting.
Select a Stream Class. You can choose Single Pipeline or Standard (which has two inputs). The Stream Class dictates whether or not your live stream has a fallback signal; most streaming use cases don’t need this. If you think you need a fallback signal for your live stream, contact Arc XP Customer Support to set up your stream and billing options.
Select an AWS MediaLive Input Type. You’ll need to choose whether you’re sending an RTMP stream or HLS; most encoders will be ready to send RTMP. There’s no cost difference between sending RTMP and sending HLS.
You can set an image to show as slate in case the signal is lost by filling out the Slate URL. The image needs to be hosted somewhere on the public internet to be used.
Client-side Encoding
You can instead choose to run your stream with Client-Side Encoding. Streams with client-side encoding require the video feed to be fully encoded (as HLS) before it’s sent to Arc; your encoder will be responsible for every rendition of the video Arc delivers to your audience.
DVR Support
Client- and Server-side encoded live streams can both optionally support DVR functionality. With DVR functionality, you’ll be able to create VOD clips from the live stream and automatically archive Live Events after they end. Streams without DVR support won’t show up as an option in the clipping tool.
Once you’ve created your stream
Once you’ve created your stream, you can no longer change its settings. After you’ve created your stream, you’ll need to configure your encoder to push video to Arc. The methods for doing so are slightly different for Server-side encoding and client-side encoding streams.
Server-side Encoding
If you’ve created a stream with Server-side Encoding, you’ll need to point your encoder at the input URL listed on the page.
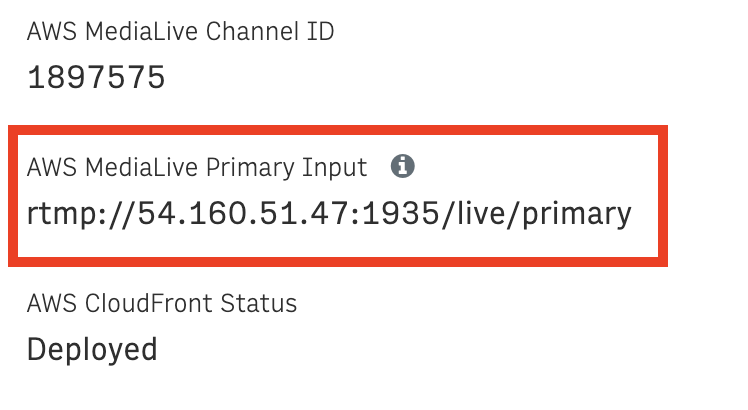 |
If you’ve created a single pipeline channel, you will have one input. Configure your encoder to push a high-bit rate stream to the AWS MediaLive Primary Input. For standard (two-input) channels, you should configure your fallback stream to point to the AWS MediaLive Secondary Input.
Note
The stream key is always “primary” (at the end of the RTMP URL) for the primary input when selecting the single pipeline channel or the standard stream types. Use “secondary” for the secondary input when selecting the standard stream type. There are no passwords for streams.
You’ll notice that 24/7 Streams have the option to start or stop the streams manually. Stopping a stream lets you make certain changes to it, and also prevents it from incurring costs if you’re not using it. However, a stopped/idle stream won’t be viewable by your audience. On-Demand streams do not have this option.
 |
Client-side Encoding
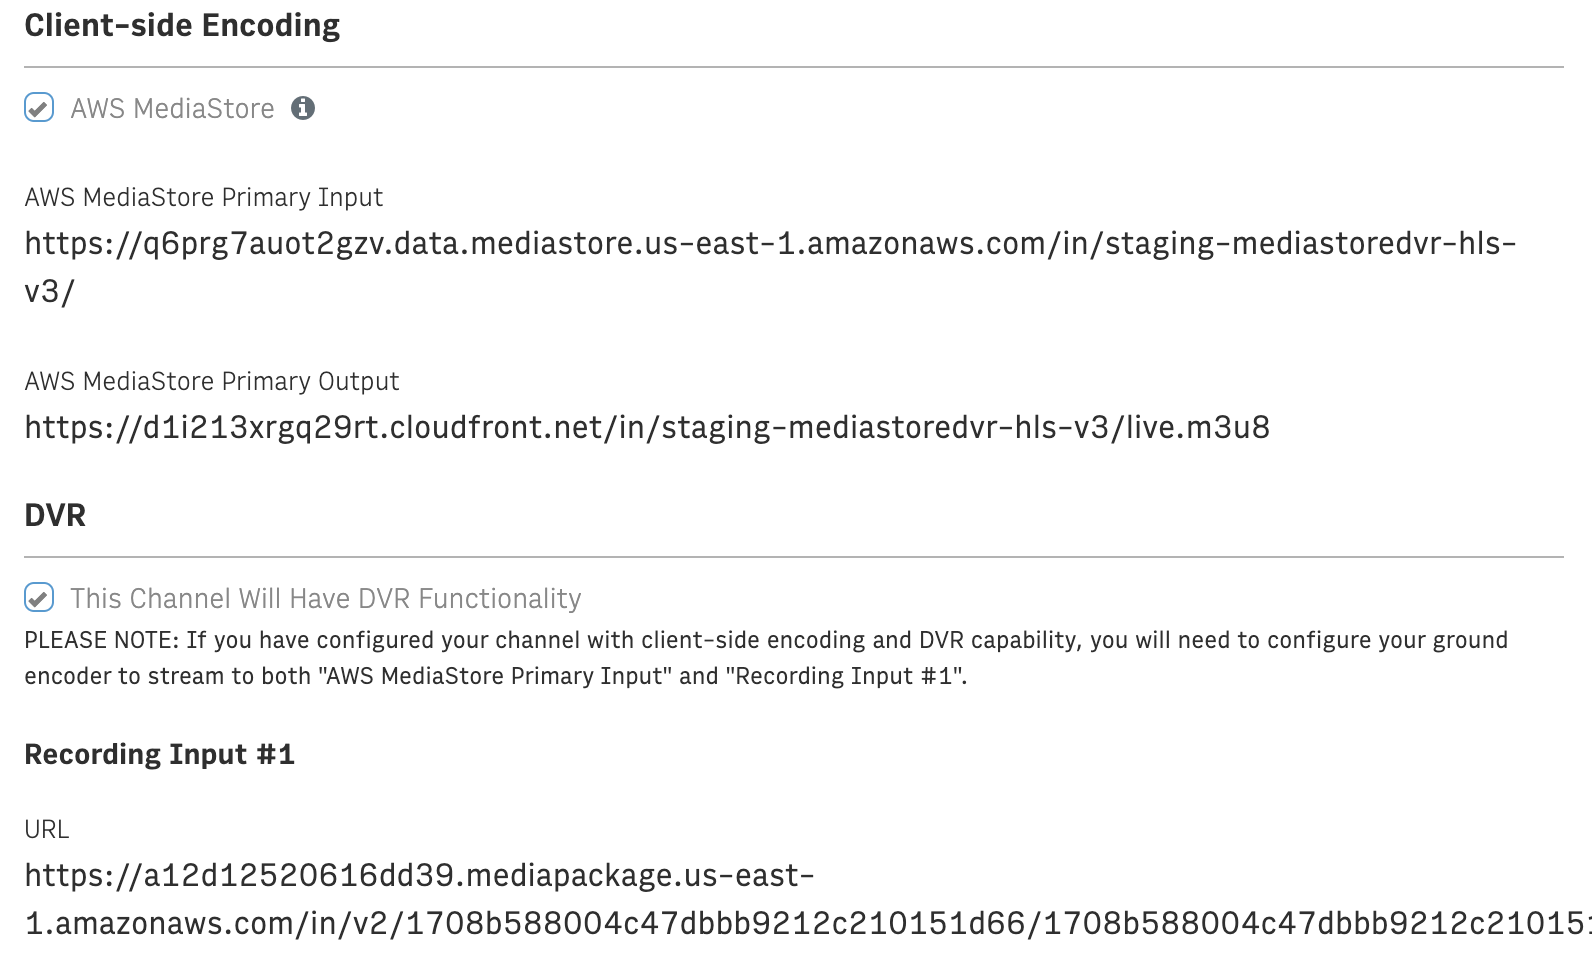
If you’ve created a stream with Client-side Encoding, you’ll need to configure your encoder to point to the AWS MediaStore Primary Input. You can add as many separate HLS playlists to this destination as you want, and Arc will make them available to consuming applications.
Note
Client-side encoding requires HLS output from your encoder. It does not support RTMP connections from your encoder.
If you’ve enabled DVR for your Client-side Encoding stream, you’ll need to configure your encoder to send streams to both the AWS MediaStore Primary Input as well as Recording Input #1. You will need to include the credentials when configuring your encoder in order to connect to the Recording Input.
 |
Now that you’ve created your stream and configured your encoder, you can create a Live Event in Video Center and start streaming.
DVR Recording Configuration
Customers with Live Events & Channels can optionally request the deletion of DVR files after a specified number of days. This feature helps reduce costs by removing unpublished VODs from Live Events. A nightly script will delete these unpublished VODs and their associated S3 assets. If you are interested in enabling this, open a ticket to Arc XP Customer Support with the number of days you would like.