How to Set Up Social Logins with Arc XP Subscriptions
Today’s users want to quickly and easily log in to their accounts, and one of the simplest ways to do that is with their existing social and third party account.
If the user has a social account on Facebook, Google and Apple, the user can login into the website using the same credentials used in their social account. This authentication mechanism has some advantages:
No need to remember additional passwords.
Email verification is not required if email verification is enabled
Just one account (UUID) is used for email + password and social account login methods
Accounts connecting automatically can happen when users have previously created an email and password account or when they first logged in using a social account and later try to log in with just an email.
Email and Password account: When logging in with a social account, the account is automatically linked to a user profile if they email addresses match.
Social account first: If a user has previously logged in with their social account and tries to log in or sign up with an email & password account, they will be prompted to check their email to complete set up of their password. This starts the change password process that completes the email & password profile portion of their account.
You will initially have to set up the provider client id and secret key with Facebook, Apple or Google and can then use this portal to make those sign-in methods available immediately to your customers. Configuration guides for these can be found at the links below;
How to Configure Sign In With Google with Arc XP Identity
How to Configure Apple Login with Arc XP Subscriptions
How to Configure Facebook Login with Arc XP Subscriptions
How to use Arc XP identity as IDP (OIDC)
Social Sign-in Setup
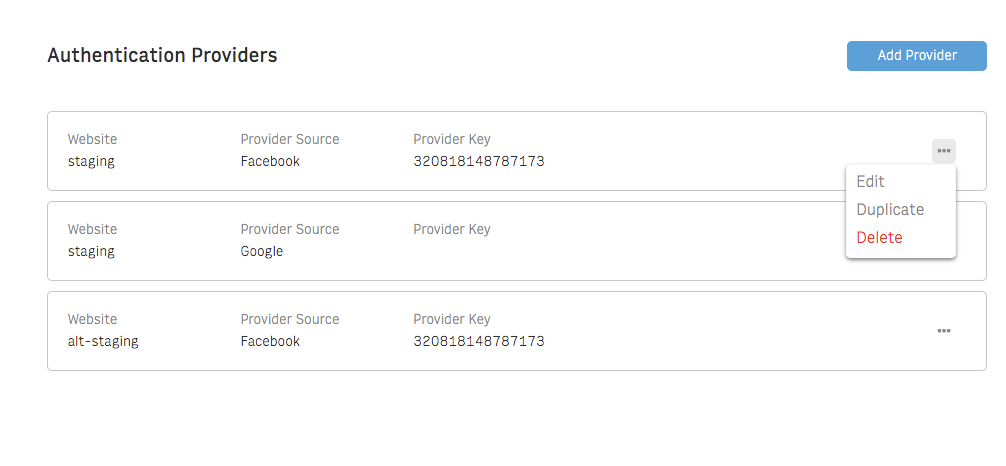
Configure the Facebook, Google and Apple login methods using the configuration admin in Settings. The Authentication Providers tab is under the Identity section in Settings and enables you to add or update your provider information.
These options are also available when using the Themes registration and sign-in blocks. All the settings below need to be configured in order for the blocks to function.
 |
If your tenant is multi-site, you need to select the site. On this page, click on “Add Provider” button and select the authentication provider: “Facebook”, “Google” or “Apple”. In order to add the authentication provider, we need to enter “App ID” and “App Secret” for facebook, “Client ID” and “Client Secret” for Google, and “Client ID”, “Client Secret”, “Team ID”, “Redirect URL” and “Key ID” for Apple. These values are obtained through Facebook, Google or Apple developer tools.
App ID and client ID (for Facebook and Google, respectively) make part of site configuration. In order to know if Facebook and Google are already enabled as authentication providers into your site, you can:
Go to Settings > Authentication Providers in the Commerce Admin tool. Make sure the Authenticator provider Facebook and/or Google are configured.
Call Public API GET {Base_Path}/Identity/Public/V1/Config or
Call SDK method Identity.GetConfig()