How to Create and Manage Story Templates in Composer
You can use story templates to provide your staff with a starting point when authoring stories. Templates let you define a variety of fields, so your team doesn't have to spend time repeatedly filling in the same content or even remembering to do so.
A primary benefit of story templates is pre-selecting circulations for your story. Pre-selecting circulations ensures that stories are always published to the accurate section of your site.
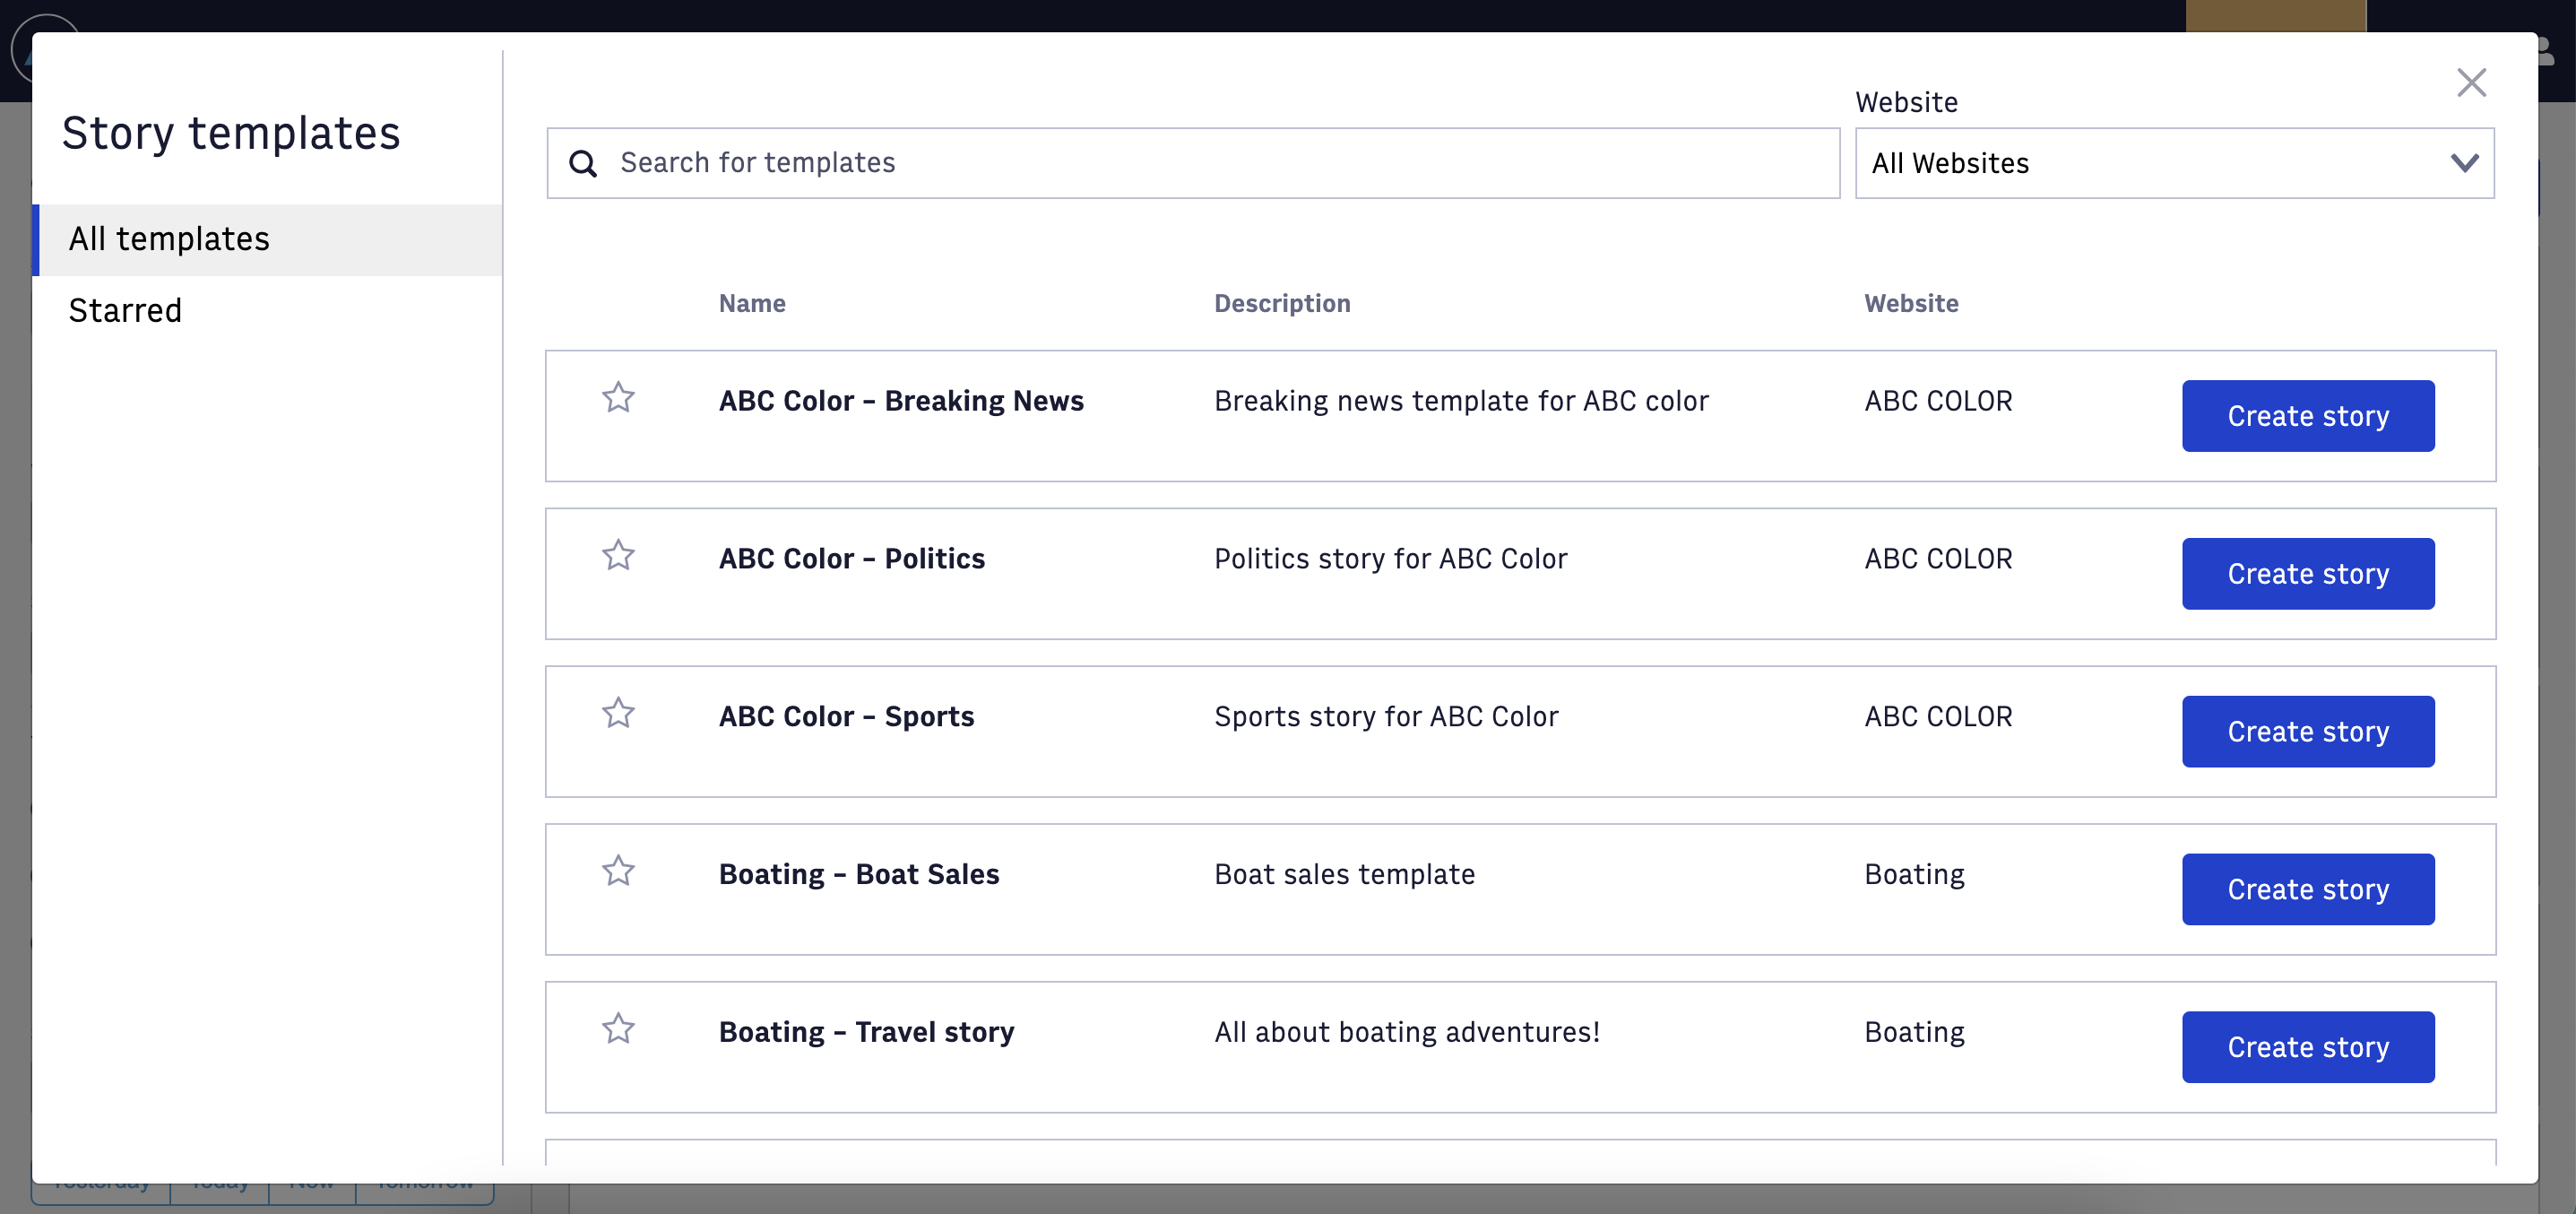
After you create a template, you can make that template available to all authors in your organization. The following image is the view an author sees when they click Browse all templates from the home screen in Composer. In this corresponding article Composer: Saving Starred Templates you can learn more about how authors can best utilize templates and jumpstart story creation by setting favorite templates.
 |
Managing your story templates
To access, create, and manage story templates, click the Templates tab in the Composer top navigation. If you do not see this option in your navigation, it's because you don't have permission to create and edit templates for your organization. Contact your organization administrator to request this permission.
When you arrive in the Template Settings page, you see the following functionality. In the next sections, we break down what you can find in Template Settings.
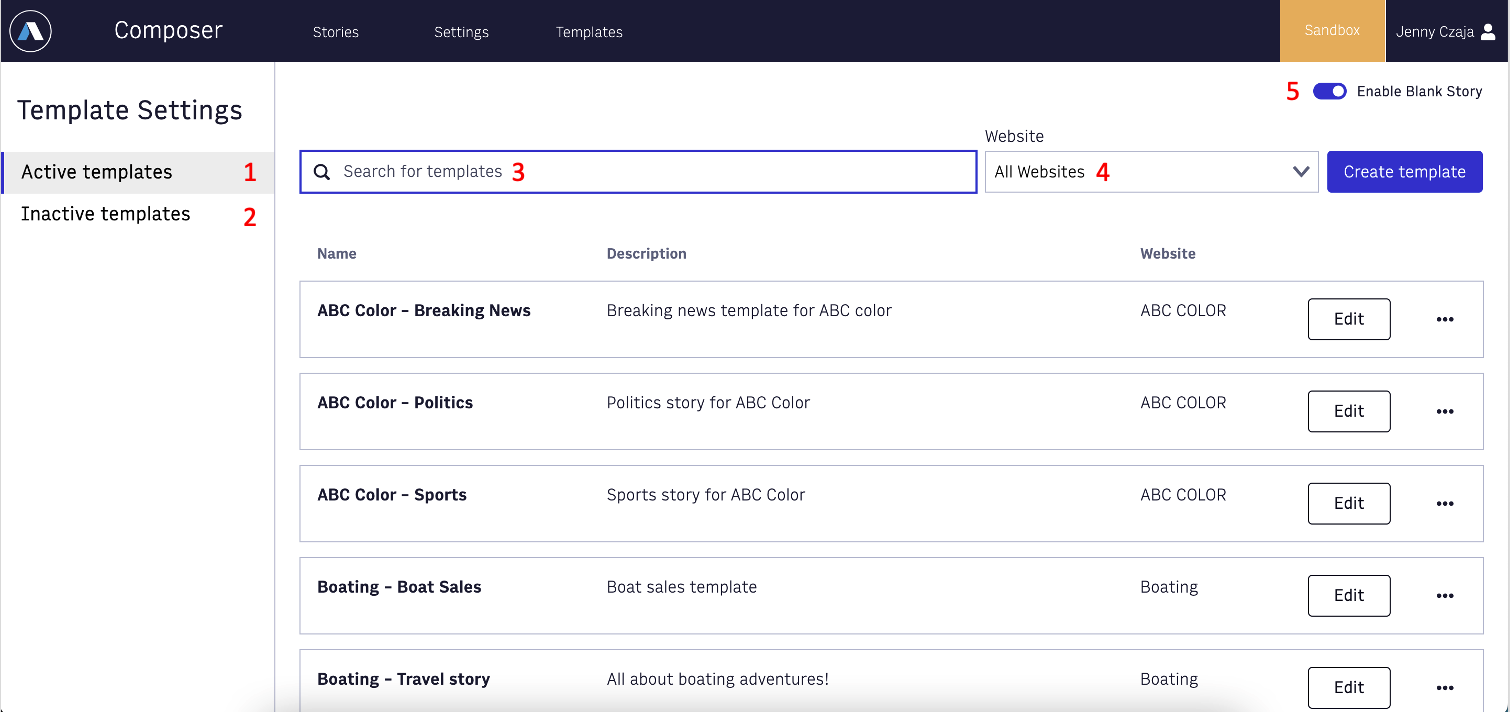 |
Active templates - This section displays all templates that are currently available to your users.
Inactive templates - This section displays all the templates that are currently hidden from your users.
Search bar - Here you can search for templates by template name.
Website filter - Here you can filter down your list of templates by Primary Website. This is based off the Primary Website field set within the template.
Enable Blank Story - This is a toggle that, when enabled, allows your authors to quickly create a blank story from the “Create story” button on the Composer Stories home screen (see image below). This is a shortcut to open a completely blank Composer story without any fields preset. We recommend enabling this option only if you do not otherwise encourage authors to use story templates.
 |
Creating a new template
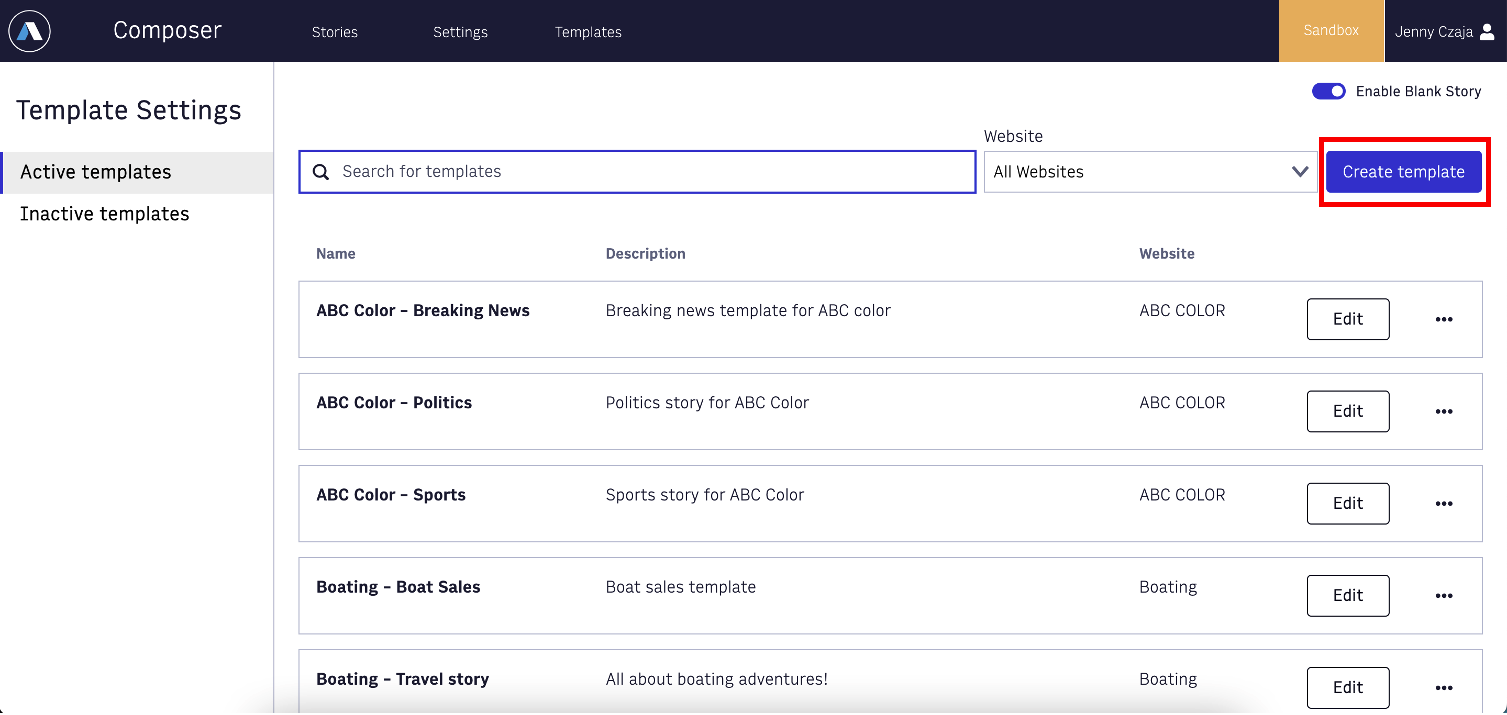
From the Template Settings screen, click Create template.
 |
When you create a template, you first fill out the most important information.
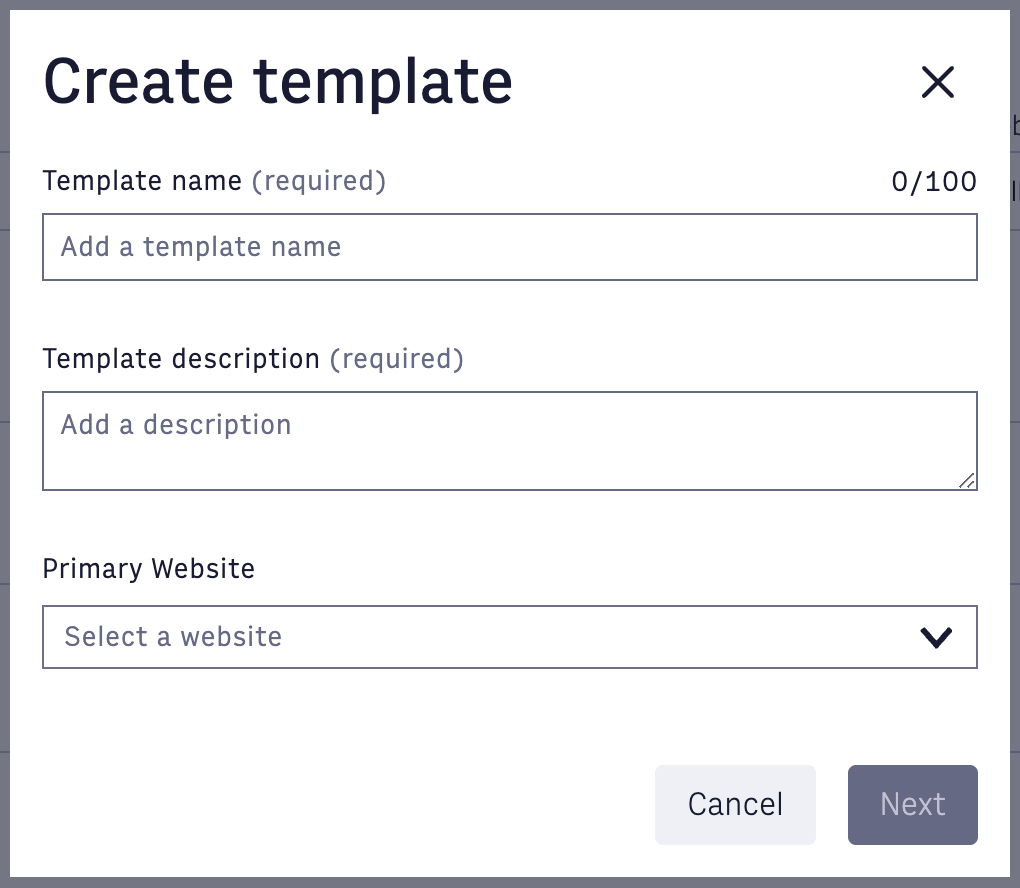 |
When you click Next, you are taken into the template editor.
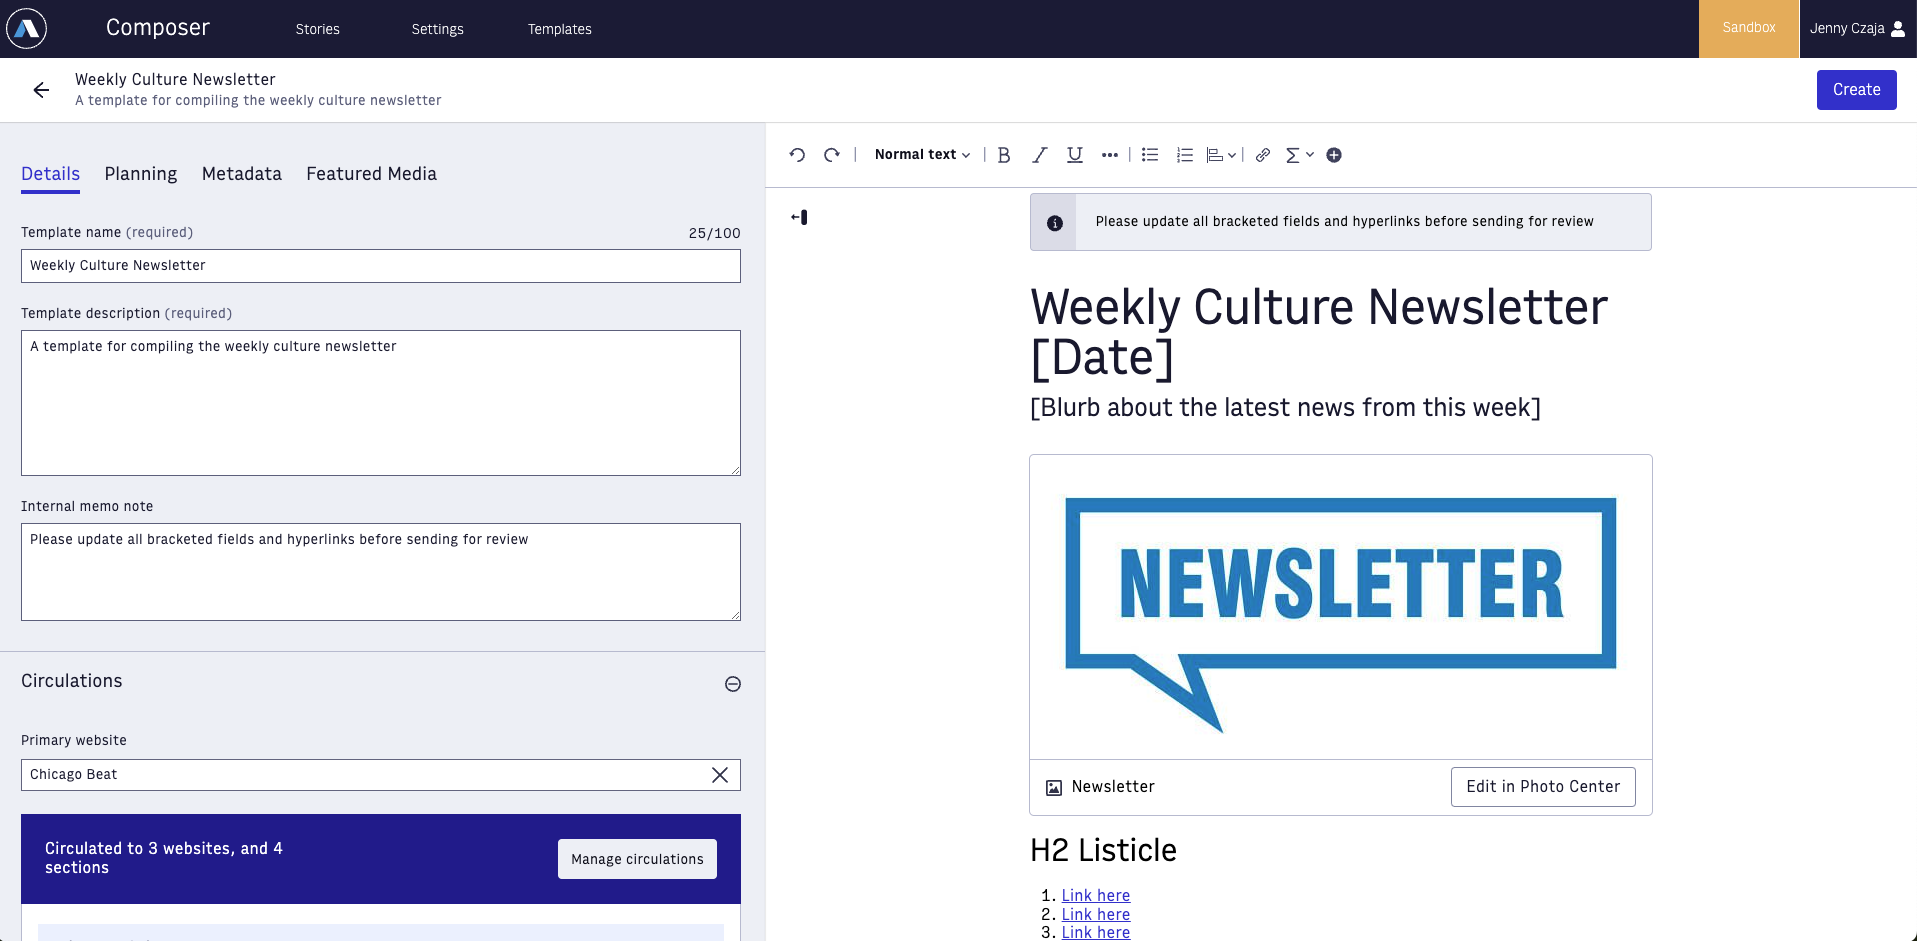 |
From within the template editor, you can pre-populate any necessary fields. The most commonly used fields in templates are consolidated in the first Details tab, where you can edit your template name and description. Templates are required to have unique names with fewer than 100 characters and no special characters. Here on the Details tab you can also add an internal memo note if you would like a banner message to appear for your authors at the top of the story editor. This internal memo note space is often used for instructions in templates. Below that you'll find Primary Website and Circulations where you can set your desired websites and sections for this template.
The remaining three tabs mirror exactly which fields your authors will see in the main story editor. You can pre-populate any fields, so when an author starts a story from this template, your desired metadata is already filled in. You can fill out as much or as little as you would like in any of the tabs.
Within the text editor space on the right, you have multiple formatting options to choose from to pre-populate your templates with your desired formatting and media. Text formatting options within templates include all headers H1-H6, bold, italics, underline, strikethrough, code, bulleted and numbered lists, text floats, hyperlinks, and special characters.
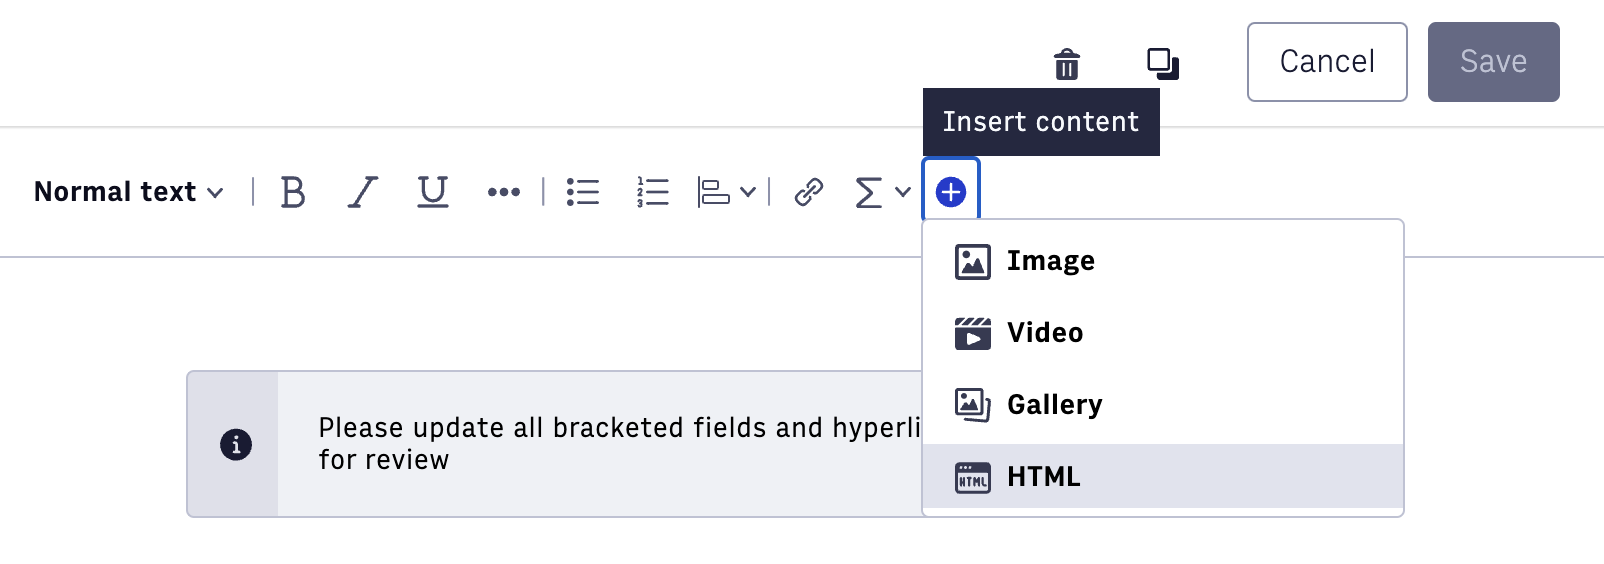
The plus button in the top toolbar allows you to insert content elements within templates. Supported content elements in templates include images, videos, galleries, and HTML blocks. If your organization has been enabled to support story variants you will see an option to insert variant zones into a template as well.
 |
After you have your preferred template data filled out, click Create template. The system displays a message when your template is successfully created and saved.
Once you create your new template, if you want to make changes, click Edit from the Template Settings page, which takes you back into the template editor.
You can clone templates from both within the template editor and from the Template Settings page. Cloning a template will automatically carry over any existing data into a new template, which you can adapt as you wish. Be sure to click Create once you modify your cloned template to ensure it saves.
Note that in Composer, a story template is different from front-end templates in PageBuilder, because PageBuilder is what determines how your story appears visually on your site. You can, however, create matching Composer story templates and PageBuilder front-end templates. For example, you can use the Composer subtype field to determine which front-end template the system should use to render the story on the live site. You might have a sports subtype that maps to a designated front-end sports rendering template. You can quickly and easily set this up in Composer story templates. Pre-select the circulations where this type of story should publish, and select the appropriate subtype to map it to the front-end template. Then when you publish a story created from that story template, everything publishes to the correct sections using the correct rendering format. You can learn more in How to Set Subtypes in Composer.
Active and inactive templates versus delete templates
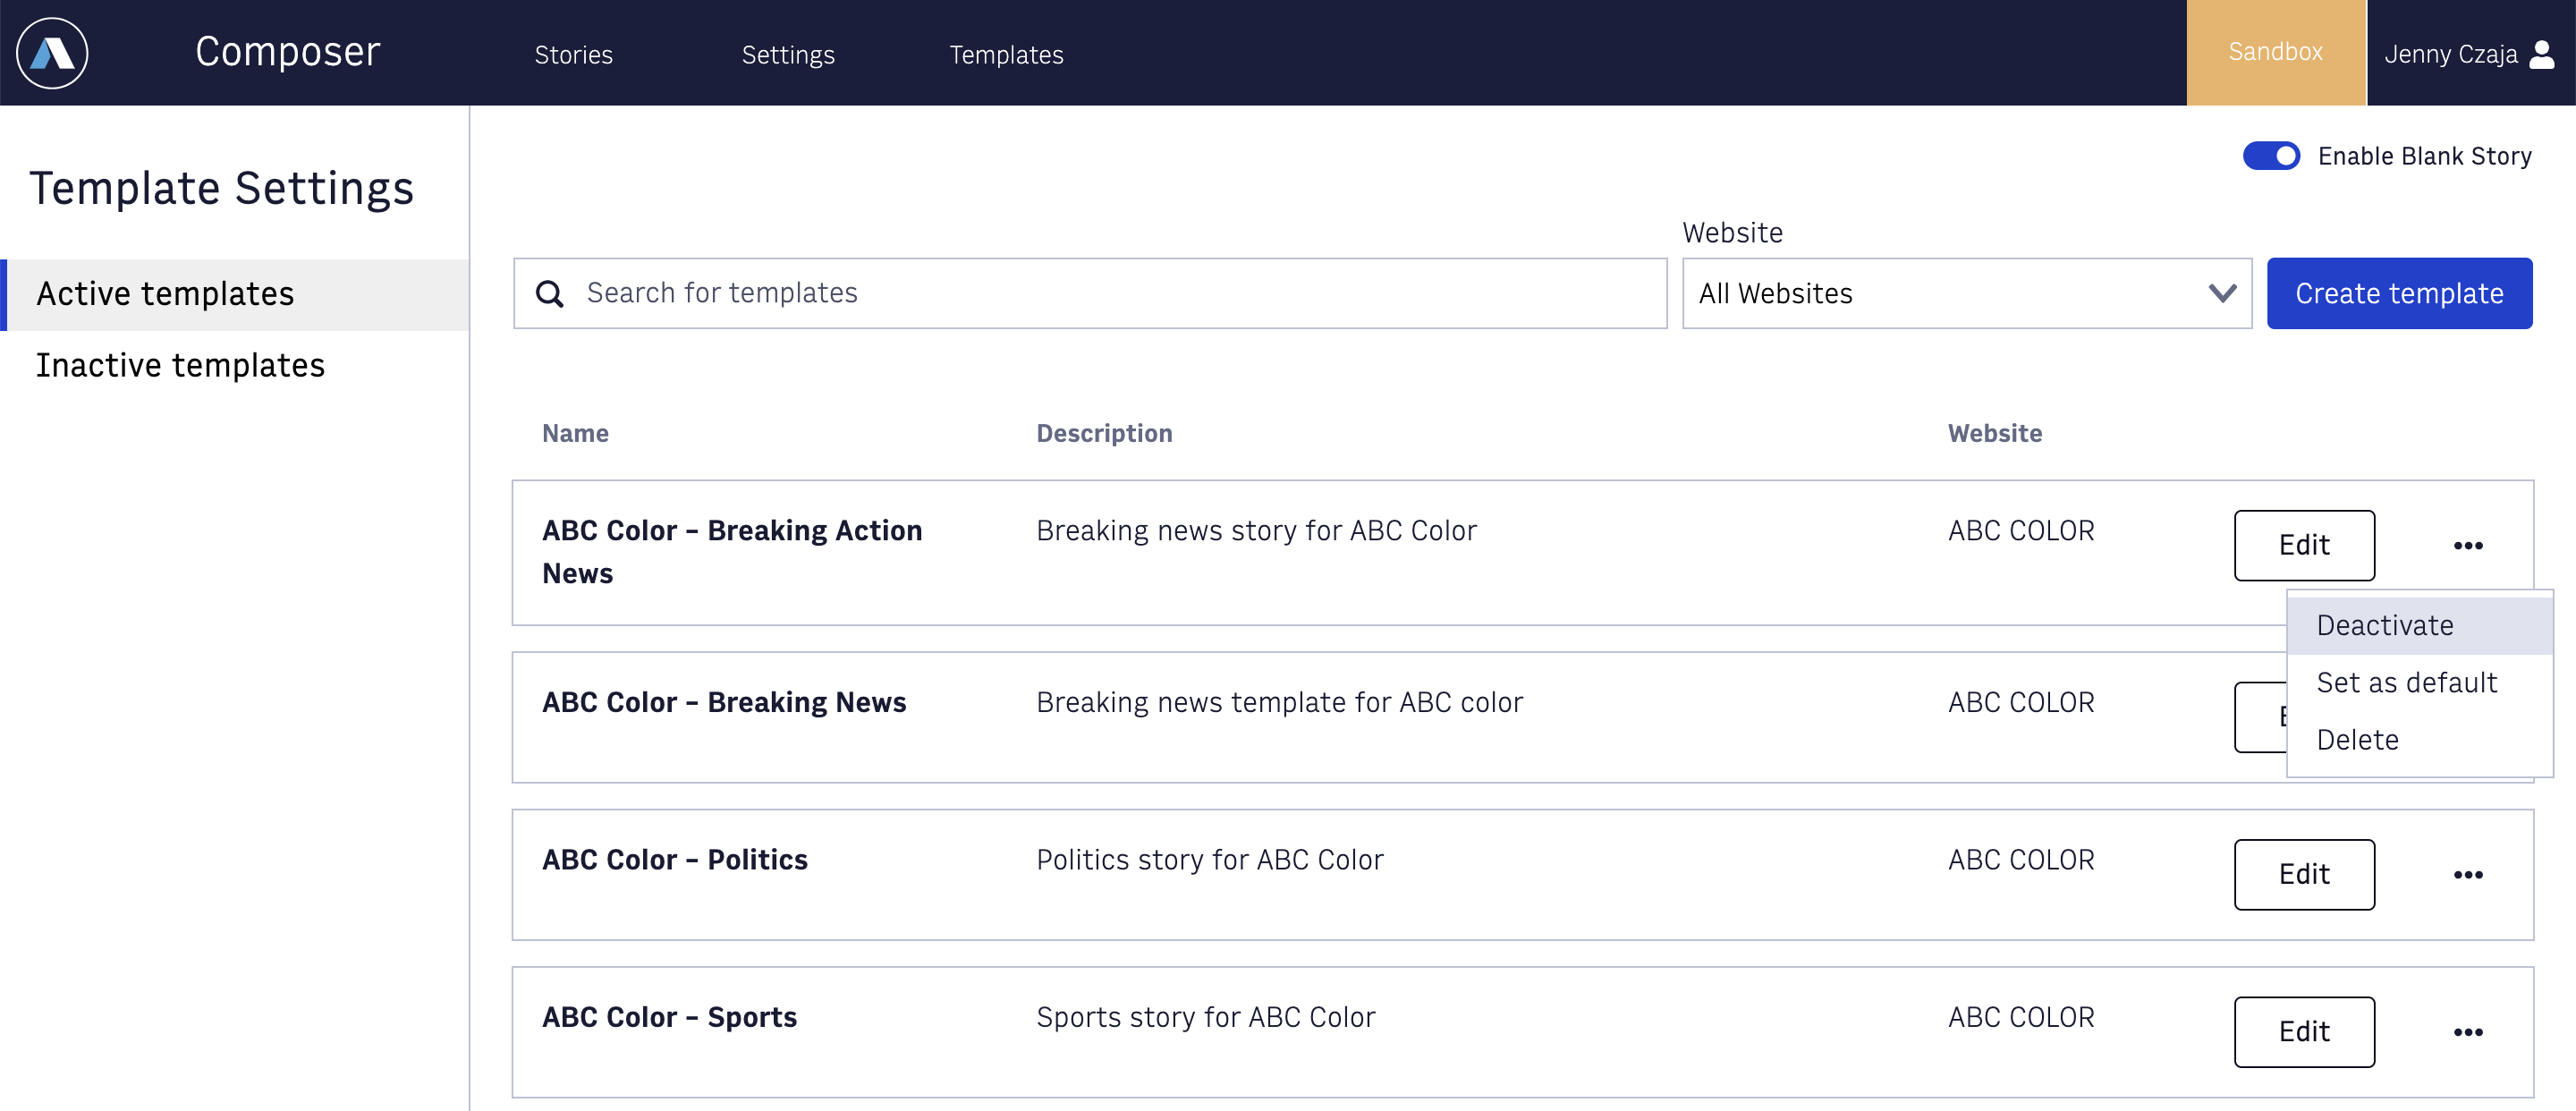
Any template you create is visible and usable by all authors in your organization unless you specifically choose to hide a template. You can deactivate any template by accessing the three dot menu in the template. Note that deactivating is different than deleting a template. When you delete a template, it no longer exists and cannot be recovered. If you choose to delete or deactivate a template, a modal will pop up to confirm your intended action so you’re not accidentally erasing data. There are a number of reasons you may want to deactivate a template rather than delete it:
You have a seasonal template, and you don’t want your authors to mistakenly use it year-round (for example, Holiday Shopping Guides, Black History Month, Pride Month, Election Month, etc.)
You have an author who is out on leave, and you don’t want other authors mistakenly using their template
You have a particular type of story where you may want to eventually reuse the metadata for new story types (for example, high-profile court trials or sporting events)
 |
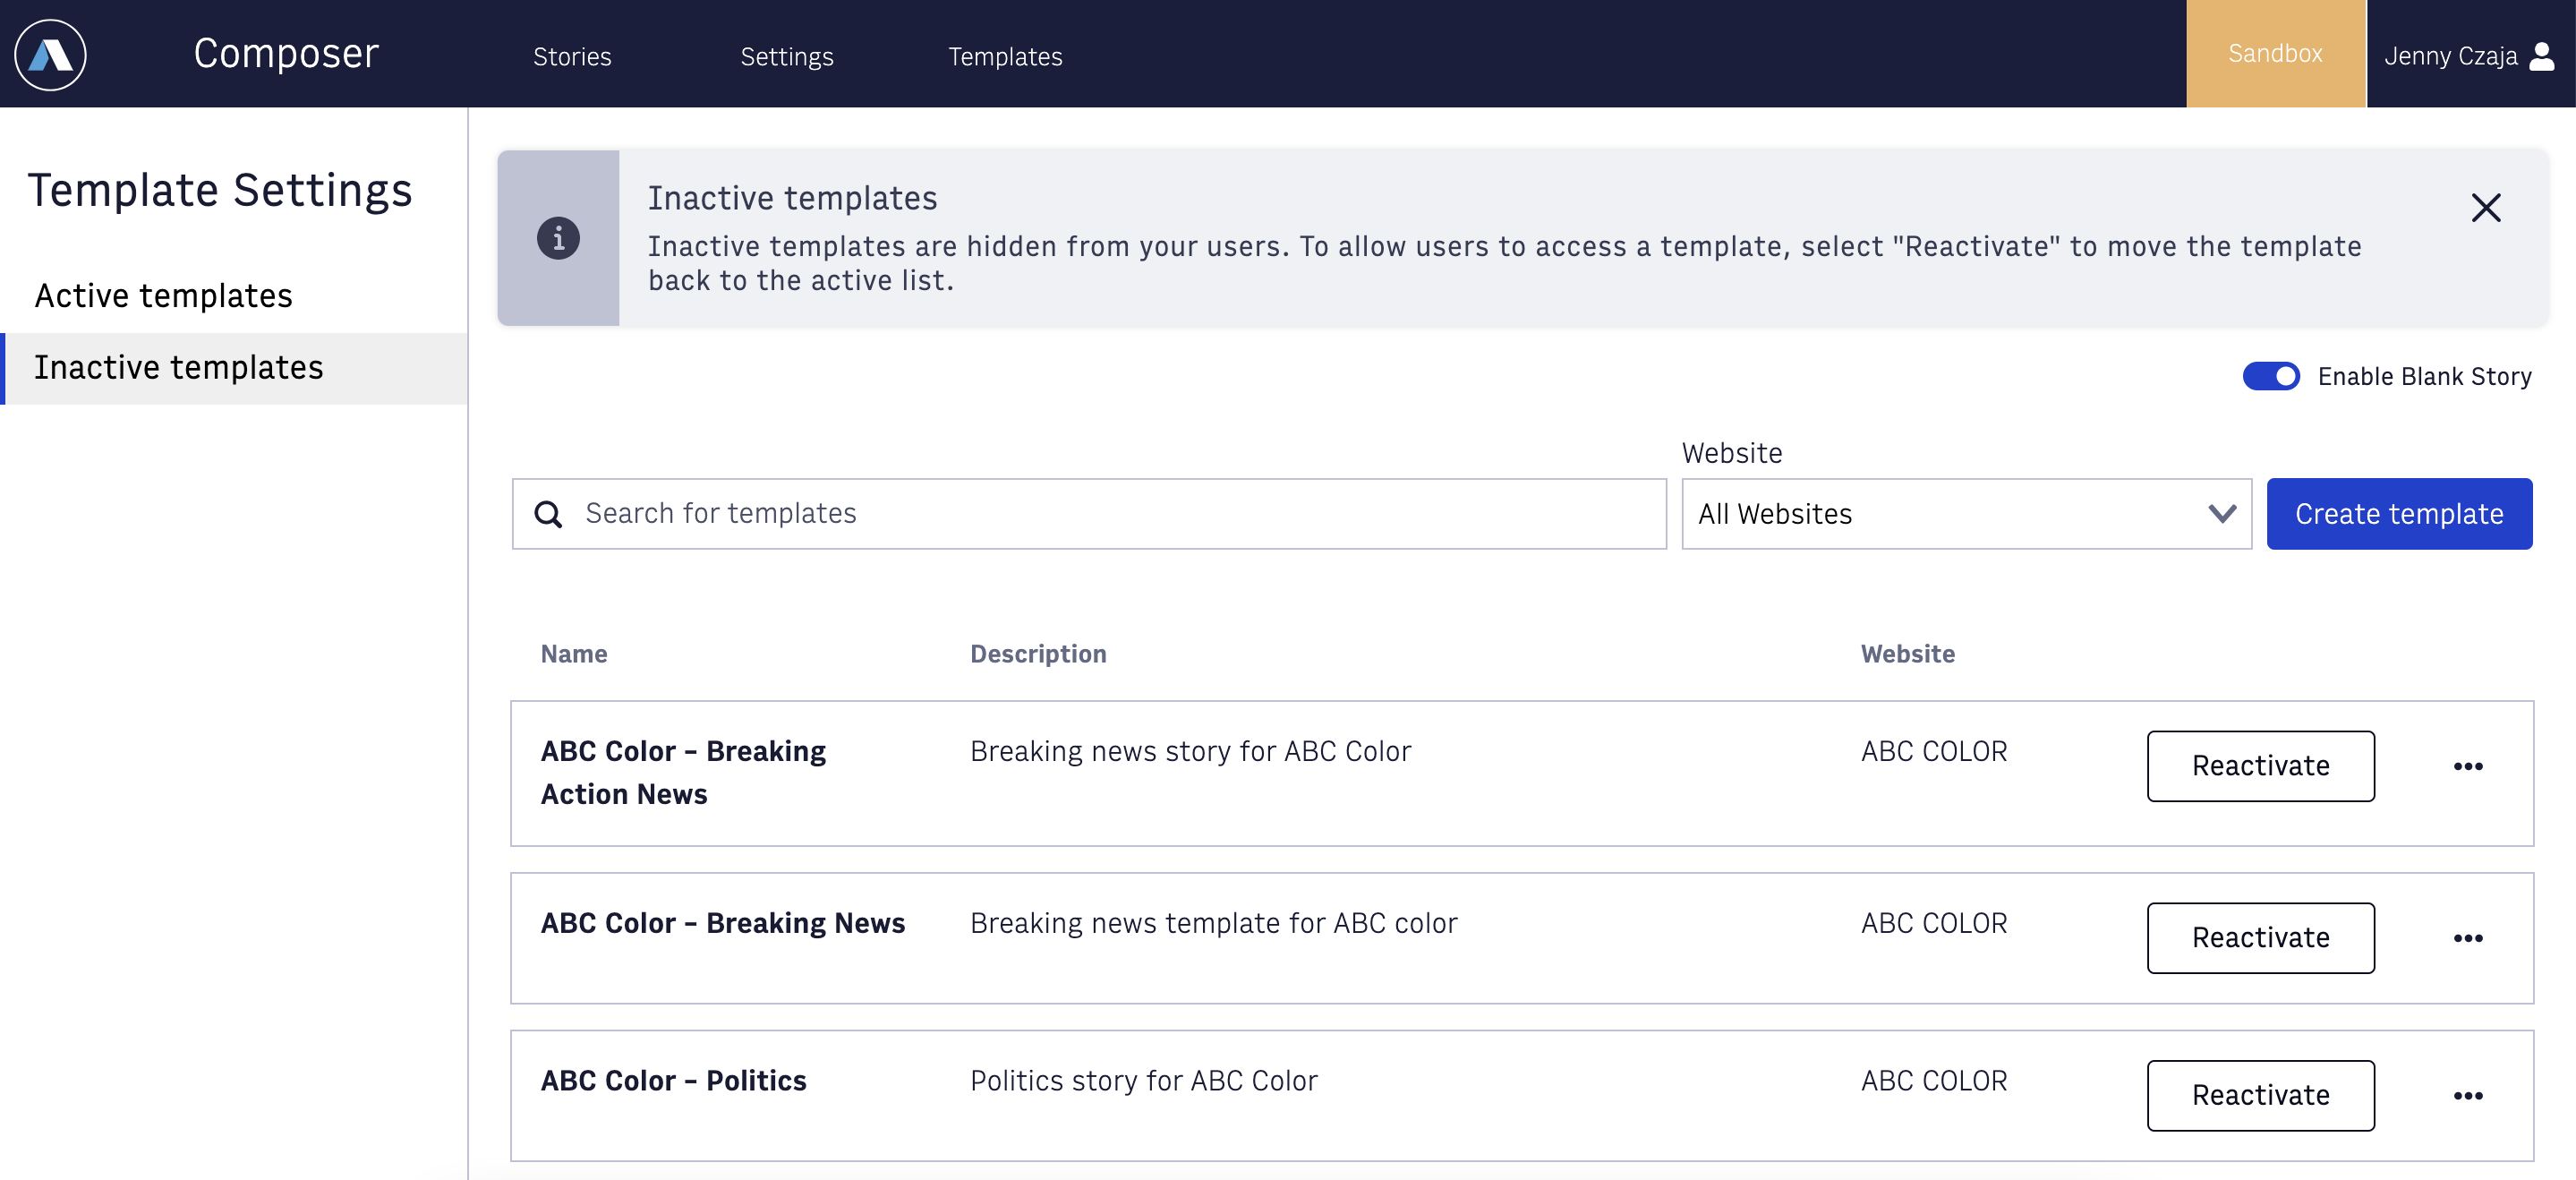
Deactivating a template removes the template from the list of available template options presented to your authors. If a user stars a template as a personal favorite, after you deactivate it from Template Settings, it's removed from any author’s starred templates. You can learn more about starred templates in Composer: Saving Starred Templates.
The system stores deactivated templates in the Inactive templates list where you can restore them by clicking Reactivate.
 |
Default templates
If there’s a particular template that you want all of your authors to have quick and easy access to, you can save it as a default template. First, we’ll show you how to set and unset a default template. In the following GIF, we chose the template “ABC Color - Politics” as the default template by selecting Set as default from the three dot drop-down menu. When you set a template as default, the system pins it to the top of the Template Settings page. You can similarly remove a default template by following the same three dot drop-down menu pattern.
One frequent use case we see among our clients is to create their own version of a “Blank story” template, filled in with some key metadata, that they then set as the organizational default. This is often used in place of “Enable blank story.”
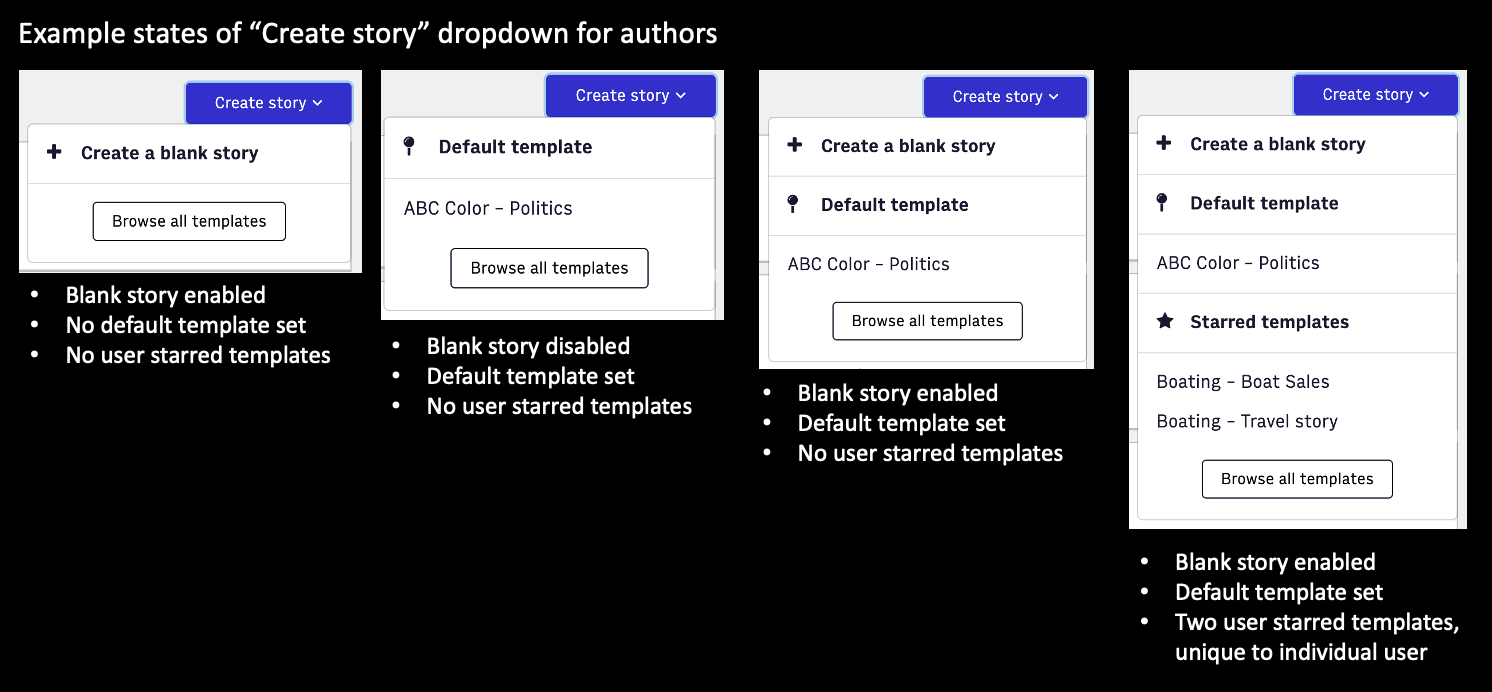
The real power of the default template is how you can quickly elevate this particular template for easy access among all of your authors. When authors create a story from the main Composer stories page, you can control what story templates they see. The blank story option always appears first if enabled, followed by the default template if enabled. Note that the default template appears for all users in your organization. If you want to give your users more granular control of which templates appear in their quick access menu, users can set and save their own personal favorite templates as starred templates. See Composer: Saving Starred Templates to learn more about how your authors can create their own unique quick access menu using Starred templates.
 |