Getting Started with Theme Settings
The Theme Settings application allows you to configure key aspects of your Themes website. You can preview the changes before deciding the promote them to your live website. This page guides you through the basic functionalities of Theme Settings.
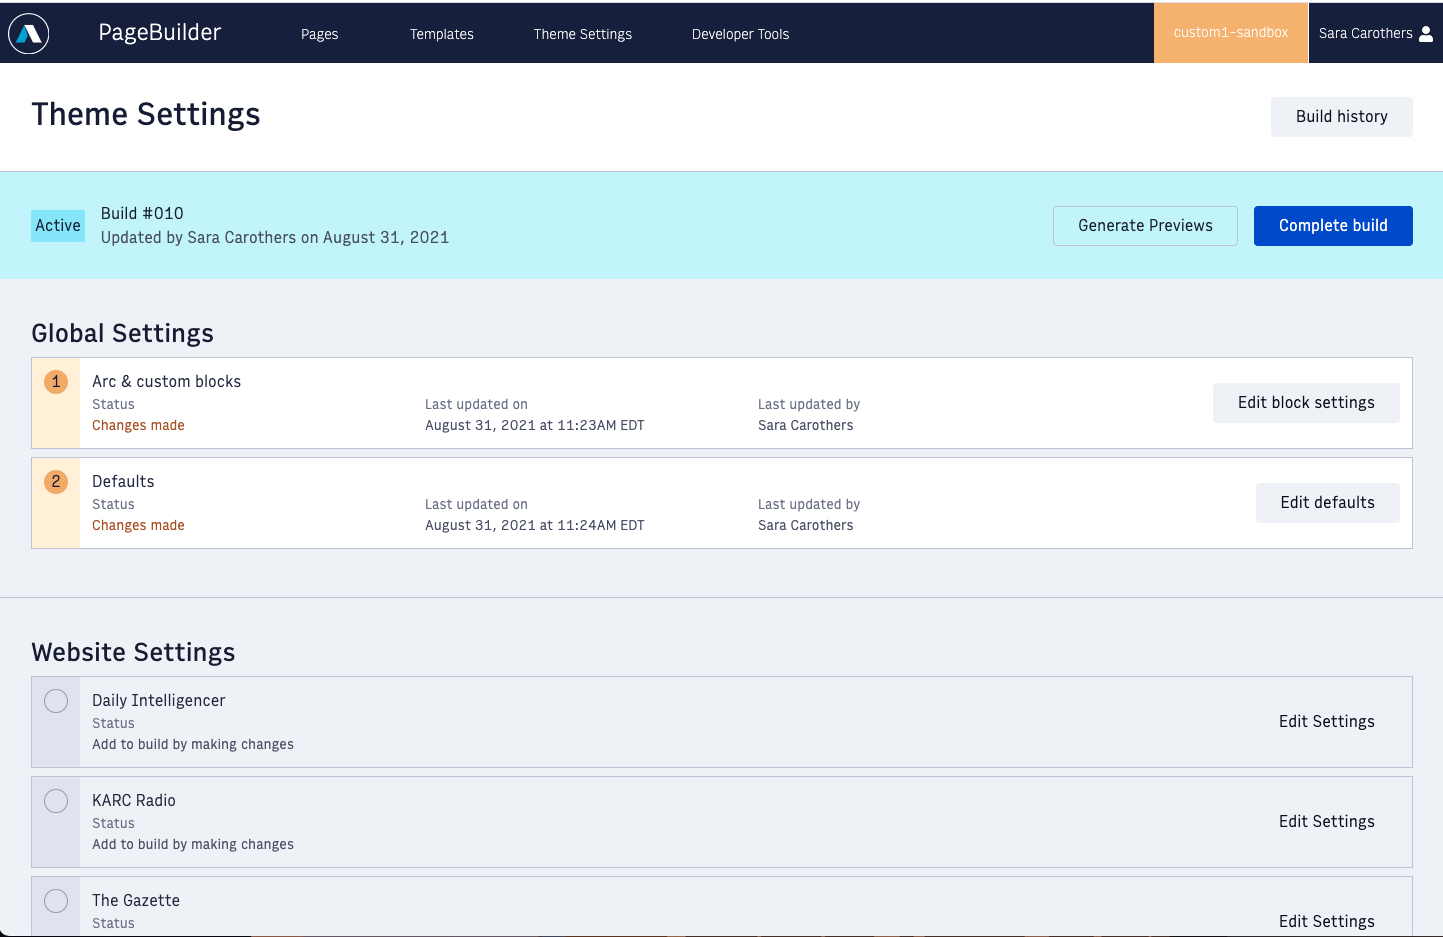
Theme Settings landing page
When you first visit Theme Settings, you'll see this landing page:
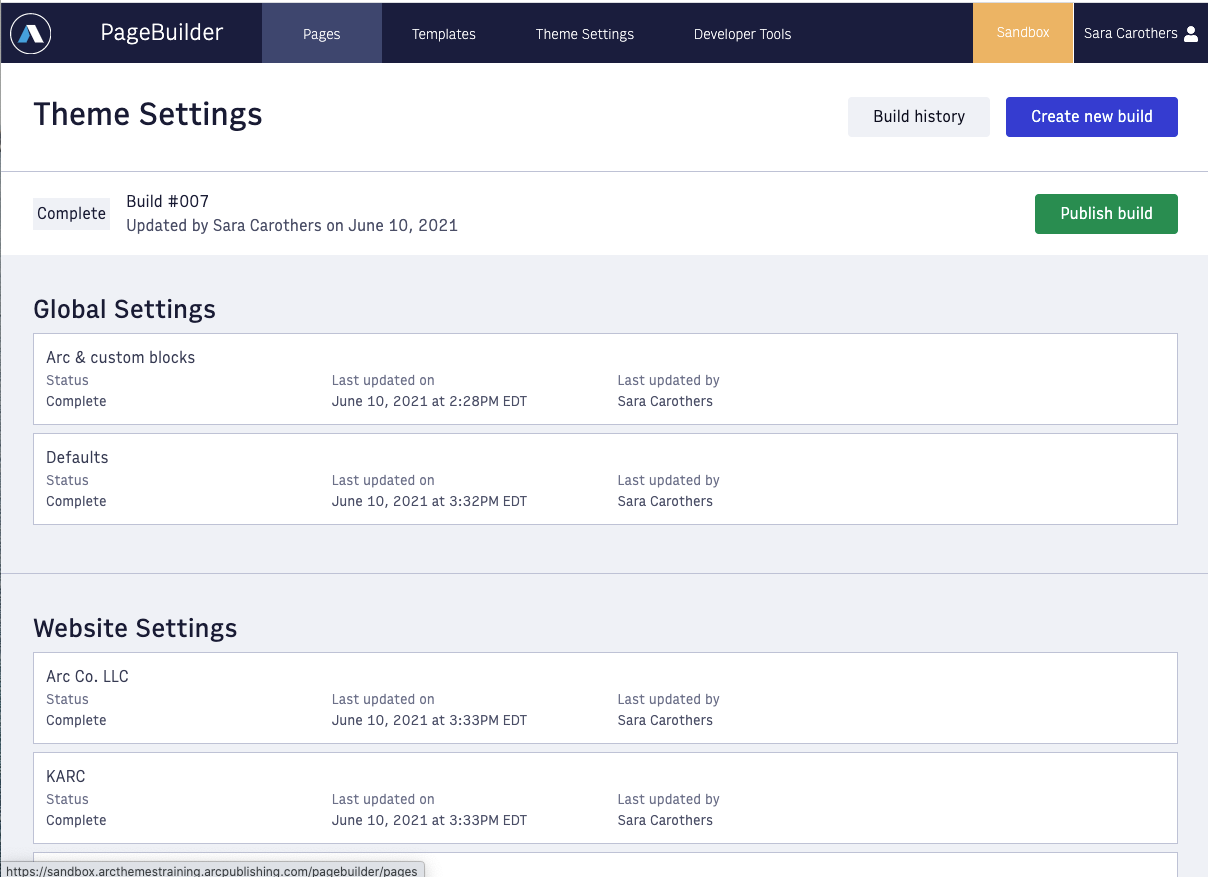 |
The landing page shows you the status of your Themes websites, including when websites were last updated.
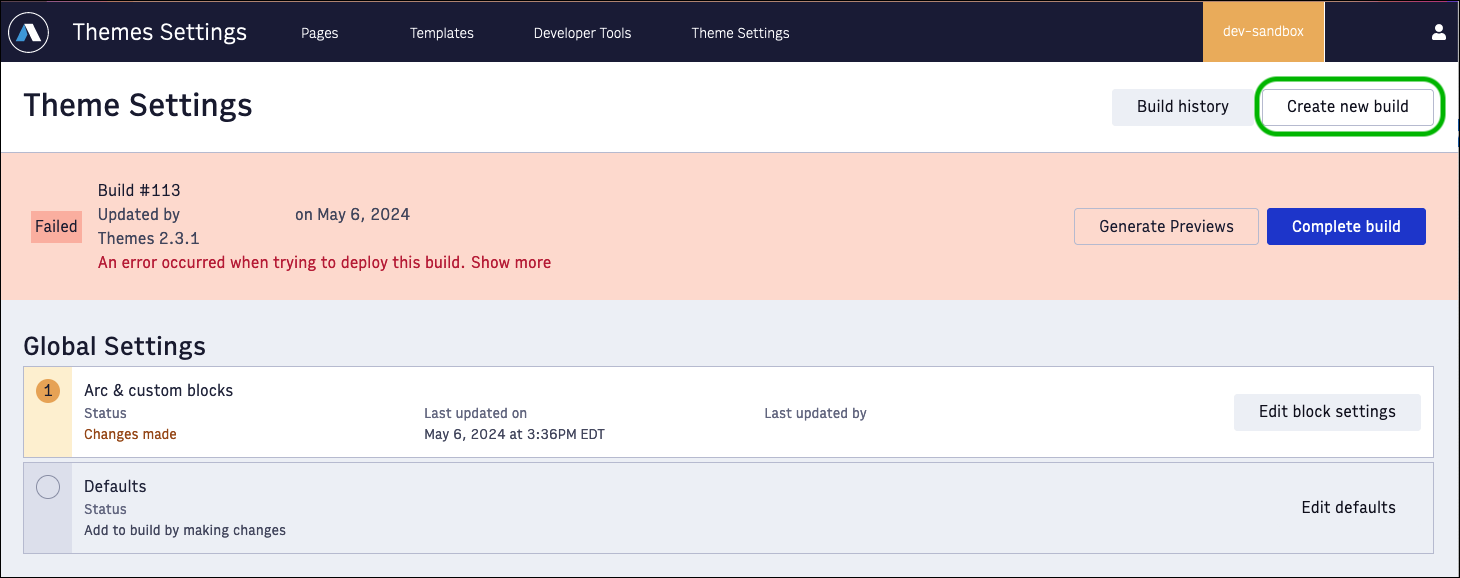
Each time you want to make a set of changes to your Themes websites, you'll need to Create a new build. A "build" is a set of changes that you can preview together, before deciding to publish live.
Create a new build
Once you're ready, you can press Create new build to get started, and you'll see that the landing page now looks like this:
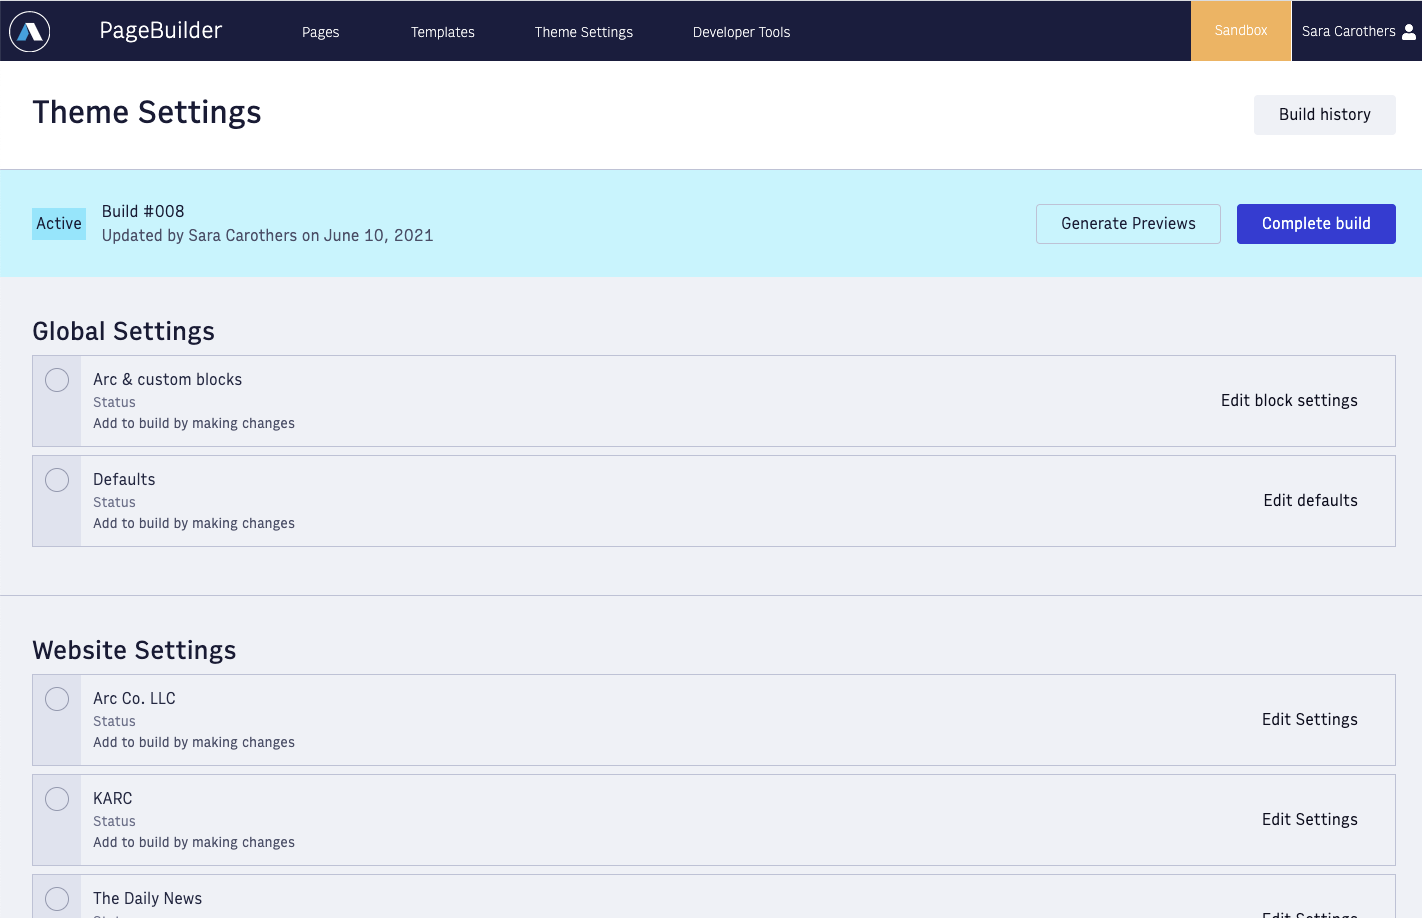 |
Notice the following:
The blue status bar tells you you're actively working on - in this case, Build #8
You now have the option to Edit various settings
You can also Generate previews of your build, and once you're ready, you can Complete build
Note
You are limited to viewing the 10 most recent builds. You cannot access older builds from Themes Settings; however, you can access them from Developers Tools > Deployer. But if you promote those builds, they are not synced with Theme Settings. We intentionally limit you to the 10 most recent builds to avoid you deploying an older build that uses an unsupported version of Themes.
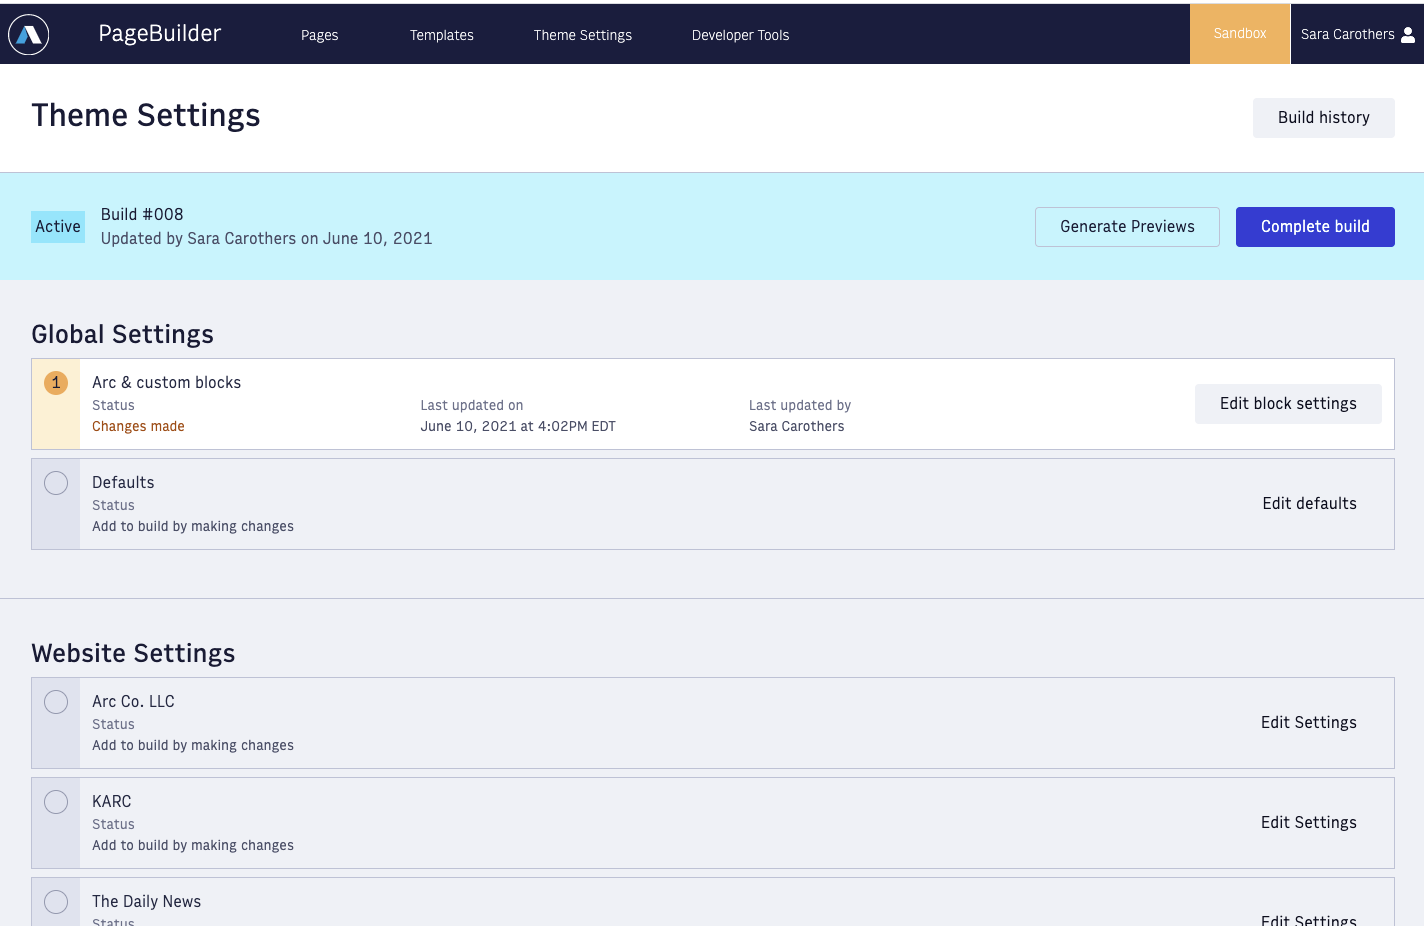
Below that, you'll see two main sections: Global Settings and Website Settings. We'll start off by configuring Global Settings.
Configure Global Settings
Under the Global Settings header, there are two rows: Arc & custom blocks, and Defaults. These settings apply globally across your Theme websites, as opposed to the Website settings group, which apply only to each individual website.
First, we'll look at Arc & custom blocks.
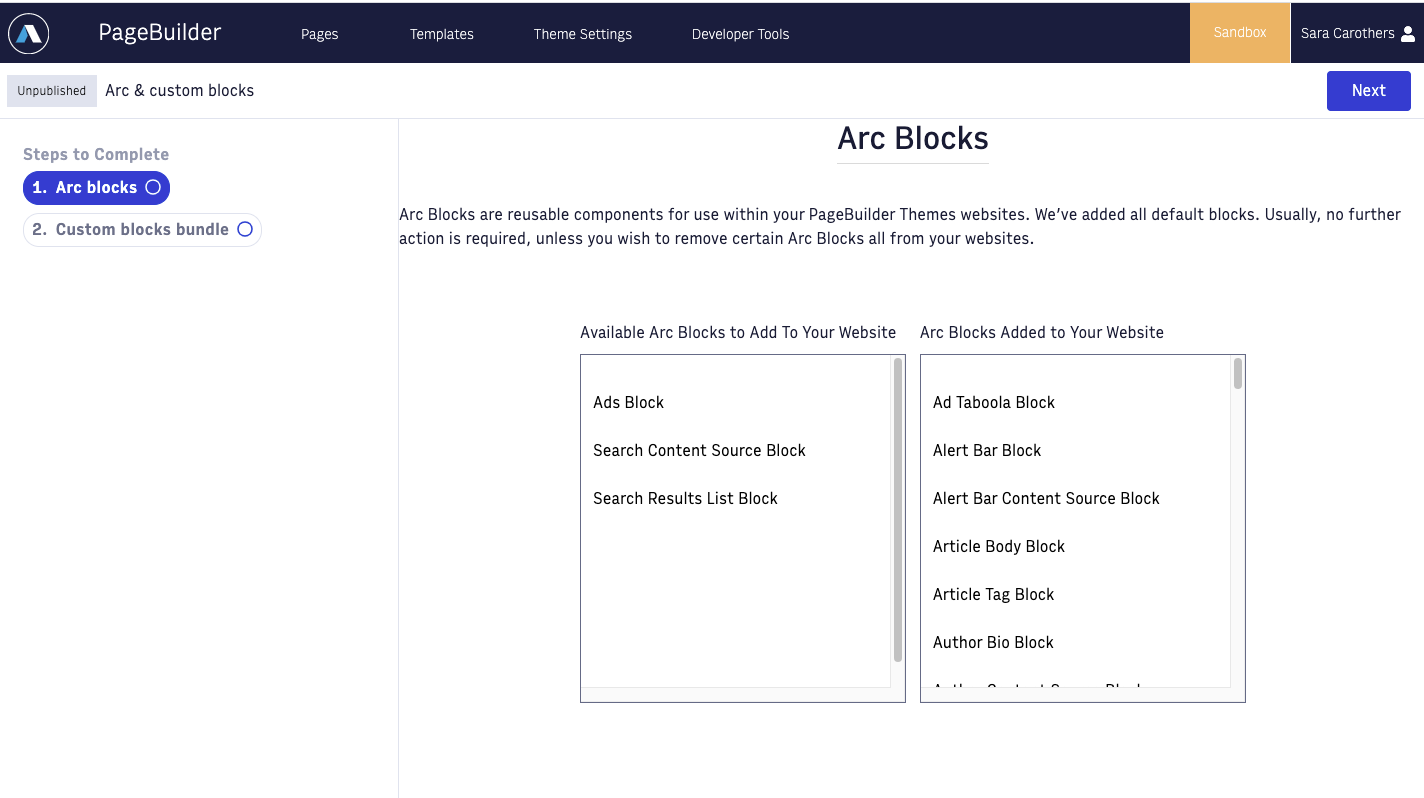
Arc & custom blocks
To make configurations to Arc & custom blocks, press the Edit Block settings button on this row. You'll be brought to this page:
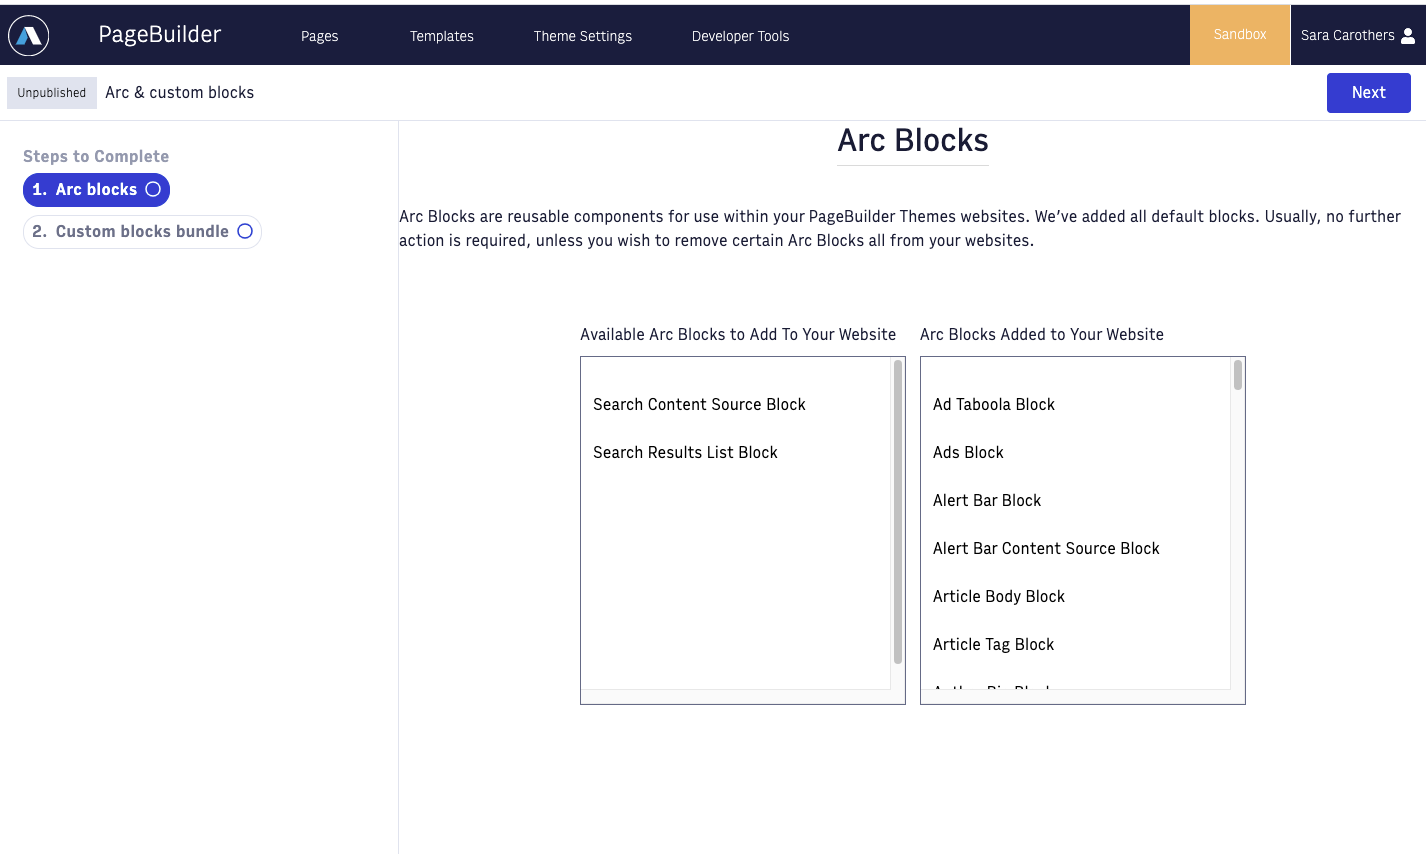 |
Here, you'll see a list of the Arc blocks added to your website, as well as Available Arc Blocks. You can select a block to move it to the other list.
For your first time going through Theme Settings, you can leave the list of blocks as-is - we've preconfigured your environment with the best choices for your organization. Later on, you may decide that you don't need a particular Arc Block, and you want to remove it so that your editing staff cannot use it within PageBuilder Editor. For example, you may have a Custom Ad Block, so you don't need the Ads Block built by Arc. You can select that block in the Added column:
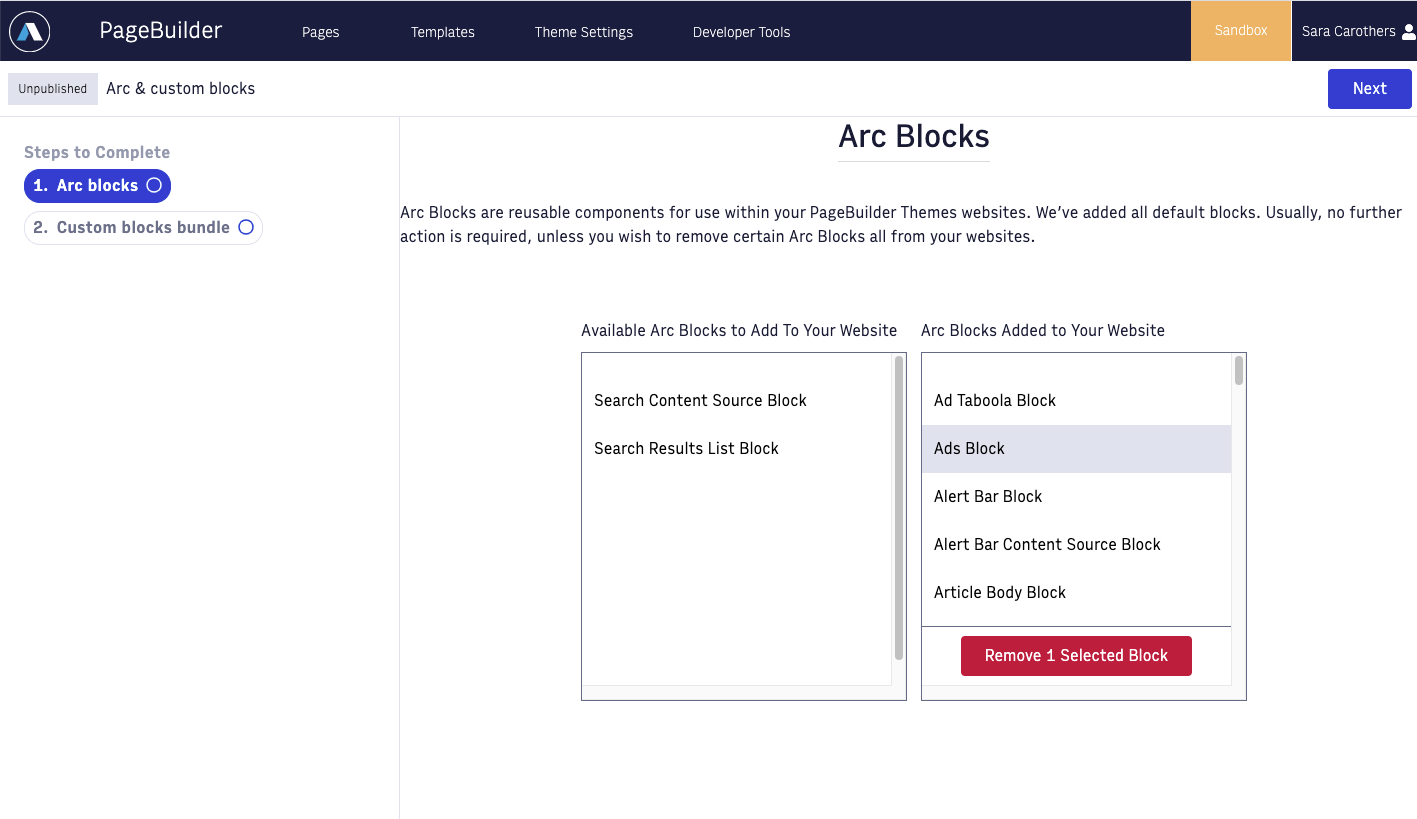 |
… and then press the Remove 1 Selected Block button to move it over to the Available column:
 |
Now, that Ads block will not be included in the list of available blocks within PageBuilder Editor for your organization.
Custom blocks bundle
Once you're done configuring Arc Blocks, you can press the Next button to move to your Custom blocks bundle:
 |
Here, your engineering team will be able to upload a bundle of Custom Blocks, if your organization chooses to do so.
For now, you can leave the existing bundle selected, and your engineering team can come back to this step later.
Press the Finish button, and you'll return to the Theme Settings landing page. When you return, you may notice that there's now a number next to the Arc & Custom Blocks row. As you make changes in Theme Settings, a count of those changes is kept, including information about who made the change and when. This helps your organization keep track of what changes are being included in a given build:
 |
In this example, one change was made (removing the Ads block). If you haven't made any changes, you may not see this messaging yet, but you will once you change other Theme Settings.
Default settings
Next, click the Edit Defaults button to go to the Default Settings page:
 |
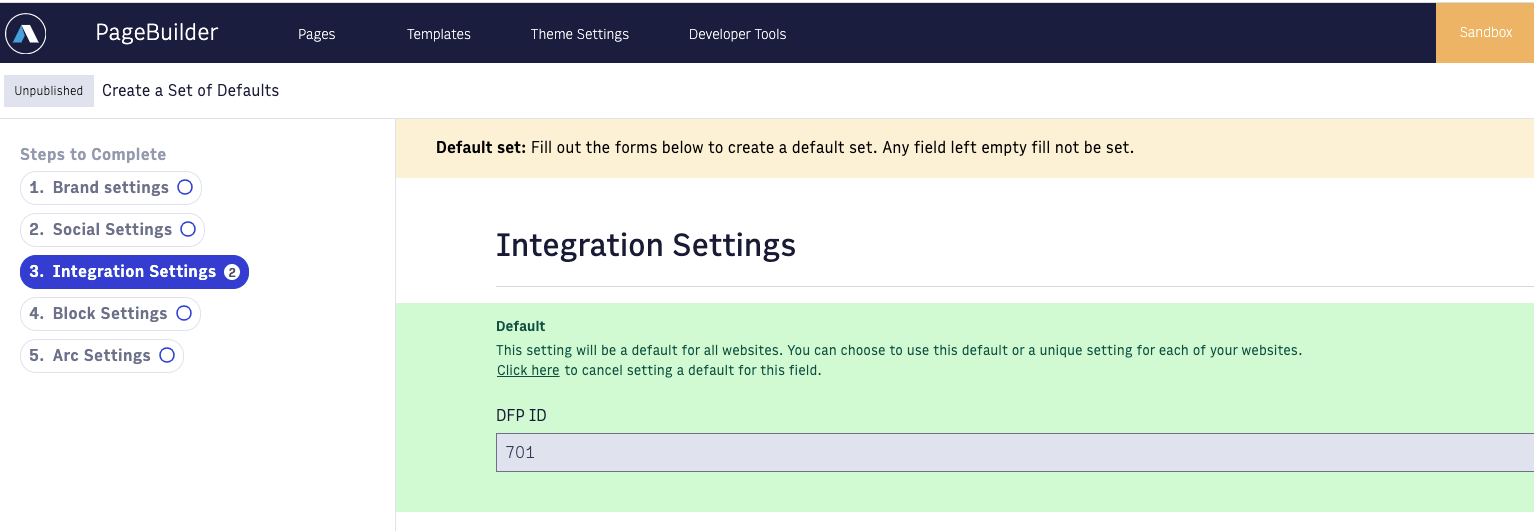
Here, you'll be able to set default values that you want to apply to all (or most) of your Theme websites. Theme Settings are broken up into the following categories, as you'll see in the Steps to Complete on the left-hand side of the page:
Brand settings
Social settings
Integration settings
Block settings
Arc settings
More detail about each setting and what it does for your website is available here: Theme Settings Configurations. Themes 2.0 only: As shown in the linked table, some site properties have been removed from the Theme Settings UI, and are now supported in the Block Styling design system.
A default value will apply to all of your websites (unless you decide to override it for an individual website). For example, you may want to have the same Primary and Secondary font across all (or most) of your websites. If so, you'd set a Default value for those Theme Settings:
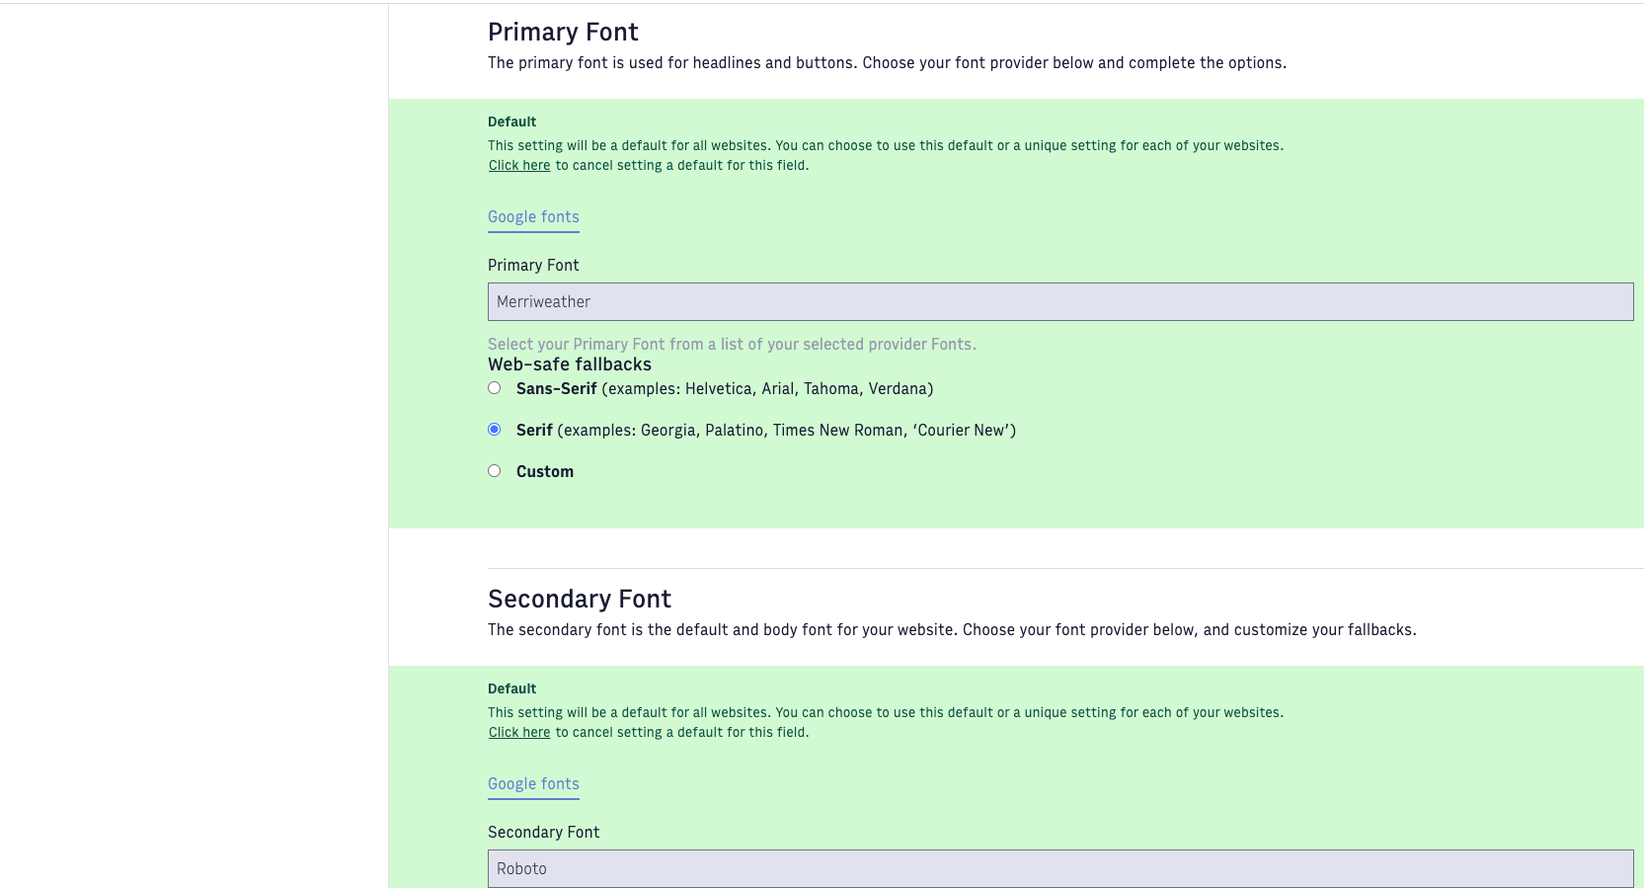 |
Additionally, many organizations have common ads + analytics integration IDs for all of their websites, so you may set default values for these. If you set a default value, you'll see a green Default treatment show up for that field:
 |
If you want to change the default value, press the button that says Click here to cancel setting a default for this field, and you'll be able to change the value. The default value will apply to all of your websites (unless any have specifically overridden it in Website settings).
However, some other Theme Settings will likely be different for each individual website. For example, your website logos will differ, and the website name - so you don't need to fill out default values for these:
 |
Click Next to look through all of the steps to complete, and press Finish on the last screen to save your choices and return to the Themes Landing Page.
Website settings
Underneath the heading that says Website settings, you'll see a row for each of your organization's websites (as you've set them up in Site Service):
 |
For example, this organization has a website called Daily Intelligencer, another called KARC Radio, and another called The Gazette.
To make changes to the Theme Settings for a particular website, press the Edit Settings button next to that website.
 |
In this example, we've decided to update Theme Settings for Daily Intelligencer. We've set the Website Display Name to Daily Intelligencer, and we've set the Website Domain Name to https://daily-intelligencer.com.
As you make changes in Theme Settings, you'll see that each field gets a Changed treatment, to visually show you what you're changing in this build.
As mentioned above, you also have the option to override default settings for each website. For example, the default Primary and Secondary Font are set to Merriweather and Roboto for this organization, respectively. But you can override those choices for this website.
First, you'll need to press the button to detach from this setting. This will enable interaction with the field, and you can make your new selection.
Once you've finished configuring the Theme Settings for the website, press the Finish button to return to the landing page.
At this point, you can choose to set up website settings for another website, or complete your build.
Complete build
Once you've made all the changes you want to include in this build, press the Complete build button to complete your build. You'll see a modal pop up where you can include a build message:
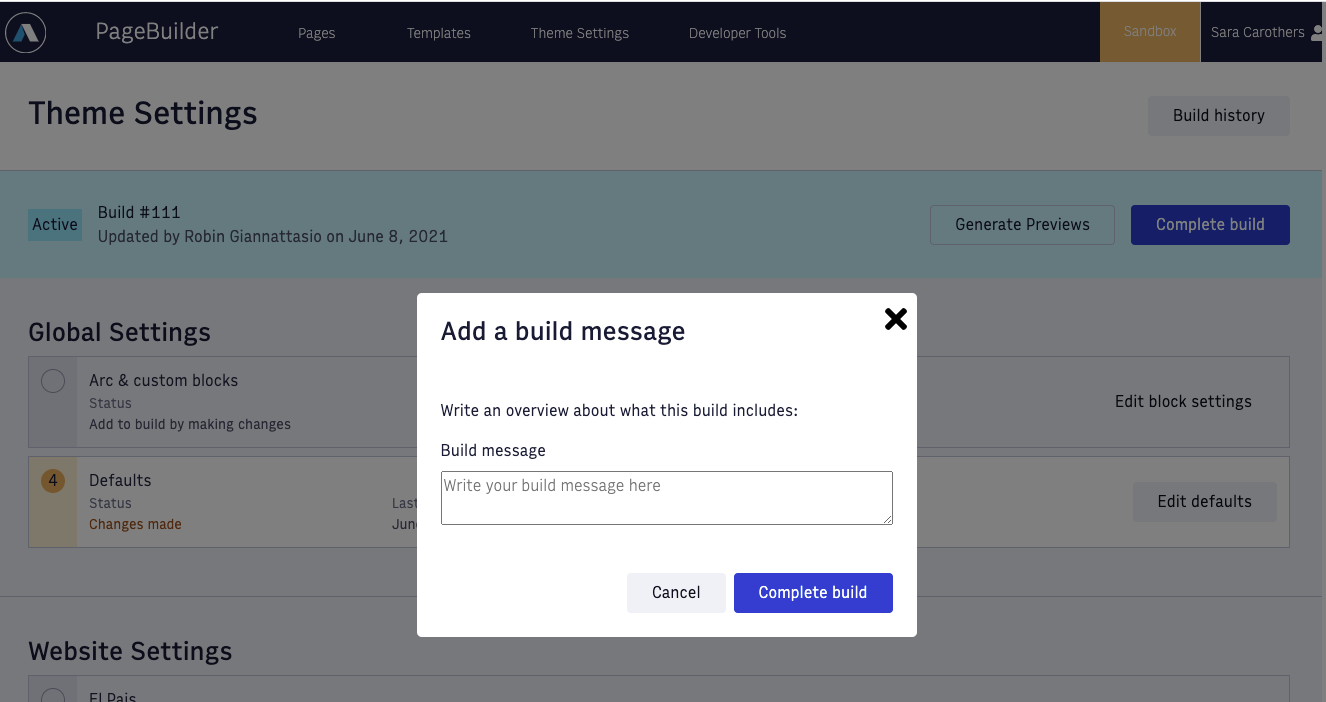 |
Here, you can include a short summary of the changes you made in this build, so that you (and your colleagues) know what this build included. Especially once your Themes websites are live, you might want to describe if you tweaked an accent color due to updated brand guidelines for your organization, or added a new analytics setting that your organization has decided to use.
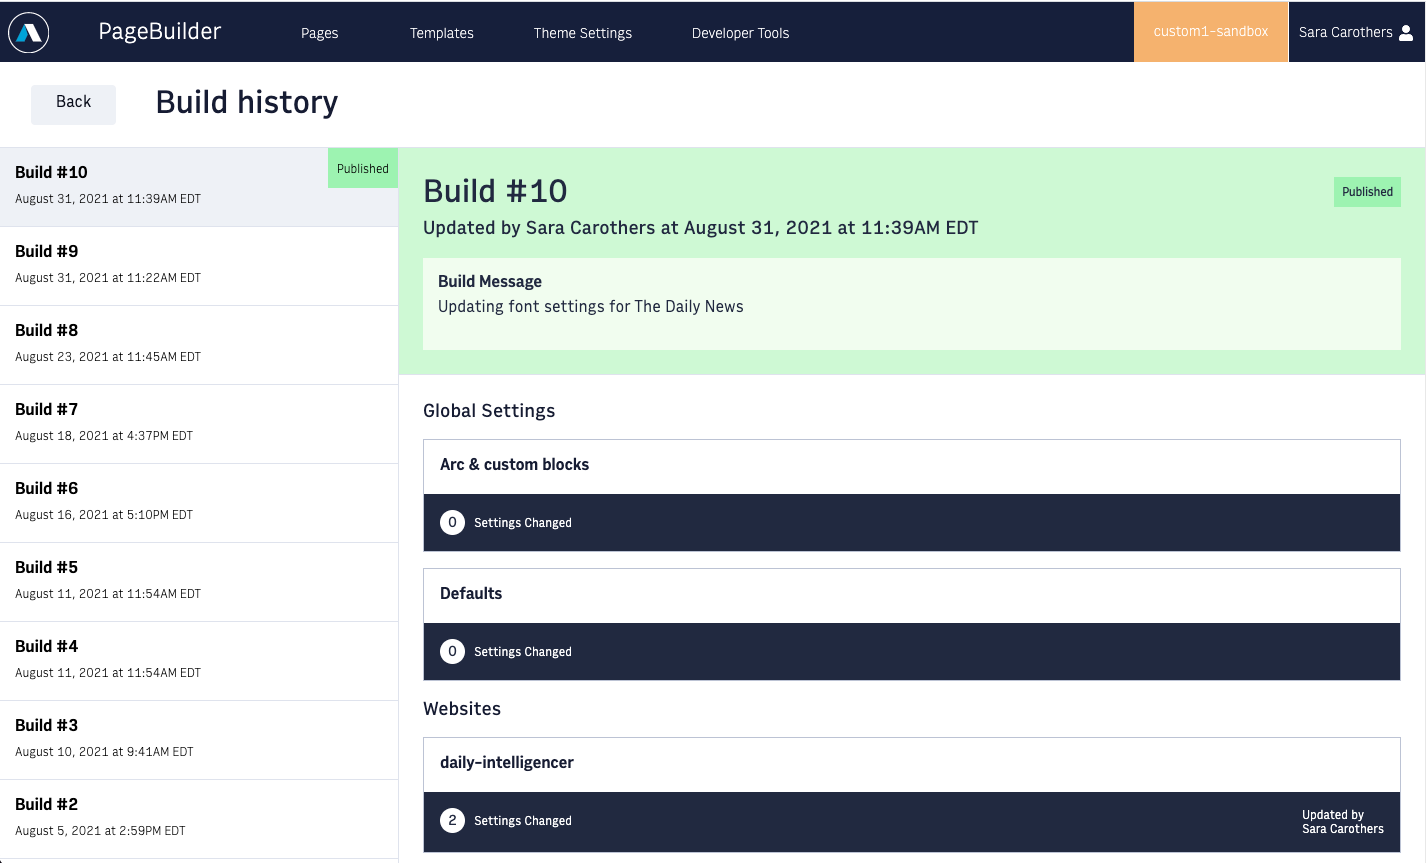
Press Complete build on the modal, and you'll see the Build History page:
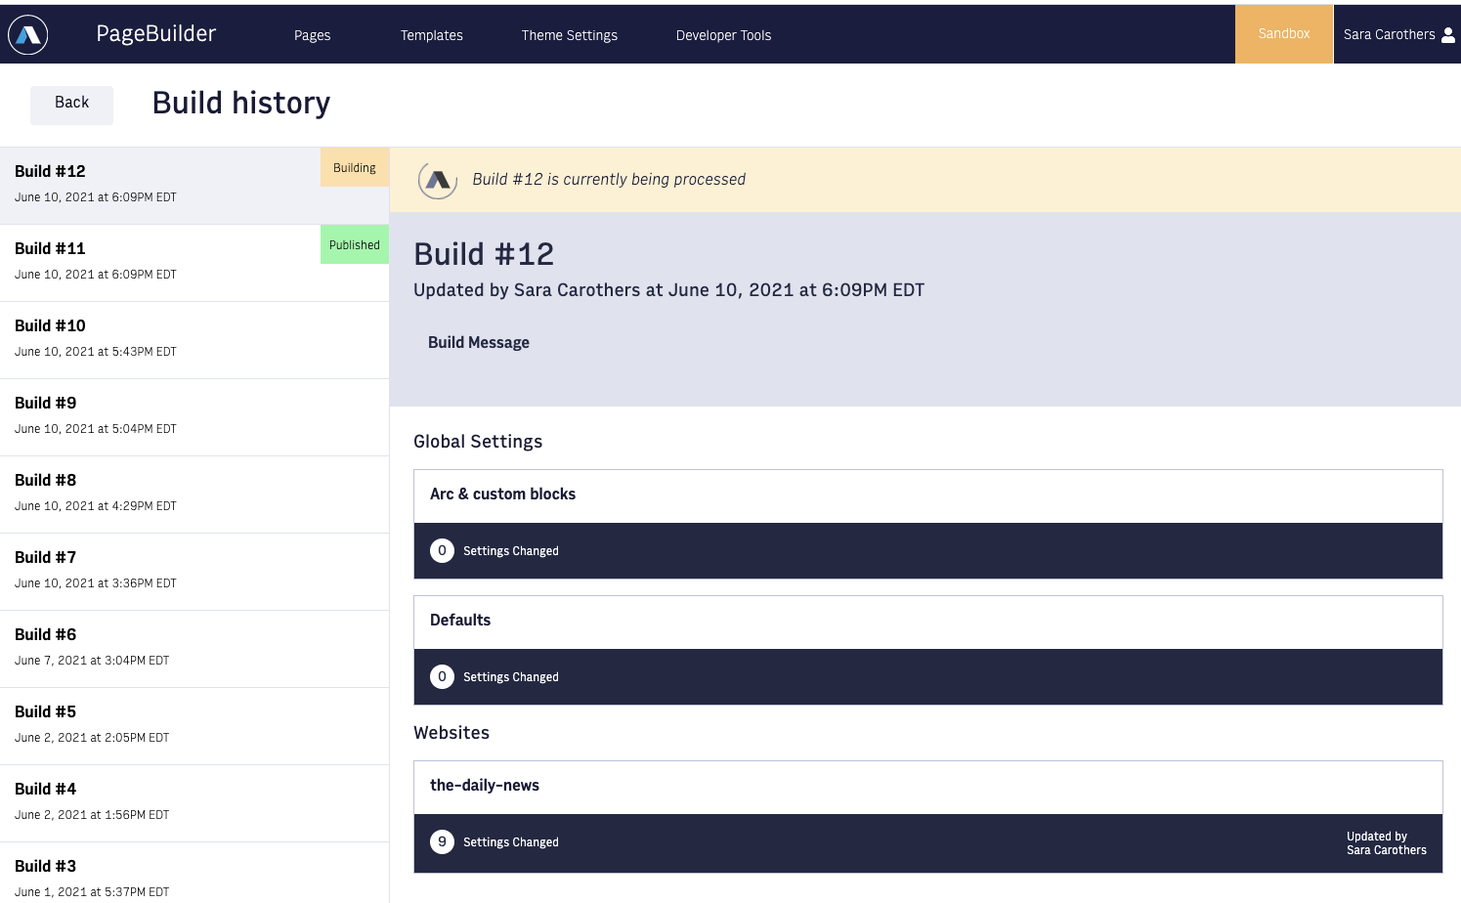 |
Here, you'll see a history of builds created by your organization. The build you were just working on will be at the top, and will have a status of Building. It takes a couple minutes to finish this process; you'll see a loading icon. Once the build has finished processing, you'll get a message that the build has finished processing:
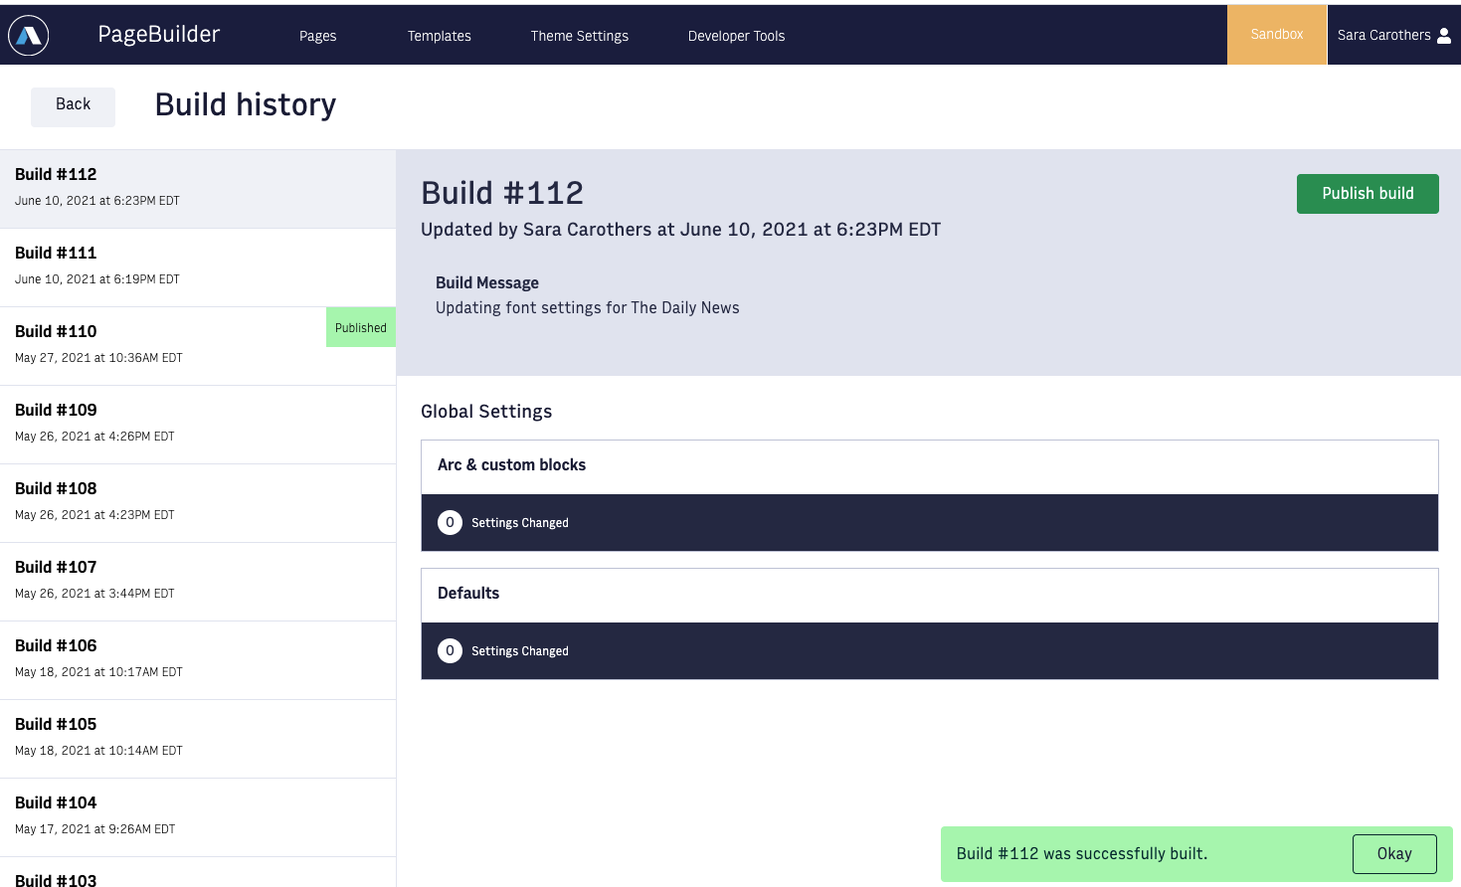 |
Press the Publish build button to make this build live for your organization:
 |
This build is now live on your website.
When you return to the Theme Settings homepage, you'll see that your build is published. At this point, if you want to make additional changes to your websites, you can press the Start new build button and begin the process again.
Setting a Themes Version in your bundle
By using the Theme Settings application and version picker to complete your deployments, the Theme Settings version will automatically be applied in the blocks.json within your bundle. If you opt to use the PageBuilder deployer to complete your deployments and are using Themes, you must set the desired Themes version as the themesReleaseVersion within your blocks.json, for example:
 {
  ...
  "themesReleaseVersion": "arc-themes-release-version-2.1.0",
  ...
}
See here to understand which Engine versions are compatible with the Themes version you are deploying.
Creating a build after an error
You can create a new build regardless of the state of the previous build. This provides a self-serve option to move forward with a new build after a build has failed due to an error within the bundle or selecting the wrong Themes version. The “Create new build” button will remain active after a failed publish.
 |