Getting Started with Galleries in Photo Center
Navigating
Let’s collect some of those great photos you now have into a gallery. Click the Galleries tab on the navigation bar at the top of the page, then click the “New Gallery” button in the top right corner.
 |
Once you are in your new gallery, you will see its publishing status, workflow status, and other buttons you can use to control the gallery.
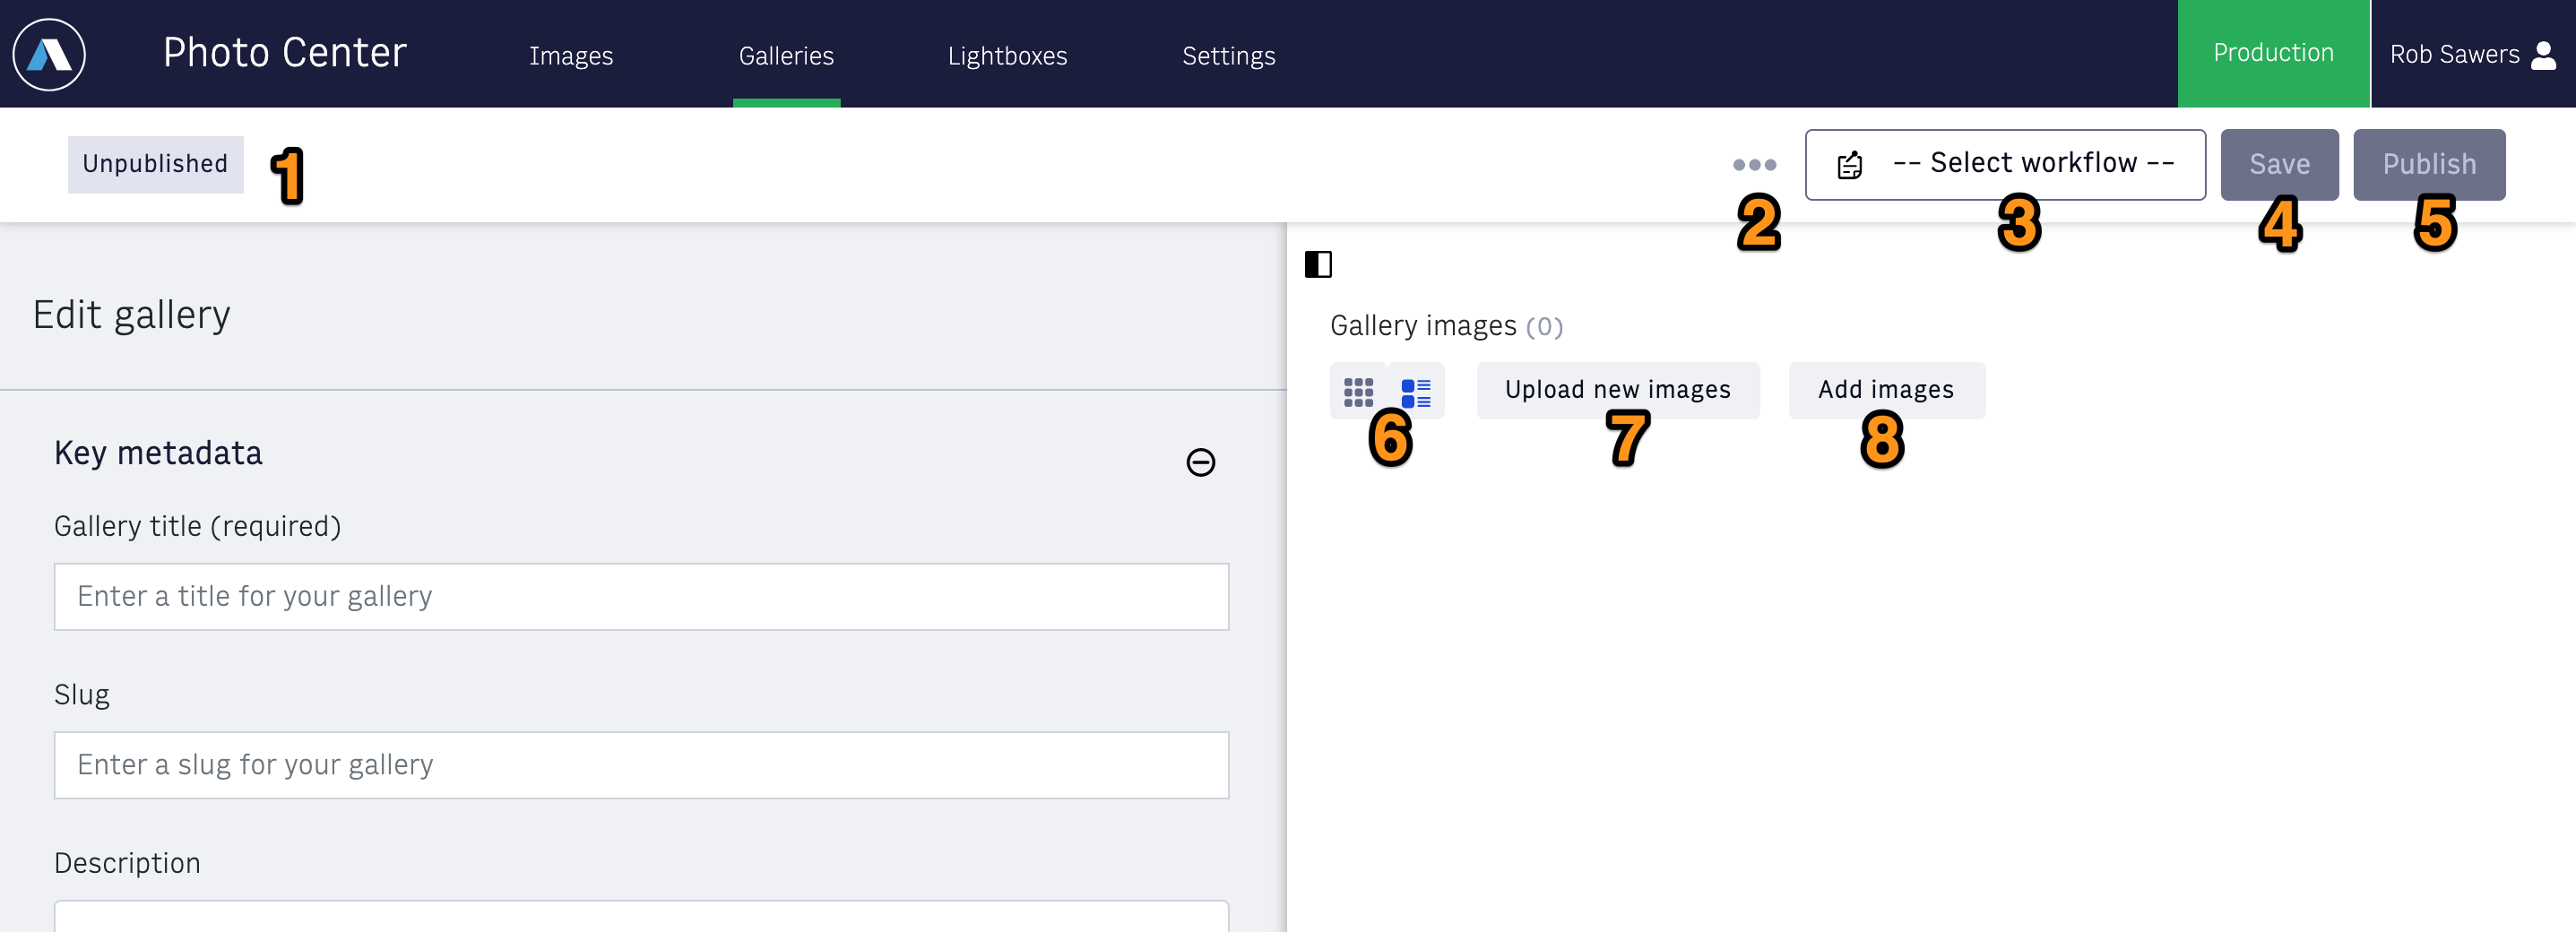 |
Publishing Status - This will indicate whether the gallery has been published or not.
Overflow Menu - Clicking on the overflow menu will show the options to Discard Changes and to Clone Gallery.
Workflow Status - Workflow statuses are specific to your organization and are meant to track the different actions needed as a piece of content moves from creation to publishing. Workflow statuses can also be used to trigger task creation and assignment in WebSked.
Save - Click to Save your progress.
Publish - Click to Publish your gallery. This will give this gallery a unique URL and make it ready to be live on your website.
Image Toggle - Toggle Between Tile View and List View in the Gallery Images List.
Upload New Images - Click here to upload new images to the Photo Center and add them to this gallery.
Add Images - Click here to add an image already uploaded to Photo Center.
Edit Gallery Metadata
Next, you can go through the various sections of metadata fields to add important details and information, including some required fields. The fields used on your site depend on your internal workflow and how your site is built, so for more guidance on what fields must be filled out, talk to your editors or site admin. Click the plus/minus sign buttons to expand or collapse each section of metadata fields.
Here are some of the highlights of the fields available:
Key Metadata
Gallery Title (required) - A required field for the headline of this gallery.
Slug - this is the informal ID used internally in your organization
Description - Generally used as the teaser or subhead for this gallery.
Display Date - You may also set the “Display Date”, which is the time stamp shown to readers on the article page and is independent of the actual time that the content was published or updated.
Planned Published Date - This indicates when you believe this content will be ready to publish. The WebSked app uses this date to sort content in the Stories View.
Circulations (required)
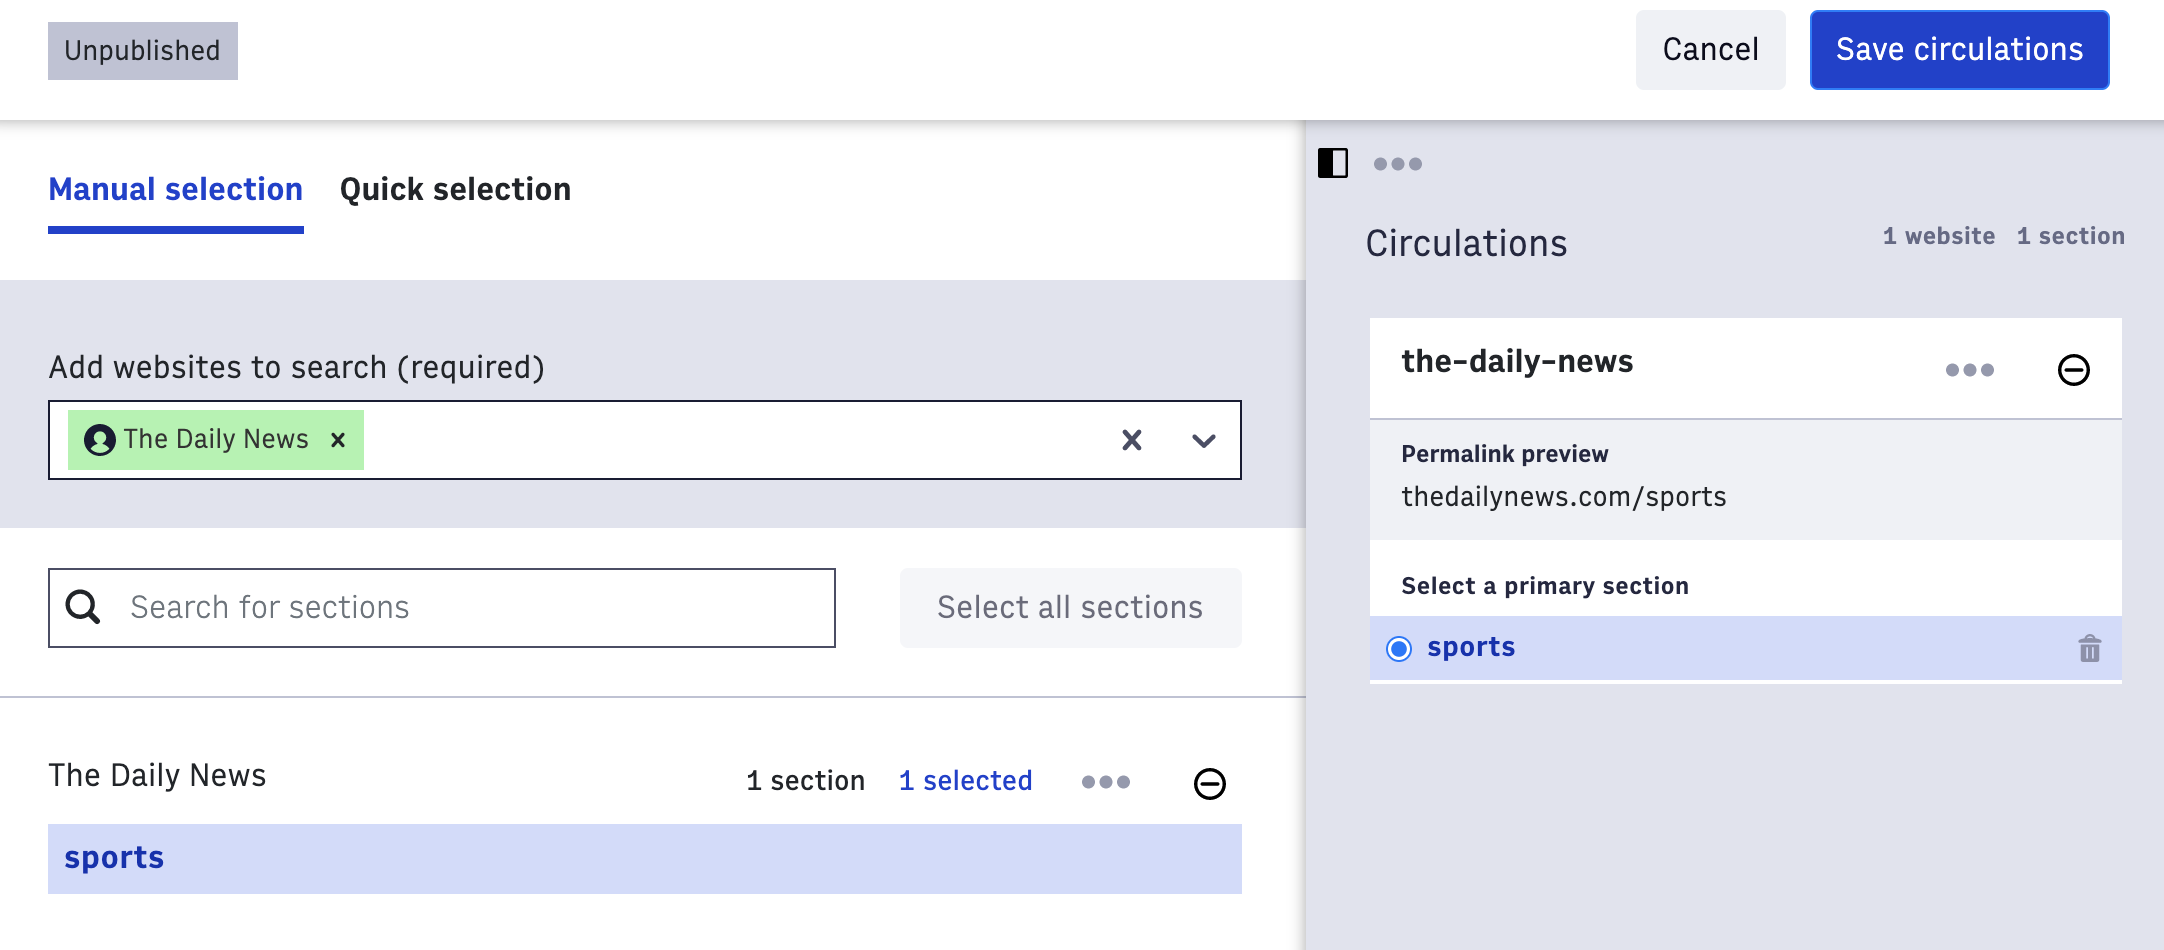 |
Manage Circulations - Circulation simply refers to the websites and sections to which this content item will be published. Any content item (story, image gallery, or video) has to have at least one circulation to be able to publish because the website and section will be part of that content’s URL. Content can be published to more than one website (if your organization has multiple), and multiple sections on each website. However, each content item must have a primary section set for each website that it is circulated to.
Primary Website - If your organization is multi-site, then you must set which is the primary website for this gallery.
Distributor
Distributor - Select a distributor from one of the distributors configured for images in Global Settings or enter a custom distributor. Selecting a configured distributor populates the name, category, and subcategory with what Global Settings stores and these fields are not directly editable. If no distributors are configured, the user may select “Custom”, thereby freeing the other Distributor metadata fields to be filled manually.
Distributor Name - This will be a free-text field if the Distributor is “Custom”.
Distributor Category - This will show a drop-down menu of fixed options for staff, wires, freelance, stock, handout, and any other that is specified in ANS. Users who enter custom distributors are required to add a name and category.
Distributor Subcategory - This is a free-text field and it is optional.
Adding images
When all of that information is filled out, now it’s time to add your images to the gallery. Select the “Add Images” button to pull photos that are already in Photo Center, or you may also choose the “Upload New Images” button and pull in new images.
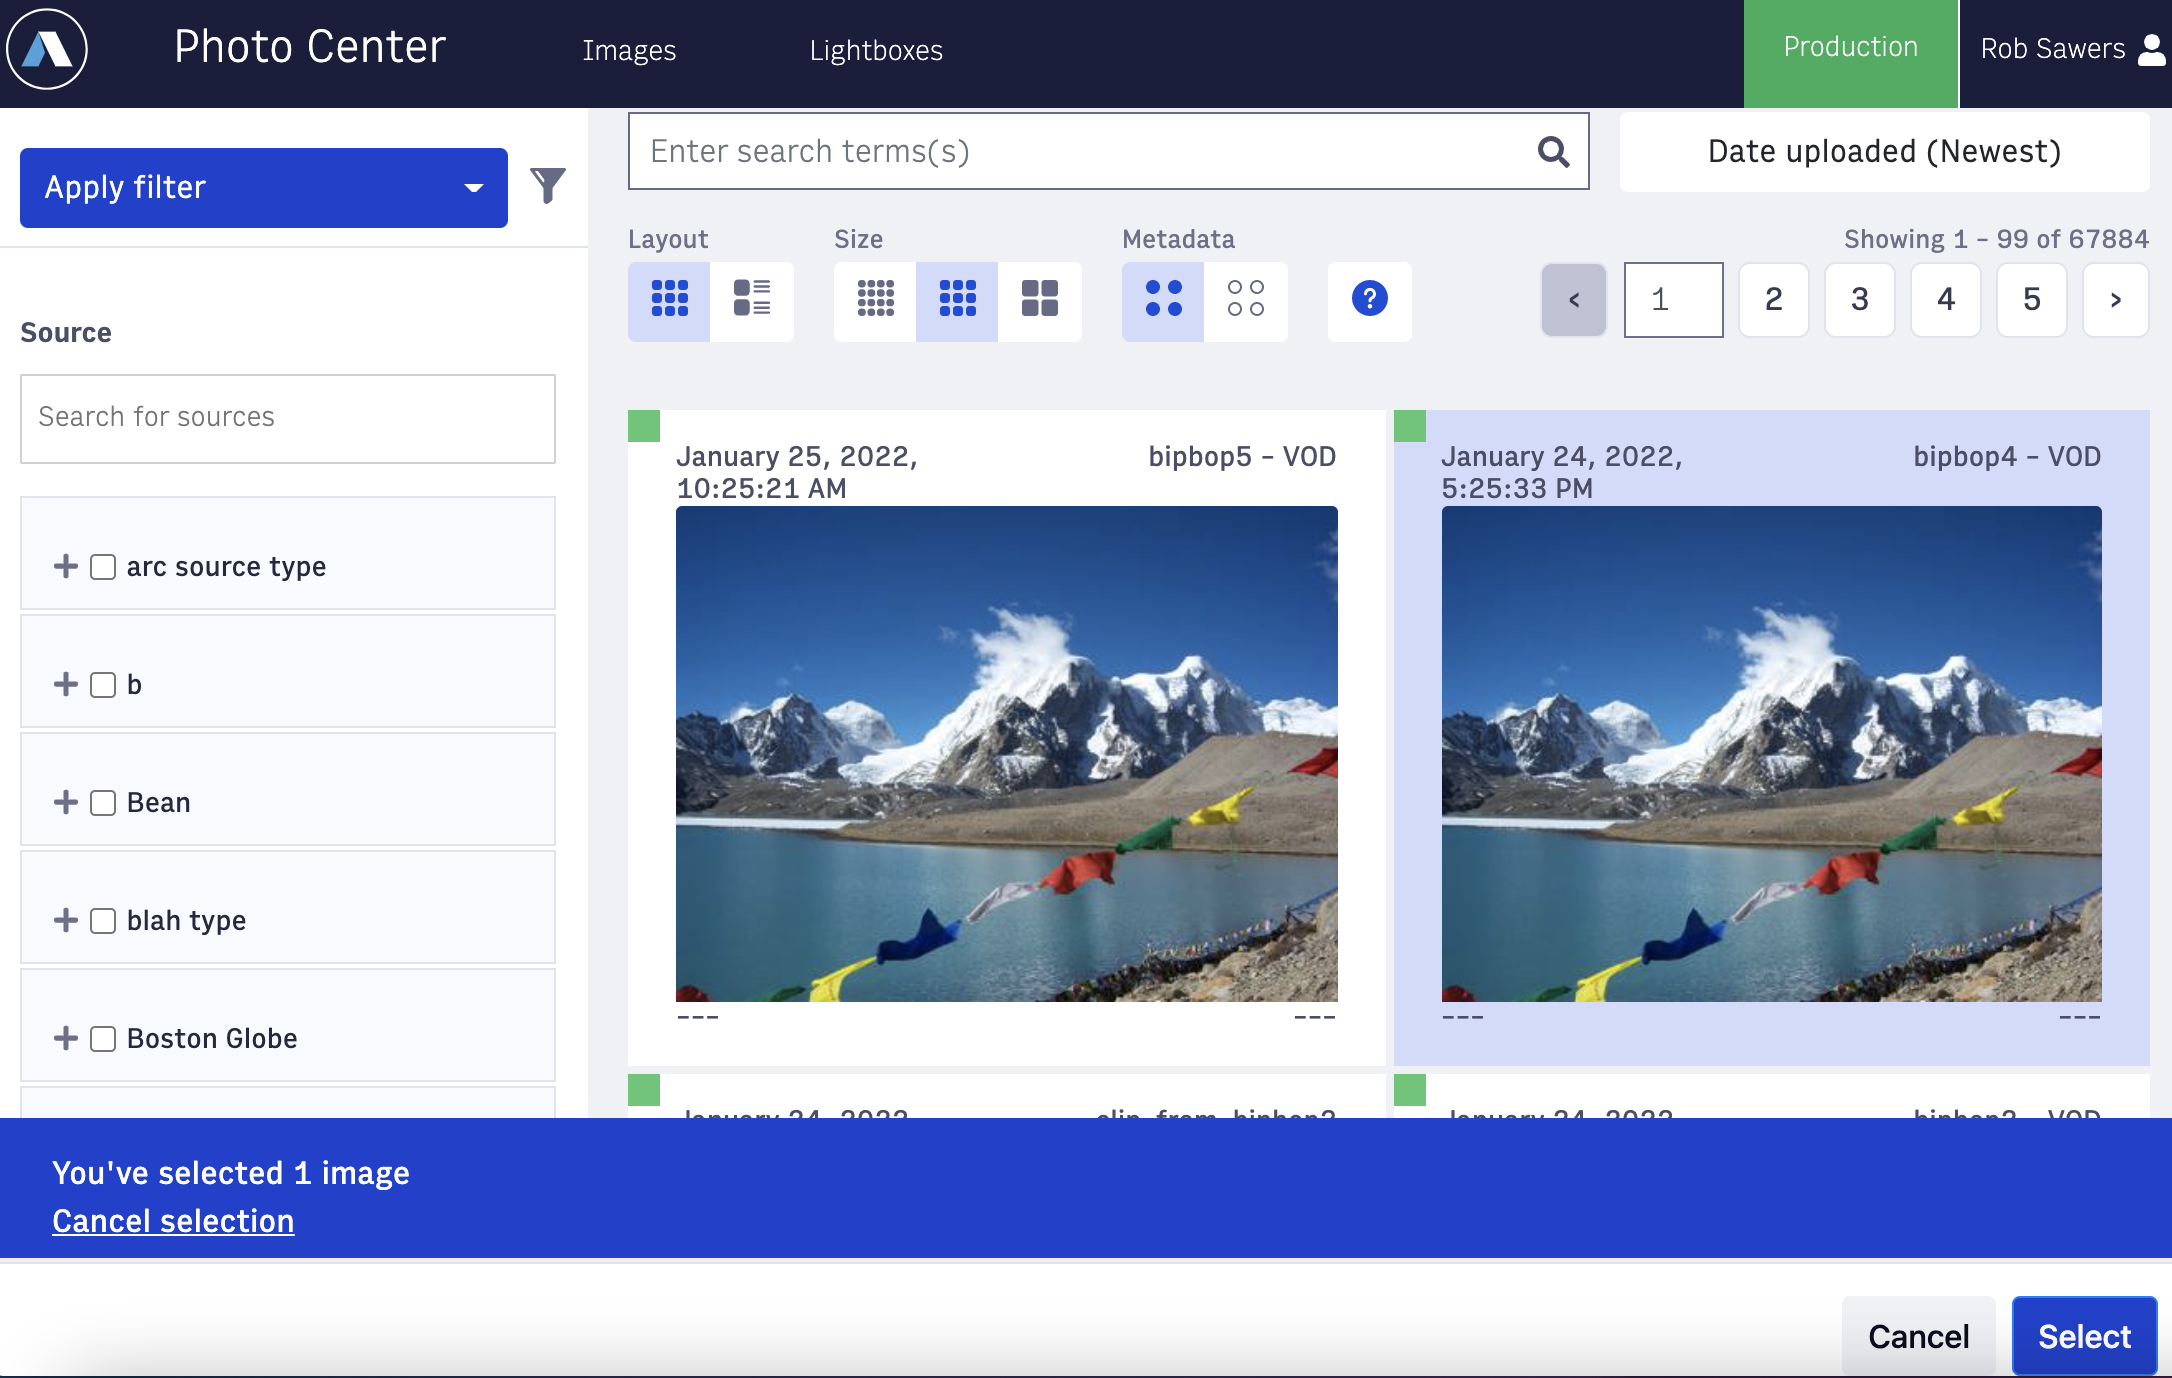 |
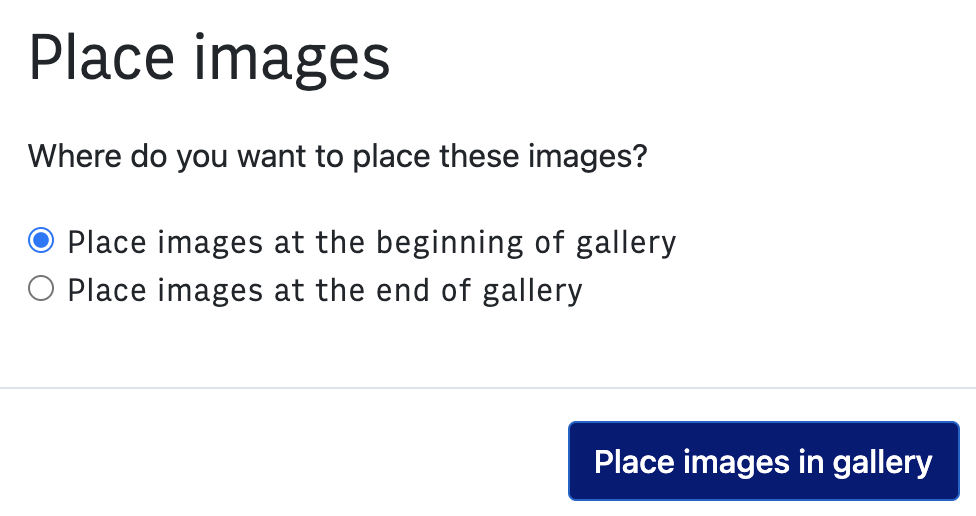
Select the images you would like, then indicate whether you would like the images to be placed at the beginning or the end of the gallery. If you upload multiple images at once, the ordering of those images in the gallery is determined by which image finishes uploading first. The images may then be dragged around to get the desired order.
 |
Now that you have the list of images you want to use for your gallery click the ellipsis button on the upper-righthand corner of the image tile to see extra options. Here you can:
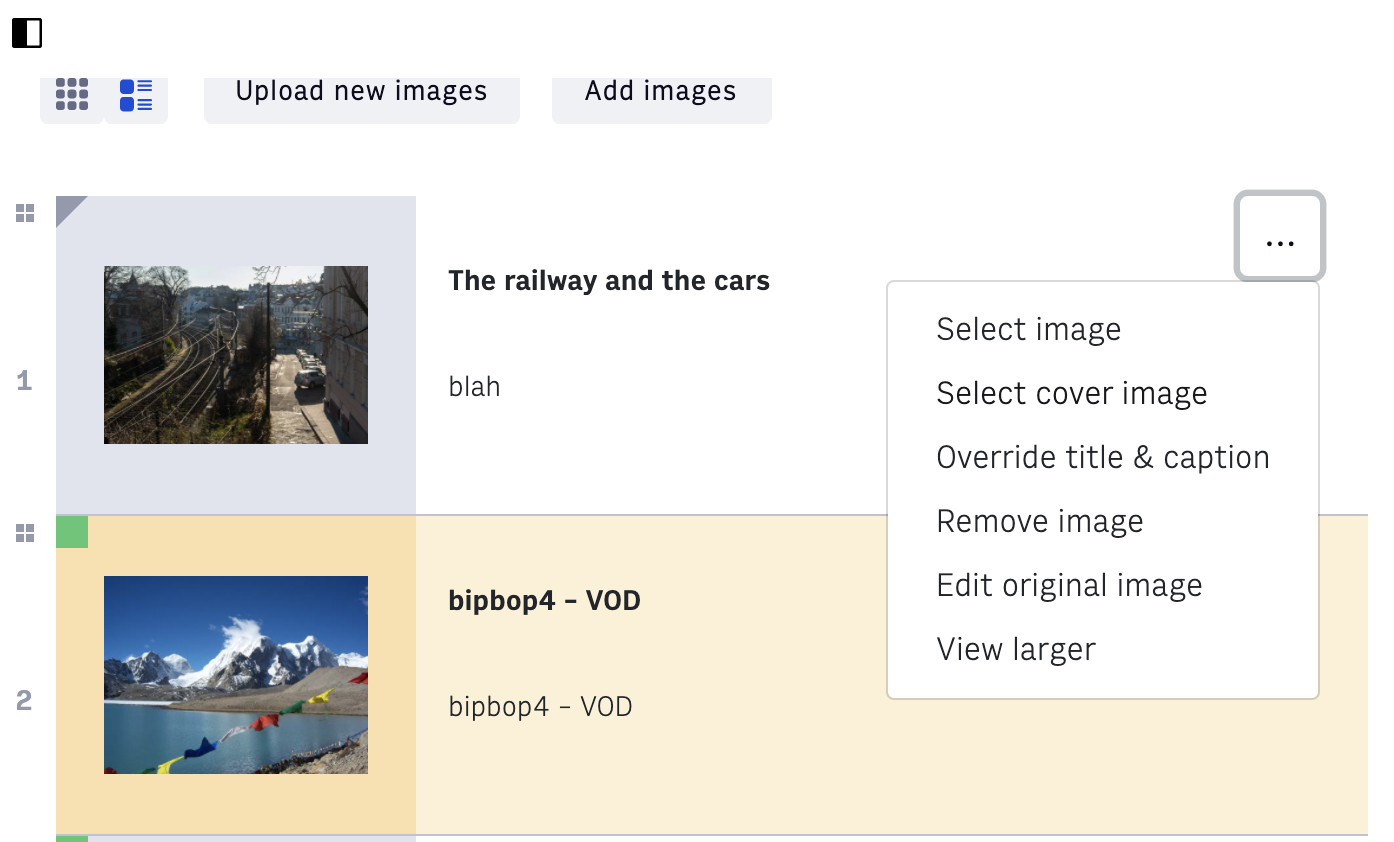 |
Select Image - a checkbox appears on the left side of the image card, and a toolbar will appear at the bottom of the screen with the option to move this image to the beginning or the end, add the image to a different gallery or lightbox, or remove the image.
Select cover image - This indicates which image will be used in the promo or thumbnail used to represent this content on your homepage or other locations. Once selected, the cover image will be highlighted in yellow.
Set Focal Point - This allows you to ensure that the key imagery doesn’t get auto-cropped out of the image. This focal point will serve as the center point for any resizing actions that the system takes. if you set a focal point for an image, the focal point will persist in the gallery. You can override the gallery image focal point, without impacting the focal point of the original image. Once inside the gallery, you may only set a focal point for the cover image.
Override title & caption - This allows you to give this image a new title and caption for use in this gallery only without modifying the original image record in Photo Center.
Remove Image - This will remove the image from the gallery
Edit original image - Unlike “Override title & caption”, this option allows you to modify the metadata on the original image record in Photo Center. A new tab will open to allow you to edit the original image. If you make changes to the title and/or caption of the original image and you do not see them reflected in your gallery you will need to refresh the gallery for the changes to persist (unless you have overridden the caption or title).
View larger - this will expand the image so it is easier to view.
Lastly, you can update the gallery’s workflow status and Save and Publish your gallery using the buttons in the top right-hand corner.